This blog post is for parents. Specifically, it’s for parents who want to help their kids get into making things with technology but don’t know where to start.
Lots of us at the Raspberry Pi Foundation are parents too, and right now we’re also all trying to figure out how to keep our kids occupied, entertained, and learning useful things. So we recognise that families are currently facing lots of challenges, which is why we’re supporting parents and carers with learning for young people at home.
We already provide loads of resources and activities that are available for free, online, in up to 30 languages, and we’ll help you get your children set up and started.
![]()
All of our online projects for young people are completely free. They include step-by-step instructions and are easily filtered by level and topic. The projects are designed so that young people can complete them in no more than an hour.
You don’t need any coding experience yourself. The step-by-step instructions mean you can learn alongside your child, or, as long as they can read the instructions themselves, they can work independently on the projects.
![]()
If you’re wondering where to start, or how digital making can work for your young people at home, take a look at our introduction video by Mark, our Youth Programmes Manager. He tells you about Scratch, a free graphical programming language developed by our friends at the Scratch Foundation (plus, it’s the language used to teach computing in most primary schools and a great place to start for beginners):
A parents’ introduction to the programming language Scratch
Find out more about the #RaspberryPi Foundation: Raspberry Pi http://rpf.io/ytrpi Code Club UK http://rpf.io/ytccuk Code Club International http://rpf.io/ytc…
He also takes you through our project site, which is where all the fun stuff happens:
How to use the Raspberry Pi projects site
Find out more about the #RaspberryPi Foundation: Raspberry Pi http://rpf.io/ytrpi Code Club UK http://rpf.io/ytccuk Code Club International http://rpf.io/ytc…
We’re also offering a series of free weekly, instructor-led videos called Digital Making at Home, which have code-along instructions to help young people with fun projects they can do independently at home. Here’s more information about how you and your family can get involved.
Get involved in Digital Making at Home
Find out more about the #RaspberryPi Foundation: Raspberry Pi http://rpf.io/ytrpi Code Club UK http://rpf.io/ytccuk Code Club International http://rpf.io/ytc…
Sign up now to start receiving free activities suitable to your child’s age and ability straight to your inbox. And let us know what you as a parent or carer need help with, and what you’d like more or less of.
![]()
“I started to try coding activities with my kids a few years ago (now aged 8 and 11). They really like the clear instructions from the Raspberry Pi projects site, it has helped build their confidence particularly when getting started. Their interest in coding has gone up and down over that time, but when I sense that they are losing interest I try to step back and not push it. They like coding simple games particularly, and changing the rules to make it easier for them to win!” Olympia, parent and Head of Youth Partnerships at the Raspberry Pi Foundation
![]()
“Finding independent activities is really hard – especially good ones that are also educational. Once we were up and running, Dylan (age 9) was able to follow the step-by-step video and make a game in Scratch by himself!” Dan, step-parent
![]()
“My younger daughter is on the autistic spectrum and really enjoys creating projects which appeal to her particular interests. So we often modify Scratch projects so that she can use different images or add in different sounds. Shifting the focus to things she particularly enjoys means that when we hit a bug, she is more motivated to persevere, fix it, and celebrate her success. Taking a child-centred approach is important for lots of children who want to be in control of their own learning journey.” Katharine, parent and Programme Coordinator at the Raspberry Pi Foundation
![]()
“I introduced my son to coding in Scratch when he was 6. At the start, it was important to sit with him as he worked through little projects. I kept my hands away from his mouse and keyboard and let him explore the interface, with a bit of gentle guidance. Within no time he was independently creating his own projects, and using Scratch for his school work and home life. He even created a random Karate moves generator to help him prepare for a Karate grading. Eventually he wanted to move on though, and when Scratch became too limited we explored some HTML and CSS, and then a little Python. He’s now fully independent, and coding 3D games using Unity. It’s got to the point where he’s using a language that I have no experience with, so debugging just involves me asking him to explain his code and helping him to find solutions online.” Marc Scott, Parent and Senior Learning Manager at the Raspberry Pi Foundation
PS: All of our resources are completely free. This is made possible thanks to the generous donations of individuals and organisations. Learn how you can help too!
The post Digital making at home: a guide for parents appeared first on Raspberry Pi.
La demande apparemment insatiable des particuliers et des entreprises pour des solutions de vidéoconférences contribue à révéler une série de problèmes de confidentialité et de sécurité auxquels la plateforme est confrontée.
L'article Problèmes de vie privée et de sécurité: Zoom sur la sellette a d'abord été publié sur WeLiveSecurity
![]() In this guest blog post, OpenFaaS founder and Raspberry Pi super-builder Alex Ellis walks us down a five-year-long memory lane explaining how things have changed for cluster users.
In this guest blog post, OpenFaaS founder and Raspberry Pi super-builder Alex Ellis walks us down a five-year-long memory lane explaining how things have changed for cluster users.
I’ve been writing about running Docker on Raspberry Pi for five years now and things have got a lot easier than when I started back in the day. There’s now no need to patch the kernel, use a bespoke OS, or even build Go and Docker from scratch.
My stack of seven Raspberry Pi 2s running Docker Swarm (2016)
Since my first blog post and printed article, I noticed that Raspberry Pi clusters were a hot topic. They’ve only got even hotter as the technology got easier to use and the devices became more powerful.
![]()
Back then we used ‘old Swarm‘, which was arguably more like Kubernetes with swappable orchestration and a remote API that could run containers. Load-balancing wasn’t built-in, and so we used Nginx to do that job.
I built out a special demo using kit from Pimoroni.com. Each LED lit up when a HTTP request came in.
Docker load-balanced LED cluster Raspberry Pi
Ask questions and get all the details including the code over on the blog at: http://blog.alexellis.io/iot-docker-cluster/
After that, I adapted the code and added in some IoT sensor boards to create a smart datacenter and was invited to present the demo at Dockercon 2016:
IoT Dockercon Demo
Get all the write-up here: http://blog.alexellis.io/meet-me-at-dockercon/
Docker then released a newer version of Swarm also called ‘Swarm’ and I wrote up these posts:
Docker Swarm mode Deep Dive on Raspberry Pi (scaled)
Please Subscribe to the channel! Get all the details @ http://blog.alexellis.io/live-deep-dive-pi-swarm/
This is still my most popular video on my YouTube channel.
Now that more and more people were trying out Docker on Raspberry Pi (arm), we had to educate them about not running potentially poisoned images from third-parties and how to port software to arm. I created a Git repository (alexellis/docker-arm) to provide a stack of common software.
I wanted to share with users how to use GPIO for accessing hardware and how to create an IoT doorbell. This was one of my first videos on the topic, a live run-through in one take.
Did you know? I used to run blog.alexellis.io on my Raspberry Pi 3
Then we all started trying to run upstream Kubernetes on our 1GB RAM Raspberry Pis with kubeadm. Lucas Käldström did much of the groundwork to port various Kubernetes components and even went as far as to fix some issues in the Go language.
I wrote a recap on everything you needed to know including exec format error and various other things. I also put together a solid set of instructions and workarounds for kubeadm on Raspberry Pi 2/3.
Users often ask what a practical use-case is for a cluster. They excel at running distributed web applications, and OpenFaaS is loved by developers for making it easy to build, deploy, monitor, and scale APIs.
In this post you’ll learn how to deploy a fun Pod to generate ASCII text, from there you can build your own with Python or any other language:
This blog post was one of the ones that got pinned onto the front page of Hacker News for some time, a great feeling when it happens, but something that only comes every now and then.
The instructions for kubeadm and Raspbian were breaking with every other minor release of Kubernetes, so I moved my original gist into a Git repo to accept PRs and to make the content more accessible.
I have to say that this is the one piece of Intellectual Property (IP) I own which has been plagiarised and passed-off the most.
You’ll find dozens of blog posts which are almost identical, even copying my typos. To begin with I found this passing-off of my work frustrating, but now I take it as a vote of confidence.
Shortly after this, Scott Hanselman found my post and we started to collaborate on getting .NET Core to work with OpenFaaS.
![]()
This lead to us co-presenting at NDC, London in early 2018. We were practising the demo the night before, and the idea was to use Pimoroni Blinkt! LEDs to show which Raspberry Pi a Pod (workload) was running on. We wanted the Pod to stop showing an animation and to get rescheduled when we pulled a network cable.
It wasn’t working how we expected, and Scott just said “I’ll phone Kelsey”, and Mr Hightower explained to us how to tune the kubelet tolerance flags.
As you can see from the demo, Kelsey’s advice worked out great!
Building a Raspberry Pi Kubernetes Cluster and running .NET Core – Alex Ellis & Scott Hanselman
Join Scott Hanselman and Alex Ellis as they discuss how you can create your own Raspberry Pi cluster that runs Kubernetes on the metal. Then, take it to the …
Fast forward and we’re no longer running Docker, or forcing upstream Kubernetes into 1GB of RAM, but running Rancher’s light-weight k3s in as much as 4GB of RAM.
k3s is a game-changer for small devices, but also runs well on regular PCs and cloud. A server takes just 500MB of RAM and each agent only requires 50MB of RAM due to the optimizations that Darren Shepherd was able to make.
I wrote a new Go CLI called k3sup (‘ketchup’) which made building clusters even easier than it was already and brought back some of the UX of the Docker Swarm CLI.
Kubernetes Homelab with Raspberry Pi 4
Join me for this hands-on tutorial where I build out a Kubernetes Homelab with a Raspberry Pi 4 and get internet access with a LoadBalancer, something normal…
To help combat the issues around the Kubernetes ecosystem and tooling like Helm, which wasn’t available for ARM, I started a new project named arkade . arkade makes it easy to install apps whether they use helm charts or kubectl for installation.
k3s, k3sup, and arkade are all combined in my latest post which includes installing OpenFaaS and the Kubernetes dashboard.
![]()
In late March I put together a webinar with Traefik to show off all the OpenFaaS tooling including k3sup and arkade to create a practical demo. The demo showed how to get a public IP for the Raspberry Pi cluster, how to integrate with GitHub webhooks and Postgresql.
The latest and most up-to-date tutorial, with everything set up step by step:
Cloud Native Tools for Developers with Alex Ellis and Alistair Hey
In this Traefik Online Meetup, Alex Ellis, Founder of OpenFaaS, and Alistair Hey, from the OpenFaaS community, will show you how to bootstrap a Kubernetes cl…
In the webinar you’ll find out how to get a public IP for your IngressController using the inlets-operator.
Some people try to reason about whether you should or should not build a cluster of Raspberry Pis. If you’re asking this question, then don’t do it and don’t ask me to convince you otherwise.
You don’t need special equipment, you don’t even need more than one Raspberry Pi, but I would recommend two or three for the best experience.
Kubernetes clusters are built to run web servers and APIs, not games like you do with your PC. They don’t magically combine the memory of each node into a single supercomputer, but allow for horizontal scaling, i.e. more replicas of the same thing.
Some popular software like Istio, Minio, Linkerd, Flux and SealedSecrets do not run on ARM devices because the maintainers are not incentivised to make them do so. It’s not trivial to port software to ARM and then to support that on an ongoing basis. Companies tend to have little interest since paying customers do not tend to use Raspberry Pis. You have to get ready to hear “no”, and sometimes you’ll be lucky enough to hear “not yet” instead.
If you compare my opening statement where we had to rebuild kernels from scratch, and even build binaries for Go, in order to build Docker, we live in a completely different world now. We’ve seen classic swarm, new swarm (swarmkit), Kubernetes, and now k3s become the platform of choice for clustering on the Raspberry Pi. Where will we be in another five years from now? I don’t know, but I suspect things will be better.
In my opinion, the primary reason to build a cluster is to learn and to explore what can be done. As a secondary gain, the skills that you build can be used for work in DevOps/Cloud Native, but if that’s all you want out of it, then fire up a few EC2 VMs on AWS.
Featured: my 24-node uber cluster, chassis by Bitscope.
Well, all of that should take you some time to watch, read, and to try out — probably less than five years. I would recommend working in reverse order from the Traefik webinar back or the homelab tutorial which includes a bill of materials.
Become an Insider via GitHub Sponsors to support my work and to receive regular email updates from me each week on Cloud Native, Kubernetes, OSS, and more: github.com/sponsors/alexellis
And you’ll find hundreds of blog posts on Docker, Kubernetes, Go, and more on my blog over at blog.alexellis.io.
The post Five years of Raspberry Pi clusters appeared first on Raspberry Pi.
On Wednesday, we hosted the first-ever Cambridge Computing Education Research Symposium online. Research in computing education, particularly in school and for young people, is a young field compared to maths and science education, and we do not have much in terms of theoretical foundations. It is not a field that has received a lot of funding, so we cannot yet look to large-scale, longitudinal, empirical studies for evidence. Therefore, further research on how best to teach, learn, and assess computing is desperately needed. We also need to investigate ways of inspiring and motivating all young people in an area which is increasingly important for their future.
![]()
That’s why at the Raspberry Pi Foundationwe have made research a key part of our new strategy, and that’s why we worked with the University of Cambridge to hold this event.
This was to be our first large-scale research event, held jointly with the University of Cambridge Department of Computer Science and Technology. Of course, current circumstances made it necessary for us to turn the symposium from a face-to-face into an online event at short notice.
![]()
An enthusiastic team took on the challenge, and we were delighted with how well the way the day went! You can see what participants shared throughout the day on Twitter.
![]()
Our keynote speaker was Dr Natalie Rusk of MIT and the Scratch Foundation, who shared her passion for digital creativity using Scratch.
![]()
We were excited to see images from early versions of Scratch and how it had developed over the years. Plus, Natalie revealed the cat blocks that were available on 1 April only — I had completely forgotten the day of the symposium was April Fools’ Day! The focus of Natalie’s presentation was on creativity, invention, tinkering, and the development of ideas over time, and she explored case studies of two ‘Scratchers’ who took a very different approach to working in the Scratch community on projects. The talk was well received by all.
![]()
We heard from researchers from a range of institutions on topics under these themes:
Highlights for me were Ethel Tshukudu’s analysis of the way students transfer from one programming language to another, in which she draws on semantic transfer theory; and Paul Curzon’s application of Karl Maton’s semantic wave theory (taken from linguistics) to computing education.
![]()
The symposium’s focus was computing for young people, and much of the research presented was directly grounded in work with teachers and students in learning situations. Lynne Blair shared an interesting study highlighting female participation in A level computer science classes, which found the feeling of a lack of belonging among young women, a finding that echoes existing research around computing education and gender. Fenia Aivaloglou from the University of Leiden, Netherlands, considered the barriers faced by learners and teachers in extra-curricular code clubs, and Alison Twiner and Jo Shillingworth from the University of Cambridge shared a study on engaging young people in work-related computing projects.
![]()
We also heard how tools for supporting learners are developing, for example machine learning techniques to process natural language answers to questions on the free online learning platforms Isaac Computer Science and Isaac Physics.
For the poster sessions, we divided into separate sessions so that the poster presenters could display and discuss their posters with a smaller group of people. This enabled more in-depth discussion about the topic being presented, which participants appreciated at this large online event. The 11 posters covered a wide range of topics from data visualisations in robotics to data-driven dance.
![]()
We showcased some of our own work on progression mapping with learning graphs for the NCCE Resource Repository; the Isaac Computer Science A level content platform; and our research into online learning with our free online courses for teachers.
From having successfully hosted this event online, we learned many lessons that we want to put into practice in future online events being offered by the Raspberry Pi Foundation.
There’s a plethora of tools available, and they all have their pros and cons (we used Google Meet). It’s my view that the tool is less important than the preparation needed for a large-scale online event, which is significant! The organising team hosted technical run-throughs with all presenters in the two days before the event, and instigated a ‘green room’ for all presenters to check their setups again five to ten minutes before their speaking slot. This helped to avoid a whole myriad of potential technical difficulties.
![]()
I’m so grateful to the great team at the Raspberry Pi Foundation, who worked behind the scenes all day to make sure that the participants and presenters got the most out of the event!
If you’re interested in receiving a regular update about these and other research activities of ours, sign up to our newsletter.
We look forward to building a community of researchers and to sharing more of our work with you over the coming years.
The post Cambridge Computing Education Research Symposium – recap of our online event appeared first on Raspberry Pi.
Welcome back to Digital Making at Home from the Raspberry Pi Foundation! If you’re joining us for the first time this week, welcome: you’re now part of a global movement with other young digital makers from all over the world. You’re in great company, friend!
You all CRUSHED making your own games last week, so we’re eager to see how you take on this week’s theme: storytelling!
Welcome to Digital Making at Home: Storytelling with code
Find out more about Digital Making at Home at http://rpf.io/home Find more digital making projects at http://rpf.io/projects Find out more about the #Raspber…
We all have a story to tell, and with the power of coding and digital making, you can share your own story in your very own way with other digital makers around the world! This week, your challenge is to tell us a story using code. Maybe you want to create your own story or retell one of your favourite tales in your own way — the possibilities are endless.
![]()
And when you’ve created your story, share it with others! We’re excited to see it too, so show us what you’ve made by sending it to us to check out..
If you need some inspiration, our Raspberry Pi team is here for you! They’re all back with more code-along videos to help you explore storytelling with code.
Join Mr. C and his sidekick Zac as they create their own story generator in Scratch.
Digital Making at Home – Story generator (beginner)
Go to the project guide: http://rpf.io/dm-storygen What do you think about this content? Tell us your feedback: https://docs.google.com/forms/d/e/1FAIpQLScM4…
Go to the free project guide (available in 19 languages).
Mr C has also recorded some extra videos showing you how to do cool extra things with your Scratch story! Find them in this week’s playlist.
Christina shows you how to tell a story on a web page you build with HTML/CSS and any pictures you like.
Digital Making at Home – Tell a story (intermediate)
Go to the project guide: http://rpf.io/dm-tellastory What do you think about this content? Tell us your feedback: https://docs.google.com/forms/d/e/1FAIpQLSc…
Go to the free project guide (available in 25 languages).
Code along with Marc, who creates his own online version of a classic story using more advanced HTML/CSS code and content that’s in the public domain.
Digital Making at Home – Magazine (advanced)
Go to the project guide: http://rpf.io/dm-magazine What do you think abotut his content? Tell us your feedback: https://docs.google.com/forms/d/e/1FAIpQLScM4…
Go to the free project guide (available in 21 languages).
If you want to try something else, here’s a video from a friend of ours! In it, Nick, one of our Raspberry Pi Certified Educators in the USA, explains how to create interactive fiction stories in Python.
We would love to see the story you’re choosing to tell this week! When you’re ready, enlist an adult to send us your story. Who knows, maybe we will feature it in an upcoming blog for our global community to see?
As you’re coding something new this week, we’ll be playing through your game projects from last week! We were super thrilled to see so many digital makers submit their games from all over the world: Iraq, Canada, United Kingdom, and beyond. We wonder what story you’ll tell us this week…?
Are you ready? Get set…LET’S CODE!
We’d love to know what you think of Digital Making at Home, so that we can make it better for you! Please let us know your thoughts.
PS: All of our resources are available for free forever. This is made possible thanks to the generous donations of individuals and organisations. Learn how you can help too!
The post Digital Making at Home: Storytelling with code appeared first on Raspberry Pi.
Les acteurs malveillants ont accédé à une série d'informations personnelles identifiables, notamment des noms, des dates de naissance et plus encore.
L'article Marriott à nouveau piraté: 5,2 millions d’usagers touchés a d'abord été publié sur WeLiveSecurity
Designed to celebrate a new home, Instaclock uses two Raspberry Pi computers to great visual effect. Rosie Hattersley introduces maker Riccardo Cereser’s eyecatching build in issue #92 of The MagPi, out now.
There is nothing like a deadline to focus the mind! Copenhagen-based illustrator and UX designer Riccardo Cereser was about to move into a new apartment with his girlfriend, and was determined his new home would have a unique timepiece. Instaclock is the result.
![]()
Having studied at the Copenhagen Institute of Interactive Design, Italian-born Riccardo was keen that his new apartment would include an object that reflected his skills. He began sketching out ideas in Photoshop, starting with the idea of images representing numbers. “A hand showing fingers; a bicycle wheel resembling the number 0; candles on a cake; or the countdown numbers that appear in the beginning of a recording…” he suggests.
Having decided the idea could be used for an interactive clock, he quickly worked out how such an image-based concept might work displaying the hour, minutes, and seconds on displays in three wooden boxes.
![]()
Next, he set off around Copenhagen. “I started taking photos of anything that could resemble a number, aiming to create sets of ten pictures each based on a specific theme,” he recalls. “I then thought how awesome it would be to be able to switch the theme and create new sets on the go, potentially by using Instagram.”
This, Riccardo explains, is how the project became known as Instaclock. He was able to visualise his plan using Photoshop and made a prototype for his idea. It was clear that there was no need to display seconds, for example. Minute-by-minute updates would be fine.
Next up was figuring out how to call up and refresh the images displayed. Riccardo had some experience of using Raspberry Pi, and had even made a RetroPie games console. He also had a friend on the interactive design course who might just be able to help
Creative coder Andreas Refsgaard soon got involved, and was quickly able to come up with a Processing sketch for Instaclock.
![]()
Having spent dozens of hours looking into how an API might be used to pull in specific images for his clock, Riccardo was grateful that Andreas immediately grasped how it could be done. Riccardo then set parameters in cron for each Raspberry Pi used, so the Instaclock loaded images at startup and moved on to the next image set every ten seconds.
![]()
Because Riccardo wanted Instaclock to be as user-friendly as possible, they also added a rule that shuts a screen down if the button on top of it is pressed for ten seconds or more. The script was one he got from The MagPi.
![]()
One of the most fun aspects of this project was the opportunity to photograph, draw, or source online images that represent numerals. It was also the most time-consuming, of course. Images reside in Dropbox folders, so can be accessed from anywhere. Deciding on a suitable set of screens to display them, and boxes or frames for them, could also have dragged on but for an impromptu visit to Ikea. Riccardo fortuitously found that the Waveshare screens he selected would fit neatly into the store’s Dragan file organiser boxes. He was then able to laser-cut protective overlays secured with tiny magnets.
Find more fantastic projects, tutorials, and reviews in The MagPi #92, out now! You can get The MagPi #92 online at our store, or in print from all good newsagents and supermarkets. You can also access The MagPi magazine via our Android and iOS apps.
![]()
Don’t forget our super subscription offers, which include a free gift of a Raspberry Pi Zero W when you subscribe for twelve months.
And, as with all our Raspberry Pi Press publications, you can download the free PDF from our website.
The post Instaclock | The Magpi 92 appeared first on Raspberry Pi.
It’s been a couple of weeks since I posted a blog about how the Raspberry Pi Foundation was responding to the novel coronavirus, and I thought it would be useful to share an update. Writing this has helped me reflect on just how much has changed in such a short space of time.
Like most of the world, we’ve been getting used to life in the lockdown. As an organisation, we’re very lucky that the vast majority of our work can be done remotely. We’ve moved all of our meetings and lots of events online. Yesterday, we held the first-ever Cambridge Computing Education Research Symposium as an online event, bringing together 250 researchers and practitioners to learn from each other.
Many of us have been figuring out how to combine working at home with additional daily caring responsibilities and homeschooling. Honestly, it’s a work in progress (in my house at least). We’ve introduced new flexible working policies, we’re working doubly hard to stay connected to each other, and we’re introducing initiatives to support well-being.
I am so grateful and frankly proud of the way that the Raspberry Pi team and all of our partners have responded to the crisis: taking care of each other, supporting the community, and focusing on how we can make the biggest positive contribution and impact.
Our educational mission has never been more vital. Right now, over 1.5 billion young people aren’t able to access learning through schools or clubs due to the restrictions needed to stop the spread of the virus. Teachers and parents are doing their best to provide meaningful learning experiences at home and online. We have a responsibility and the ability to help.
We are taking four immediate actions to help millions of young people to learn at home during the crisis:
Based on feedback from the community, we’ve launched a series of direct-to-student virtual and online learning experiences called Digital Making at Home. The idea is to inspire and support young people aged 7–17 who are learning at home, independently or with their parents, carers, or siblings. Taking our amazing library of free project resources (which are translated into up to 29 languages) as the starting point, we’re producing instructional videos that support different levels of skills. Each week we’re setting a theme that will inspire and engage young people to learn how to solve problems and express themselves creatively with technology.
Please check it out and let us have your feedback. We’ve got loads of ideas, but we really want to respond to what you need, so let us know.
You’ll hear more about Digital Making at Home and our ideas for it in my interview with Cambridge 105:
We are working with partners in England (initially) to support teachers to deliver remote lessons on Computing and Computer Science. This work is part of the National Centre for Computing Education. We are adapting the teaching resources that we have developed so that they can be used by teachers who are delivering lessons and setting work remotely. We are designing a programme of online events to support learners using the Isaac Computer Science platform for post-16 students of Computer Science, including small-group mentoring support for both students and teachers.
All of our teaching and learning resources are available for free for anyone to use anywhere in the world. We are interested in working with partners outside England to find additional ways to make them as useful as possible to the widest possible audience.
We support the world’s largest network of free coding clubs, with over 10,000 Code Clubs and CoderDojos reaching more than 250,000 young people on a regular basis. We are supporting the clubs that are unable to meet in person during the pandemic to move to virtual and online approaches, and we’ve been blown away by the sheer number of volunteers who want to keep their clubs meeting despite the lockdown.
We’re providing training and support to CoderDojo champions, Code Club organisers, educators, and volunteers, including providing free resources, support with handling issues such as safeguarding, and effective design and delivery of online learning experiences. We are also working with our network of 40 international partners to help them support the clubs in their regions.
We know that a significant proportion of young people don’t have access to a computer for learning at home, and we’re working with incredibly generous donors and fantastic partners in the UK to get Raspberry Pi Desktop Kits distributed for free to children who need them. We’re also in discussions about extending the programme outside the UK.
Everything we do is made possible thanks to an incredible network of partners and supporters. We have been overwhelmed (in a good way) by offers of help since the coronavirus pandemic took hold. Here are some of the ways that you can get involved right now:
Wherever you are in the world, I hope that you and yours are safe and well. Please follow the local public health guidance. Stay safe and take care of each other.
Philip Colligan
CEO Raspberry Pi Foundation
The post How the Raspberry Pi Foundation is responding to the novel coronavirus (part 2) appeared first on Raspberry Pi.
Avec les préoccupations de COVID-19 causant l'annulation des réunions en personne, assurez-vous d’être conscient des risques de sécurité liés à la vidéoconférence et découvrez les moyens simples à mettre en place pour vous protéger.
L'article Travailler à domicile: Vidéoconférence et enjeux de sécurité a d'abord été publié sur WeLiveSecurity
La mise en place de la cybersécurité dans le monde du travail à domicile peut s'avérer décourageante. Tony Anscombe, évangéliste en chef de la sécurité d'ESET, partage 6 bonnes pratiques pour vous guider dans la bonne direction.
L'article 6 conseils pour travailler à distance en sécurité a d'abord été publié sur WeLiveSecurity
Most Raspberry Pi projects we feature debut privately and with little fanfare – at least until they’re shared by us.
The El Carrillon project, however, could hardly have made a more public entrance. In September 2019 it was a focal point of Argentina’s 49th annual Fiesta Nacional de la Flor (National Flower Festival), where its newly overhauled bell tower proudly rang out a brand-new, Raspberry Pi-enabled tune.
Many years ago, festival organisers created custom hardware with a PIC (programmable interface) microcontroller to control 18 tuned bells. Each bell is associated with a musical note, from A3 to D5 with all the semitones. Until its long overdue update, the tower’s 18 bells had rung the tune to Ayer, also known as Yesterday by The Beatles. They now have a brand-new repertoire of MIDI-based tunes, including the theme from Star Wars.
For Gerardo Richarte, the originator of the project, there was a little extra pressure: his dad is on the board of the NGO that organises Fiesta Nacional de la Flor, and challenged his son to come up with a way to update the bells so different songs could be played.
With the challenge accepted, Mariano Martinez Peck explains, “We chose Raspberry Pi because it was inexpensive, yet powerful enough to run Linux, Python, and VA Smalltalk. We could find ready-made HATs that actually matched the pinout of the existing flat cables without much hacking, and only a minimal amount of other hardware was needed. In addition, there was plenty of documentation, materials, tutorials, and GPIO libraries available.”
The bells had a pre-existing driver module
The project aim was to be able to run a mobile-friendly website within Raspberry Pi Zero that allowed control, configuration, and playback of MIDI songs on the bell tower. “In addition, we wanted to allow live playing from a MIDI keyboard,” says Mariano. The project developed as a live test and iteration update, but the final build only came together when Mariano and Gerardo’s moment in the spotlight arrived and El Carrillon rang out the first new tunes.
The decades-old chimes were controlled by assembly code. This was superseded by Python when the team made the switch to Raspberry Pi Zero. Mariano explains, “Raspberry Pi allowed us to use Python to directly interface with both the old and new hardware and get the initial project working.”
However, the Python code was itself replaced by object-oriented VA Smalltalk code – an environment both Mariano and Gerardo are adept at using. Mariano says, “Smalltalk’s live programming environment works really well for fast, iterative development and makes software updates quick and easy without the need for recompilation that lower-level languages [such as assembly or C/C++] would need.”
El Carrillon’s bells can now play any MIDI file on Raspberry Pi, and the notes of the song will be mapped to the tuned bells. However, as the testing process revealed, some songs are more recognisable than others when reproduced on chimes.
A final feature enabled Gerardo to bag some brownie points with his father-in-law. He recently added a web interface for controlling, configuring, and playing songs, meaning the bells can now be controlled remotely and the song selected via a smartphone app.
The El Carrillon bell tower forms a striking backdrop to the flower festival and other cultural events
Find more amazing projects and tutorials in The MagPi #92, out now! You can get The MagPi #92 online at our store, or in print from all good newsagents and supermarkets. You can also access The MagPi magazine via our Android and iOS apps.
![]()
Don’t forget our fantastic subscription offers, which include a free gift of a Raspberry Pi Zero W when you subscribe for twelve months.
And, as with all our Raspberry Pi Press publications, you can download the free PDF from our website.
The post El Carrillon | The MagPi 91 appeared first on Raspberry Pi.
Gun down the clay pigeons in our re-creation of a classic minigame from Konami’s Hyper Sports. Take it away, Mark Vanstone…
Hyper Sports’ Japanese release was tied in with the 1984 Summer Olympics.
Konami’s sequel to its 1983 arcade hit, Track & Field, Hyper Sports offered seven games – or events – in which up to four players could participate. Skeet shooting was perhaps the most memorable game in the collection, and required just two buttons: fire left and fire right.
The display showed two target sights, and each moved up and down to come into line with the next clay disc’s trajectory. When the disc was inside the red target square, the player pressed the fire button, and if their timing was correct, the clay disc exploded. Points were awarded for being on target, and every now and then, a parrot flew across the screen, which could be gunned down for a bonus.
To make a skeet shooting game with Pygame Zero, we need a few graphical elements. First, a static background of hills and grass, with two clay disc throwers each side of the screen, and a semicircle where our shooter stands – this can be displayed first, every time our draw() function is called.
We can then draw our shooter (created as an Actor) in the centre near the bottom of the screen. The shooter has three images: one central while no keys are pressed, and two for the directions left and right when the player presses the left or right keys. We also need to have two square target sights to the left and right above the shooter, which we can create as Actors.
When the clay targets appear, the player uses the left and right buttons to shoot either the left or right target respectively.
To make the clay targets, we create an array to hold disc Actor objects. In our update() function we can trigger the creation of a new disc based on a random number, and once created, start an animation to move it across the screen in front of the shooter. We can add a shadow to the discs by tracking a path diagonally across the screen so that the shadow appears at the correct Y coordinate regardless of the disc’s height – this is a simple way of giving our game the illusion of depth. While we’re in the update() function, looping around our disc object list, we can calculate the distance of the disc to the nearest target sight frame, and from that, work out which is the closest.
When we’ve calculated which disc is closest to the right-hand sight, we want to move the sight towards the disc so that their paths intersect. All we need to do is take the difference of the Y coordinates, divide by two, and apply that offset to the target sight. We also do the same for the left-hand sight. If the correct key (left or right arrows) is pressed at the moment a disc crosses the path of the sight frame, we register a hit and cycle the disc through a sequence of exploding frames. We can keep a score and display this with an overlay graphic so that the player knows how well they’ve done.
And that’s it! You may want to add multiple players and perhaps a parrot bonus, but we’ll leave that up to you.
Here’s Mark’s code snippet, which creates a simple shooting game in Python. To get it working on your system, you’ll need to install Pygame Zero. And to download the full code and assets, go here.
You can read more features like this one in Wireframe issue 35, available now at Tesco, WHSmith, and all good independent UK newsagents.
Or you can buy Wireframe directly from Raspberry Pi Press — delivery is available worldwide. And if you’d like a handy digital version of the magazine, you can also download issue 35 for free in PDF format.
![]()
Make sure to follow Wireframe on Twitter and Facebook for updates and exclusive offers and giveaways. Subscribe on the Wireframe website to save up to 49% compared to newsstand pricing!
The post Code Hyper Sports’ shooting minigame | Wireframe #35 appeared first on Raspberry Pi.
When you’re part of the Raspberry Pi Foundation community, you’re a part of a global family of young creators who bring things to life with the power of digital making. We imagine that, given the current changes we’re all navigating, there are probably more of you who are interested in creating new and exciting things at home. And we want to help you! One of the best things we can do right now is to tap into what connects us as a community, and that’s digital making. So, welcome to Digital Making at Home from the Raspberry Pi Foundation!
Welcome to Digital Making at Home from the Raspberry Pi Foundation
Find out more about Digital Making at Home at http://rpf.io/home Find more digital making projects at http://rpf.io/projects Find out more about the #Raspber…
Whether you wrote your first line of code years ago or minutes ago, or you’ve yet to get started, with Digital Making at Home we’re inviting you on a digital making adventure each week.
![]()
At the start of each week, we will share a theme that’s designed to jumpstart your journey of creative expression and problem solving where you create a digital making project you’re proud of. Every week, we’ll have code-along videos led by people from our team. They will walk you through projects from our free projects collection, to give you a place to start and a friendly face to accompany you!
![]()
For those of you whose mother language isn’t English, our free project guides are available in up to 30 languages so far.
Each week, when you’ve made something you love using digital making, you can share it with us! Just make sure you have your parent’s or guardian’s permissions first. Then share your project by filling out this form. You might find one of your projects featured in a future blog post for the whole community to see, but no matter what, we want to see what you created!
Just because we’re all at home, that doesn’t mean we can’t create together, so let’s kick off Digital Making at Home with this week’s theme:
Playing a game is a fun way to pass the time, but why not take it to the next level and make your own game? This week, we invite you to create a game that you can play with your friends and family!
Let your imagination run free, and if you’re not sure where to start, here are three code-along videos to help you.
If you’re new to coding, we want to introduce you to Scratch, a block-based coding language that is perfect to start with.
Try out Archery, led by Mr C and his sidekick Xavier:
Digital Making at Home – Archery (beginner)
Access the project guide at http://rpf.io/archery Find out more about Digital Making at Home at http://rpf.io/home Share your thoughts about this content: ht…
Go to the free Archery project guide (also available in Polish).
If you’re looking to go beyond the Scratch surface, dive a little deeper into the coding language with.
Try out CATS!, led by Christina:
Digital Making at Home – CATS! (intermediate)
Access the project guide at http://rpf.io/cats Find out more about Digital Making at Home at http://rpf.io/home Share your thoughts about this content: https…
Go to the free CATS! project guide.
If you’re all Scratched out, move on to Python, a text-based coding language, to take things up a notch.
Try out Turtle Race, led by Marc:
Digital Making at Home – Turtle Race (advanced)
Access the project guide at http://rpf.io/turtle-race Find out more about Digital Making at Home at http://rpf.io/home Share your thoughts about this content…
Go to the free Turtle Race project guide (available in 16 languages).
If you’re creating a game in Scratch, check out the extra videos from Mr C in the ‘Digital Making at Home: Making games’ playlist. These will show you how to add a timer, or a score, or a game over message, or a cool starter screen to any Scratch game!
![]()
And if you’re into Python coding and hungry for more creative inspiration, we’ve got you covered. Our own Wireframe magazine, which you can download for free, has a ton of resources about making games. The magazine’s Source Code series shows you how to recreate an aspect of a classic game with a snippet of Python code, and you can read articles from that series on the Raspberry Pi blog. And if that’s still not enough, take a look at our Code the Classics book, which you can also download for free!
Alright friends, you’ve got all you need, so let’s get digital making!
We’d love to know what you think of Digital Making at Home, so that we can make it better for you! Let us know your thoughts by filling in this form.
The post Digital Making at Home: Making games appeared first on Raspberry Pi.
En 2004, Sony commercialisait la PSP, une console de jeu portable qui, pour un tarif d’environ 200€, possédait des capacités de traitements ( graphiques notamment ) bien supérieures à celles de la concurrence.
Aujourd’hui, il est possible de s’en offrir une d’occasion en déboursant moins de 50€. J’ai donc décidé de m’y intéresser, non pas en temps que console de jeu, mais comme plateforme de développement.
Les sécurités de la console ayant été contournée assez rapidement, la scène du développement amateur a produit de nombreux Homebrew, ainsi que les outils permettant de développer sur la console sans acheter le ( très onéreux ) SDK officiel.
Cet article a pour vocation de résumer mon parcours quant à l’installation logicielle nécessaire.
La première étape consiste à se doter d’un émulateur capable d’exécuter du code PSP, permettant de valider le fonctionnement du code compilé.
Pour cela j’ai choisi PPSPP, donc le code source est disponible sur github. Les instructions de compilation sous Linux sont décrites ici.
Récupérer une copie du code source et de ses sous-modules
git clone https://github.com/hrydgard/ppsspp.git
git submodule update --init --recursive
Plusieurs front-end sont disponibles, j’ai choisi d’utiliser celui basé sur Qt, principalement pour ma familiarité avec ce framework. Installer les paquets nécessaires :
apt install qt5-qmake qtmultimedia5-dev qttools5-dev-tools qtmultimedia5-dev libqt5opengl5-dev
Lancer la compilation :
cd ppspp
./.sh --qt
Une fois la compilation terminée, l’exécutable se trouve dans le dossier build
Les scripts permettant l’installation de la toolchain se situent sur le dépot git ici : https://github.com/pspdev/psptoolchain
Les récupérer avec la commande suivante :
git clone https://github.com/pspdev/psptoolchain.git
Se placer dans le dossier ainsi créé :
cd psptoolchain
Exécuter ensuite le premier script, qui se charge de l’installation des dépendances pour Debian et ses dérivés ( Ubuntu et Linux Mint notamment ). Ce script va notamment remplacer le lien symbolique /bin/sh pointant vers le logiciel DASH, par un nouveau lien symbolique pointant vers BASH, DASH ne permettant pas de mener l’installation de la toolchain sans erreurs.
./prepare-debian-ubuntu.sh
Ensuite, exécuter le script d’installation à proprement parler. Celui ci nécessite les droits super utilisateurs, d’où sont appel avec la commande sudo
sudo ./toolchain-sudo.sh
L’installation se déroule ensuite normalement. Sur ma machine, plutôt véloce, celle-ci a duré une bonne demi-heure.
L’installation va déposer les fichiers nécessaires dans le répertoire /usr/local/pspdev, et automatiquement modifier les variables d’environnement pour permettre l’appel des bons exécutables lors de la compilation, en modifiant notamment la variable d’environnement PATH. Ce système ne me plaisant guère ( pour des raisons décrites dans l’article précédent ), je vais déplacer l’ensemble de la toolchain dans un dossier séparer, empêcher la modification du PATH, et ajouter un petit script permettant le fonctionnement de la toolchain seulement dans le terminal où il sera appelé.
Déplacer la toolchain dans mon home, et en devenir propriétaire :
sudo mv /usr/local/pspdev ~/

sudo chown -R MON_NOM_DUTILISATEUR ~/pspdev/
Empêcher la modification automatique du PATH au démarrage :
sudo rm /etc/profile.d/psptoolchain.sh
Créer le script permettant de configurer un terminal capable d’utiliser la toolchain :
nano ~/pspdev/setupPspEnv.sh
Y insérer le contenu suivant :
#!/bin/bash
bash --rcfile <(cat ~/.bashrc; echo 'PS1="\e[33;1mpspdev \$\e[0m "' ; echo 'export PATH="#/pspdev/bin:$PATH"' ; echo 'export PSPDEV="~/pspdev/"')
Il suffit ensuite d’exécuter ce fichier pour mettre un place, uniquement dans le terminal actif, les variables d’environnement nécessaires au fonctionnement de la toolchain.
La toolchain contient PSPSDK. Il s’agit d’un SDK amateur qui fournissant toutes les fonctions nécessaires aux développement d’une application sur PSP. De nombreux exemples sont disponibles dans le dossier pdpdev/psp/sdk/samples.
Malheureusement, beaucoup ne compilent pas correctement. La commande make produit bien un exécutable EBOOT.PBP lisible par ppspp, mais ceux-ci provoquent souvant le crash de l’émulateur, sans plus d’information qu’un laconique « segmentation fault ».
Il s’avère que la LIBC utilisée normalement par le compilateur GCC ne produit pas du code valide en ce qui concerne le traitement des nombres flottant. Il suffit d’ajouter une ligne au Makefile de chaque example ( et plus tard aux Makefile de nos propres projets ) :
...
PSP_EBOOT_TITLE = Reflection Sample
USE_PSPSDK_LIBC = 1
PSPSDK=$(shell psp-config --pspsdk-path
...
Cette ligne spécifie au compilateur d’utiliser la LIBC fournie avec PSPSDK, et non celle fournie avec GCC.
j’ai finalement pu compiler les exemples ( notamment ceux liés à l’unité graphique (GU) de la console, afin de ma familiariser avec sa programmation, comme l’atteste le screenshot suivant :
Cet article n’est que le premier pas d’un projet centré autour d’une PSP, qui fera l’objet d’un futur article. En attendant, j’espère que celui-ci vous épargnera les nombreux tâtonnements qui m’ont été nécessaires pour en arriver là !
Si nous ne pouvons pas sécuriser la chaîne d'approvisionnement, tout le reste finira par s’écrouler.
L'article Que se passe‑t‑il lorsque la chaîne d’approvisionnement mondiale se brise? a d'abord été publié sur WeLiveSecurity
Raspberry Pi devices are often used by scientists, especially in biology to capture and analyse data, and a particularly striking – and sobering – project has made the news this week. Researchers at UMass Amherst have created FluSense, a dictionary-sized piece of equipment comprising a cheap microphone array, a thermal sensor, an Intel Movidius 2 neural computing engine, and a Raspberry Pi. FluSense monitors crowd sounds to forecast outbreaks of viral respiratory disease like seasonal flu; naturally, the headlines about their work have focused on its potential relevance to the COVID-19 pandemic.
Forsad Al Hossain and Tauhidur Rahman with the FluSense device. Image courtesy of the University of Massachusetts Amherst
The device can distinguish coughing from other sounds. When cough data is combined with information about the size of the crowd in a location, it can provide an index predicting how many people are likely to be experiencing flu symptoms.
It was successfully tested in in four health clinic waiting rooms, and now, PhD student Forsad Al Hossain and his adviser, assistant professor Tauhidur Rahman, plan to roll FluSense out in other large spaces to capture data on a larger scale and strengthen the device’s capabilities. Privacy concerns are mitigated by heavy encryption, and Al Hossain and Rahman explain that the emphasis is on aggregating data, not identifying sickness in any single patient.
The researchers believe the secret to FluSense’s success lies in how much of the processing work is done locally, via the neural computing engine and Raspberry Pi: “Symptom information is sent wirelessly to the lab for collation, of course, but the heavy lifting is accomplished at the edge.”
Image courtesy of the University of Massachusetts Amherst
FluSense offers a different set of advantages to other tools, such as the extremely popular self-reporting app developed by researchers at Kings College Hospital in London, UK, together with startup Zoe. Approaches like this rely on the public to sign up, and that’s likely to skew the data they gather, because people in some demographic groups are more likely than others to be motivated and able to participate. FluSense can be installed to capture data passively from groups across the entire population. This could be particularly helpful to underprivileged groups who are less likely to have access to healthcare.
Makers, engineers, and scientists across the world are rising to the challenge of tackling COVID-19. One notable initiative is the Montreal General Hospital Foundation’s challenge to quickly design a low-cost, easy to use ventilator which can be built locally to serve patients, with a prize of CAD $200,000 on offer. The winning designs will be made available to download for free.
There is, of course, loads of chatter on the Raspberry Pi forum about the role computing has in beating the virus. We particularly liked this PSA letting you know how to free up some of your unused processing power for those researching treatments.
Screenshot via @deeplocal on Instagram
And to end on a cheering note, we *heart* this project from @deeplocal on Instagram. They’ve created a Raspberry Pi-powered soap dispenser which will play 20 seconds of your favourite song to keep you at the sink and make sure you’re washing your hands for long enough to properly protect yourself.
The post FluSense takes on COVID-19 with Raspberry Pi appeared first on Raspberry Pi.
Alors que le monde se tourne vers la technologie pour suivre et contenir la pandémie COVID-19, cela pourrait-il signifier la fin du droit à la vie privée numérique?
L'article Santé publique vs vie privée: Doit‑on vraiment choisir? a d'abord été publié sur WeLiveSecurity
Comment les employés peuvent-ils rester motivés et productifs en travaillant à domicile pendant la crise de la COVID-19?
L'article Restez calme et continuez à travailler (à distance) a d'abord été publié sur WeLiveSecurity
« S’est-il passé autre chose ? » La crise sanitaire du coronavirus absorbe toute l’attention médiatique, alors que les mesures de confinement affectent la vie quotidienne de la moitié de l’humanité. C’est d’emblée un événement hors norme dans mon domaine de recherche, l’histoire des médias. Hors période de guerre, l’agenda médiatique n’est quasiment jamais bousculé à ce point.
Plusieurs projets ont déjà été entrepris pour collecter « en direct » des informations, archives et données sur la crise ce dont témoigne la compilation des ressources historiques de Frédéric Clavert. De mon côté j’ai spontanément commencé à réunir un large corpus de la presse quotidienne française nationale et régionale couvrant la réception médiatique de l’épidémie depuis ses premières manifestations en Chine début janvier jusqu’au 21 mars inclus.
Je n’avais pas initialement d’objectif précis, juste une volonté de comprendre un aspect de la crise à l’échelle de mon domaine de compétence. Cette exploration préliminaire a fait émerger un résultat paradoxal : l’un des discours les plus médiatisé est un discours critique de la médiatisation et du sensationnalisme des médias appelant à “relativiser” l’ampleur de l’épidémie réduite à une simple psychose irrationnelle.
Le corpus comprend actuellement 35 258 articles avec une occurrence de “coronavirus” dans Europresse1 . J’ai pris la décision pour l’instant d’exclure la presse spécialisée et, surtout, la presse en ligne : la couverture d’Europresse y est nettement moins bonne. Il faudrait une autre étude et d’autres moyens — probablement une extraction automatisée de Google News qui n’est malheureusement pas l’environnement le plus accueillant pour les projets de text mining.
Pour analyser ce corpus j’ai mis à profit les méthodes de « lectures distantes » expérimentées à une très grande échelle par le projet ANR Numapresse pour les archives de presse du XIXe et du XXe siècle. Nous avons notamment appliqué des outils de classifications automatisés par genre à l’ensemble de la presse quotidienne nationale numérisée par Gallica de 1820 à 1940. Il devient possible de suivre l’évolution quantitative d’un genre journalistique sur une très longue période et d’extraire automatiquement des sous-corpus comme les pages cinéma hebdomadaires. Ces données nouvelles ont été notamment mises à profit pour un livre sur la viralité médiatique avant Internet que je publie prochainement avec Marie-Ève Thérenty et Julien Schuh aux Éditions du CNRS.
J’ai développé un nouveau modèle de classification approprié au corpus en annotant manuellement un millier d’articles selon douze thématiques ou angles journalistiques qui caractérisent les différentes dimensions de la crise de l’organisation de la quarantaine aux problèmes d’approvisionnement.
La classification automatisée permet de distinguer clairement différentes phases de réception du virus. Les premiers articles relaient des analyses scientifiques d’un virus « mystérieux » à l’origine d’une épidémie alors lointaine. Les premiers cas apparaissent à la fin janvier. Tout au long du mois de février les médias font état de la progression de l’épidémie en France et à l’étranger ainsi que des inquiétudes croissantes des milieux économiques (à noter le cycle “hebdomadaire” des nouvelles économiques qui font généralement relâche le week-end). En mars, la couverture médiatique change profondément alors que la société française s’achemine inévitablement vers un confinement de masse : mesures de quarantaine, difficultés d’approvisionnement et, surtout, annulation d’événements en cascade. À cette date, l’épidémie est devenue un événement total qui s’insinue dans toutes les colonnes de la presse des grands titres de la une au carnet du jour.
La classification automatisée simplifie surtout la réalisation d’études « qualitatives » en permettant de rapidement focaliser le corpus sur un certain aspect de la crise. Par exemple il est possible de récupérer uniquement les articles ayant trait à l’organisation interne des hôpitaux ou, inversement, d’exclure d’emblée certaines thématiques qui ne seraient pas pertinentes (comme les nombreuses annulation d’événements sportifs et culturels à partir de mars).
Les premiers articles scientifiques parus dès janvier informent correctement sur la nature de l’épidémie : « Les chiffres actuels indiquent que la mortalité de ce virus serait de 3 à 4 %. » (La Tribune, 25 janvier), « sa létalité ne serait « que » de 3 % des personnes malade » (Les Échos, 27 janvier).
Ce constat factuel, toujours valable, est rapidement dépassé par un discours ambivalent fréquemment porté par certains professionnels de la santé : le virus est bien moins meurtrier en chiffre absolu que la grippe saisonnière qui tue en moyenne 10 000 à 12 000 personnes (sans doute un peu moins cette année avec la démocratisation de mesures de barrières puis la généralisation du confinement).
De circulation en circulation, le discours de relativisation est dépouillé de ses éléments contextuels (« jusqu’à présent »). Il se transforme en vérité générale : « le docteur **** appelle à ne pas céder à la psychose face au coronavirus et rappelle que la grippe est, à ce jour, beaucoup plus mortelle » (Le Progrès de Fécamp, 27 février : les noms des personnes non célèbres ont été anonymisées), « si on déployait la même arithmétique médiatisée et anxiogène pour la simple grippe saisonnière, qu’entendrait-on ? » (Le Télégramme, 7 mars). Les experts sollicités pointent le décalage entre la « surréaction » suscitée par le coronavirus et l’attentisme qui entoure le retour périodique de la grippe : « l’urgentiste Patrick Pelloux appelle lui à raison garder » (Santé, 27 janvier), « le docteur **** est plus inquiet des dégâts causés par la grippe » (La Croix, 31 janvier), « les équipes du SAMU rappellent que la grippe reste bien plus menaçante » (Le Monde, 30 janvier), « les pharmacies sont plus inquiètes pour la grippe que pour le coronavirus » (La Dordogne Libre, 26 février), [pour Michel Cymes] « il n’y a pas de psychose à avoir. Ce n’est qu’une grippe. » (Aujourd’hui en France, 3 mars).
La sur-préparation de la grippe H1N1 en 2009 est largement vue comme un piège à éviter : « l’épidémie de grippe H1N1 et ses nombreux ratés » (Libération 28 janvier), « on en a trop fait dans le cas de la grippe A H1N1 avec des stocks de vaccin ou d appareils » (Ouest-France, 30 janvier); Le risque d’une réaction excessive est encore pointé à la veille du passage en stade 3 et de l’instauration du confinement : « Le bilan est parfois décorrélé des peurs. La panique provoquée par la pandémie de grippe A (H1N1) en 2009-2010 — et par la réaction catastrophique des pouvoirs publics de l’époque — ne se reflète pas dans les chiffres : moins de 1 400 cas graves en réanimation et 312 décès. » (Sud Ouest, 13 mars).
Ce discours laisse des traces. De nombreux lecteurs et témoins de la presse régionale s’en approprient les termes : « je n’y crois pas à tout ce qu’ils racontent La grippe saisonnière fait davantage de morts que leur coro » (La Dépêche du Midi, 11 mars), « C’est beaucoup de cinéma. C’est moins grave que la grippe. » (témoignage dans Ouest-France, 14 mars).
La mise en place progressive du confinement à la mi-mars suscite immédiatement des incompréhensions et témoigne de l’ampleur du décalage entre le récit médiatique et la réalité de la pandémie : « On ne ferme pas le monde entier pour une simple grippe » (La Montagne, 14 mars), « On nous dit que c’est une grippe un peu plus virulente et on prend des mesures historiques » (Midi Libre, 14 mars), « La grippe n’a jamais provoqué la fermeture des bars, alors qu’elle tue davantage. Pourquoi une telle décision? » (témoignage d’un commerçant dans L’Union du 15 mars), « Quand je les ai informés des annonces d’Édouard Philippe, ils étaient ébahis. Ils ont fait des remarques du genre : La grippe, ça fait 10.000 morts. À la prochaine épidémie de grippe aussi ils ferment les restos ? » (La République du Centre, 15 mars).
Un terme revient comme un leitmotiv pour décrire l’emportement médiatique face à l’épidémie : la psychose (953 articles du corpus). L’expression commence à être utilisée fin janvier. Elle est largement disséminée pendant la période allant du développement de l’épidémie en France à l’instauration du confinement.
La psychose est décelée d’abord en Chine : « la psychose gagne Hong Kong » (La Dépêche du Midi, 25 janvier). Elle apparaît rapidement en France avec de premières ruptures de stocks dans les pharmacies : « le début de psychose qui aurait provoqué une ruée sur les masques de protection » (La Nouvelle République du Centre-Ouest, 29 janvier).
La psychose apparaît comme une maladie dans la maladie qui pourrait bien causer plus de dangers que le virus lui-même : « Un véritable phénomène de psychose collective qui a un nom de code coronavirus » (Midi Libre, 30 janvier). Pour un médecin « l’on en parle peut-être trop, au risque de favoriser la psychose » (Le Progrès de Fécamp, 27 février). La psychose est intrinsèquement lié à un discours de maintien de l’ordre réduisant la société à une population instinctive et irrationnelle : « La population s’affole un peu. Cette psychose est maintenue par certains médias au niveau national » (Nord Éclair, 3 mars). Dans ce contexte, l’enjeu essentiel pour les autorités (et plus indirectement pour une partie de la presse) « est aussi de maîtriser la psychose des gens » (Aujourd’hui en France, 26 janvier). Sans surprise, l’expression « psychose » est largement attesté dans la couverture médiatique des problèmes d’approvisionnement (10% des articles classés dans notre corpus) et des mesures de quarantaine (5,3% des articles).
La notion de psychose collective n’a plus de base scientifique solide aujourd’hui. Ce schéma d’explication a été progressivement abandonné par les spécialistes en sociologie des médias et media studies. Il a par contre un sens politique bien précis. Les premières occurrences de « psychose collective » apparaissent au début du XXe siècle sous la plume d’intellectuels conservateurs comme Paul Bourget2 ou Gustave le Bon dans la perspective d’une critique frontale des régimes démocratiques et de la légitimité de l’élection au suffrage universel.
Paradoxalement le discours de la psychose collective prépare son exact envers : la critique de l’irresponsabilité d’une foule incapable de se maîtriser et d’appliquer correctement les mesures de confinement. En moins d’une semaine l’état d’urgence sanitaire s’est considérablement renforcé remettant en cause de nombreux principes fondamentaux des libertés publiques et facilitant la généralisation de techniques de contrôles inédites. Exploitation données de connexion téléphoniques, surveillance par drone, reconnaissance faciale : face à la situation d’urgence tous les moyens paraissent bons pour imposer de force la distanciation sociale à des populations a priori désobéissantes et sujettes à des psychoses incontrôlables.
au nom de l’effet cliquet qui régit la vie de nos institutions contemporaines, il n’est pas absurde de se demander si ces décisions sanitaires, une fois mises en œuvre, perdureront dans le temps comme un vulgaire état d’urgence3 .
Le discours de la psychose prend un autre sens dans le contexte actuel. Il est fréquemment associé à la dénonciation des « fake news » et plus largement à une vision militarisée (weaponization) et verticalisée de la communication4 . À la « guerre sanitaire » lancée par le gouvernement répond une forme de guerre médiatique où les individus sont de nouveau assimilés à une population civile à contrôler et protéger malgré elle.
Le traitement médiatique d’un événement hors norme est évidemment un exercice complexe. Dès janvier, Sud-Ouest anticipe la position très délicate de la presse dans un billet réflexif sous le titre (approprié) « contagion médiatique »
Si les médias n’en parlent pas, on les soupçonne de cacher des choses, s’ils en font leurs gros titres, on leur reproche d’affoler la population. Toute la difficulté dans ce genre d’événements est de rendre compte des faits sans dramatiser en prenant en compte une réalité relativement récente.
L’analyse du corpus suggère que la couverture « directe » de la crise n’est pas parvenue à trouvé le juste équilibre : la gravité de la pandémie a été excessivement relativisée quasiment jusqu’à l’instauration des mesures de confinement. Néanmoins, c’est aussi dans la presse que les dysfonctionnements du dispositif de gestion de crise commencent à être mis au jour.
Les premiers signes de pénurie de fourniture médicale apparaissent dès la fin janvier : des pharmacies se retrouvent à court de masques. Le 26 janvier le Midi Libre fait état de « quarante-huit heures de folies » : « On est en rupture de stock. Les gens les achètent par boîtes entières. C’est irrationnel ». La pénurie se répand très vite dans toute la France (Angers, Lyon, Toulouse, Bordeaux…) et affecte rapidement d’autres produits comme les gels hydroalcooliques. La ministre de la santé doit faire une communication officielle : « nous avons des dizaines de masques en stock en cas d’épidémie » (Le Monde, 28 janvier).
Les informateurs locaux sont tout de suite moins optimistes. Un pharmacien constate que, même s’il n’y a pas encore une réelle pénurie les « stocks ne sont pas grands » (Charente Libre, 29 janvier). À Lyon, un industriel spécialisé dans ce type de produit s’avoue incapable de suivre la demande : « Si les chinois ne rouvrent pas leurs usines cela risque d’être compliqué » (Le Progrès, 2 février). Le Monde publiera finalement une enquête détaillée un mois plus tard : la France n’a pas de « plan b » en cas de pénurie de médicament, faute d’accès aux fournisseurs chinois.
Les sources locales s’interrogent également sur le degré de préparation réel des institutions médicales. Faute de retours de leur hiérarchie des soignants doivent aller à la pêche aux informations sur Internet : « La nuit dernière, nous avons appris la confirmation d’un cas via les réseaux sociaux, poursuit une autre infirmière. Il y aurait huit suspicions, mais je n’ai que des bruits de couloir. » (Ouest-France, 29 février). À la fin février, plusieurs médecins interrogés par le Parisien s’alarment du manque de tests et de réactivité des autorités : « Ils ne réalisent pas que l’Ile-de-France est devenue une zone à risque! ». (29 février). Le 4 mars, Le Monde publie une enquête détaillée sur les inquiétudes croissantes des EHPAD : pour la directrice de l’un de ses établissements « le pire est à venir ».
Ces témoignages dessinent en filigrane une forme de « fracture communicationnelle » qui fait largement écho à la fracture sociale : à rebours de l’idéal d’une “société d’information” horizontale héritée des années 1990 les administrations publiques ou privées communiquent de moins en moins en pratique. Les clients, les usagers et même les employés peinent à obtenir des informations cruciales et, inversement, les retours du « terrain » ne sont suffisamment pas pris en compte. Pour de nombreux professionnels de la santé, les voyants rouges se sont multipliés dès février : manque de moyen, préparation insuffisante et déficience des infrastructures. Et pourtant les autorités n’ont pris, en cascade, des mesures fortes que deux à trois semaines plus tard.
Using deeper learning as a framework for transformative educational experiences, Brent Richardson outlines the case for a pedagogical approach that challenges students using a Raspberry Pi. From the latest issue of Hello World magazine — out today!
A benefit of completing school and entering the workforce is being able to kiss standardised tests goodbye. That is, if you don’t count those occasional ‘prove you watched the webinar’ quizzes some supervisors require.
In the real world, assessments often happen on the fly and are based on each employee’s ability to successfully complete tasks and solve problems. It is often obvious to an employer when their staff members are unprepared.
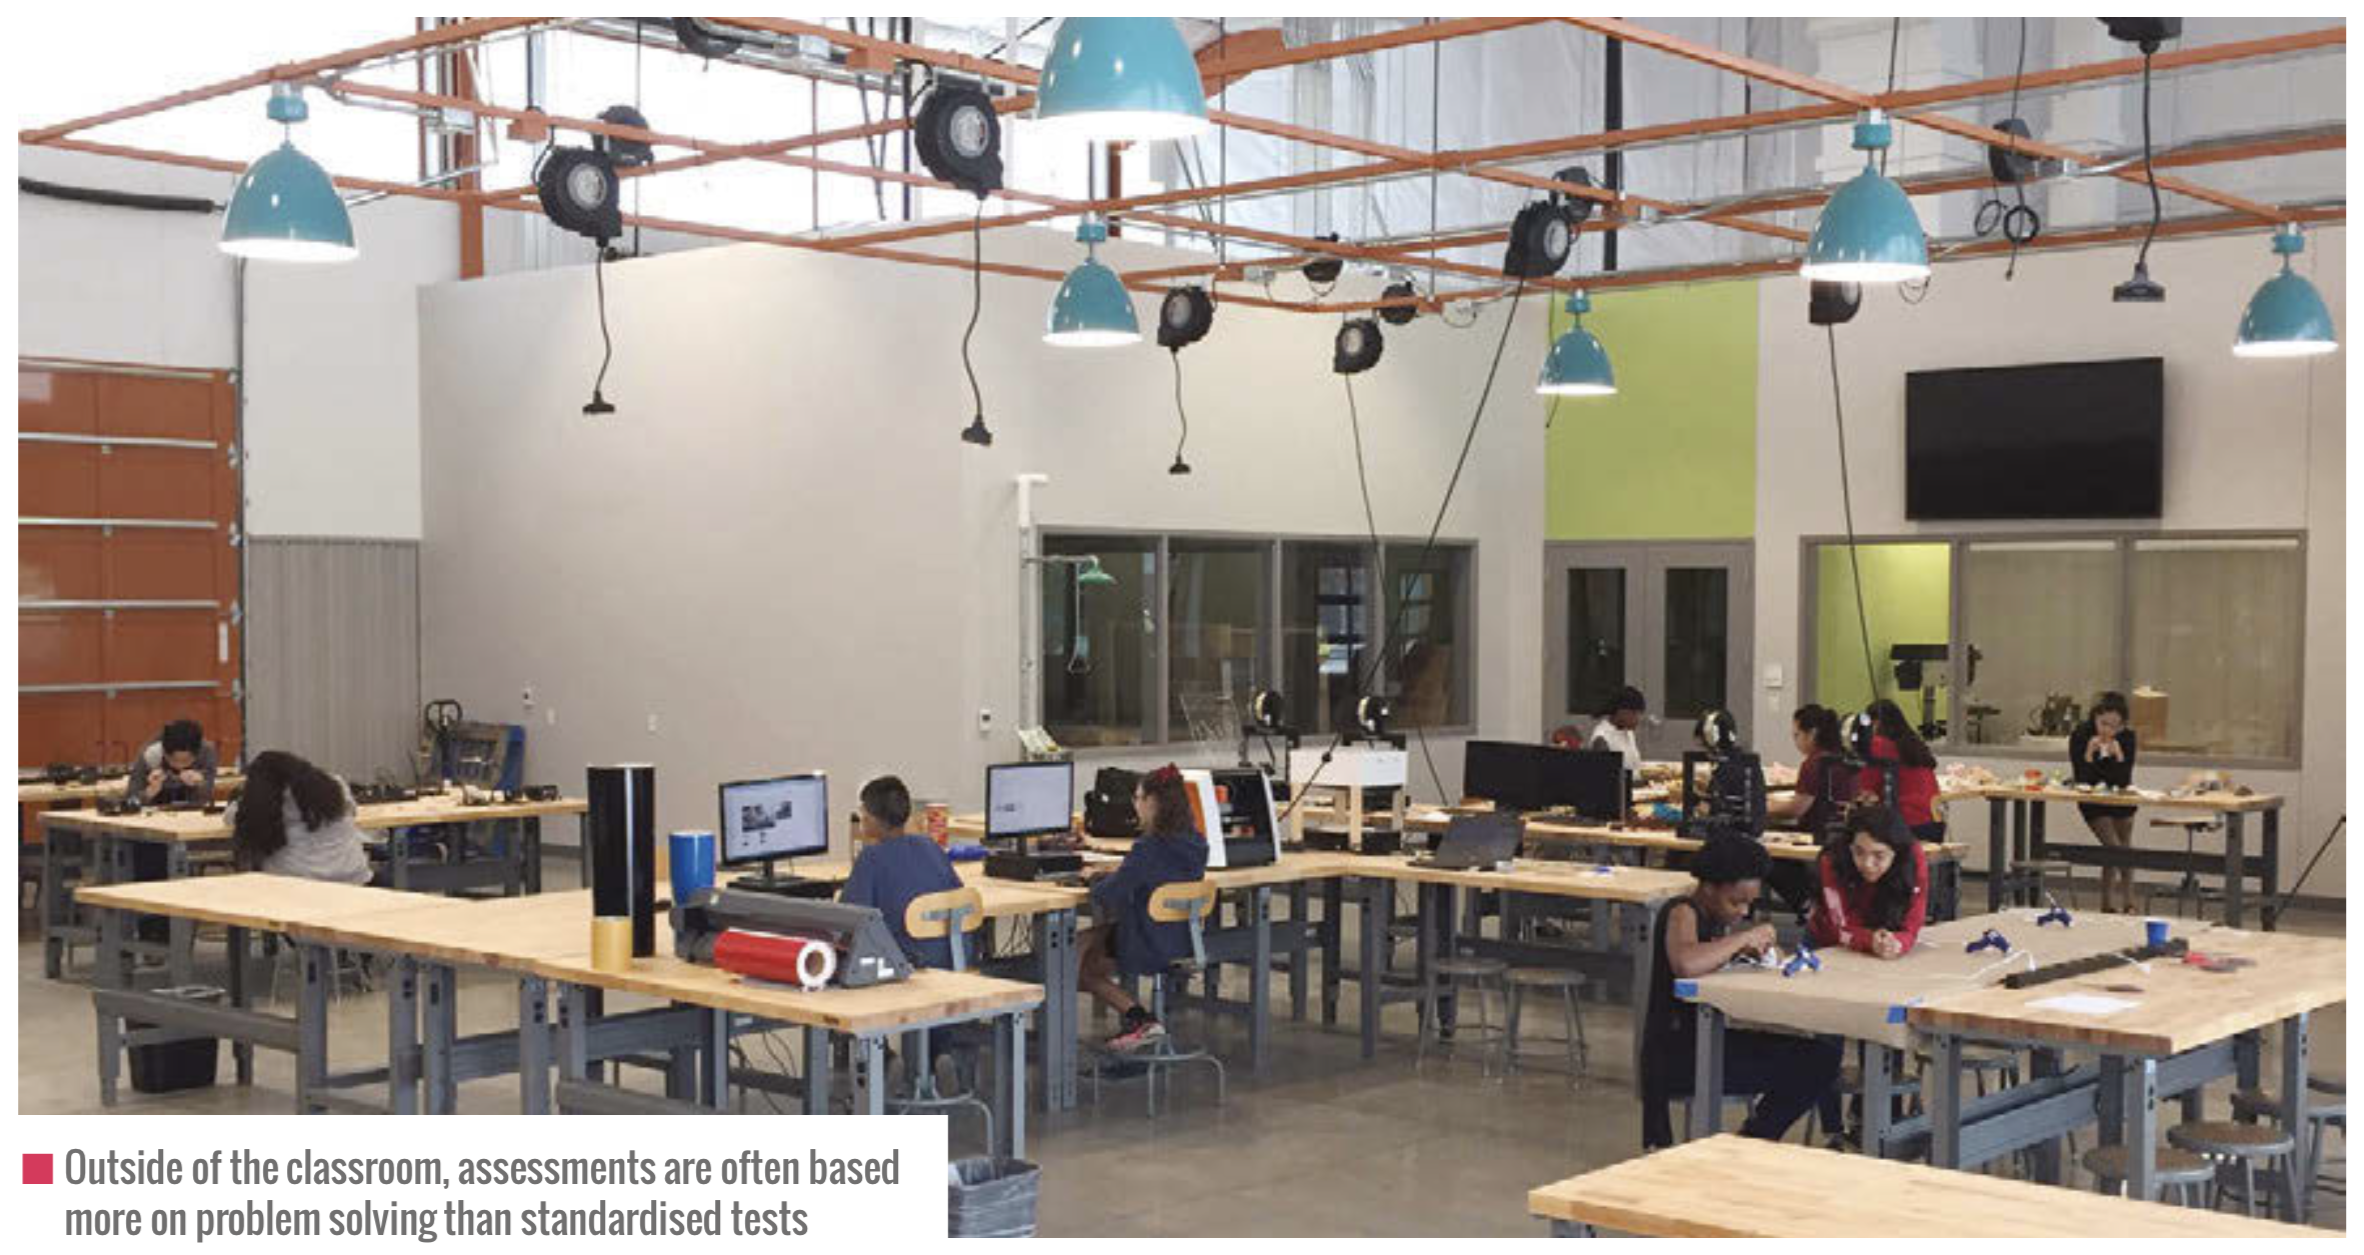
Formal education continues to focus on accountability tools that measure base-level proficiencies instead of more complex skills like problem-solving and communication.
One of the main reasons the U.S. education system is criticised for its reliance on standardised tests is that this method of assessing a student’s comprehension of a subject can hinder their ability to transfer knowledge from an existing situation to a new situation. The effect leaves students ill-prepared for higher education and the workforce.
A study conducted by the National Association of Colleges and Employers found a significant gap between how students felt about their abilities and their employer’s observations. In seven out of eight categories, students rated their skills much higher than their prospective employers had.
Some people believe that this gap continues to widen because teaching within the confines of a standardised test encourages teachers to narrow their instruction. The focus becomes preparing students with a limited scope of learning that is beneficial for testing.
With this approach to learning, it is possible that students can excel at test-taking and still struggle with applying knowledge in new ways. Educators need to have the support to not only prepare students for tests but also to develop ways that will help their students connect to the material in a meaningful manner.
In an effort to boost the U.S. education system’s ability to increase the knowledge and skills of students, many private corporations and nonprofits directly support public education. In 2010, the Hewlett Foundation went so far as to develop a framework called ‘deeper learning’ to help guide its education partners in preparing learners for success.
Deeper learning focuses on six key competencies:
This framework ensures that learners are active participants in their education. Students are immersed in a challenging curriculum that requires them to seek out and acquire new information, apply what they have learned, and build upon that to create new knowledge.
While deeper learning experiences are important for all students, research shows that schools that engage students from low-income families and students of colour in deeper learning have stronger academic outcomes, better attendance and behaviour, and lower dropout rates. This results in higher graduation rates, and higher rates
of college attendance and perseverance than comparison schools serving similar students. This pedagogical approach is one we strive to embed in all our work at Fab Lab Houston.
The importance of deeper learning was undeniable when a group of students I worked with in Houston built a solar-powered time-lapse camera. Through this collaborative project, we quickly found ourselves moving beyond classroom pedagogy to a ‘hero’s journey’ — where students’ learning paths echo a centuries-old narrative arc in which a protagonist goes on an adventure, makes new friends, encounters roadblocks, overcomes adversity, and returns home a changed person.

In this spirit, we challenged the students with a simple objective: ‘Make a device to document the construction of Fab Lab Houston’. In just one sentence, participants understood enough to know where the finish line was without being told exactly how to get there. This shift in approach pushed students to ask questions as they attempted to understand constraints and potential approaches.
Students shared ideas ranging from drone video to photography robots. Together everyone began to break down these big ideas into smaller parts and better define the project we would tackle together. To my surprise, even the students that typically refused to do most things were excited to poke holes in unrealistic ideas. It was decided, among other things, that drones would be too expensive, robots might not be waterproof, and time was always a concern.
The decision was made to move forward with the stationary time-lapse camera, because although the students didn’t know how to accomplish all the aspects of the project, they could at least understand the project enough to break it down into doable parts and develop a ballpark budget. Students formed three teams and picked one aspect of the project to tackle. The three subgroups focused on taking photos and converting them to video, developing a remote power solution, and building weatherproof housing.
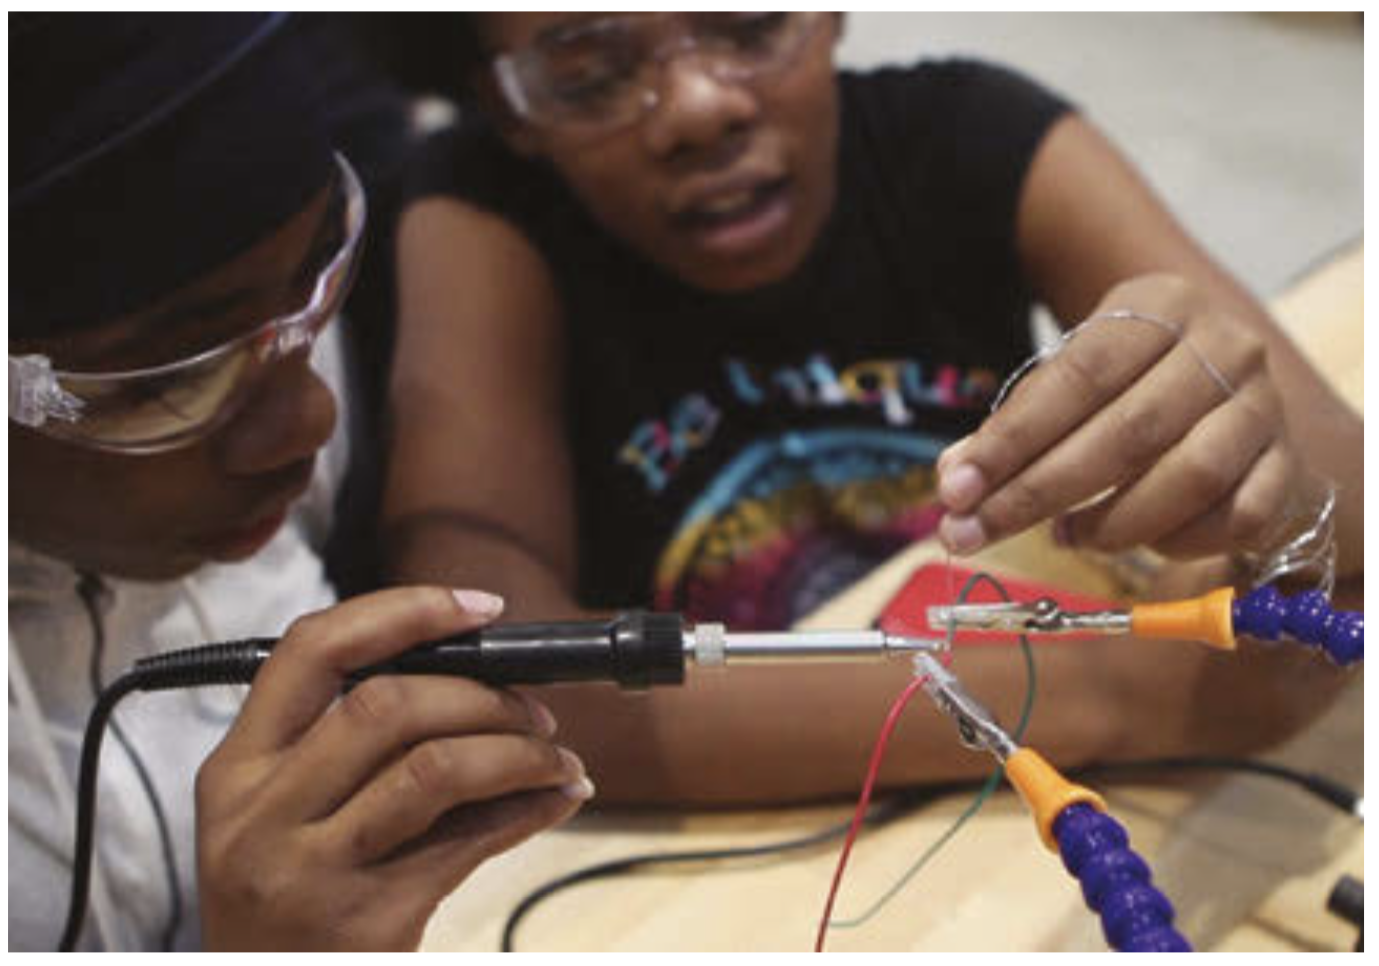
A group of students found sample code for Raspberry Pi that could be repurposed to take photos and store them sequentially on a USB drive. After quick success, a few ambitious learners started working to automate the image post-processing into video. Eventually, after attempting multiple ways to program the computer to dynamically turn images into video, one team member discovered a new approach: since the photos were stored with a sequential numbering system, thousands of photos could be loaded into Adobe Premiere Pro straight off the USB with the ‘Automate to Sequence’ tool in Premiere.

A great deal of time was spent measuring power consumption and calculating solar panel and battery size. Since the project would be placed on a pole in the middle of a construction site for six months, the students were challenged with making their solar-powered time-lapse camera as efficient as possible.
Waking the device after it was put into sleep mode proved to be more difficult than anticipated, so a hardware solution was tested. The Raspberry Pi computer was programmed to boot up when receiving power, take a picture, and then shut itself down. With the Raspberry Pi safely shut down, a timer relay cut power for ten minutes before returning power and starting the cycle again.
Finally, a waterproof container had to be built to house the electronics and battery. To avoid overcomplicating the process, the group sourced a plastic weatherproof ammunition storage box to modify. Students operated a 3D printer to create custom parts for the box.
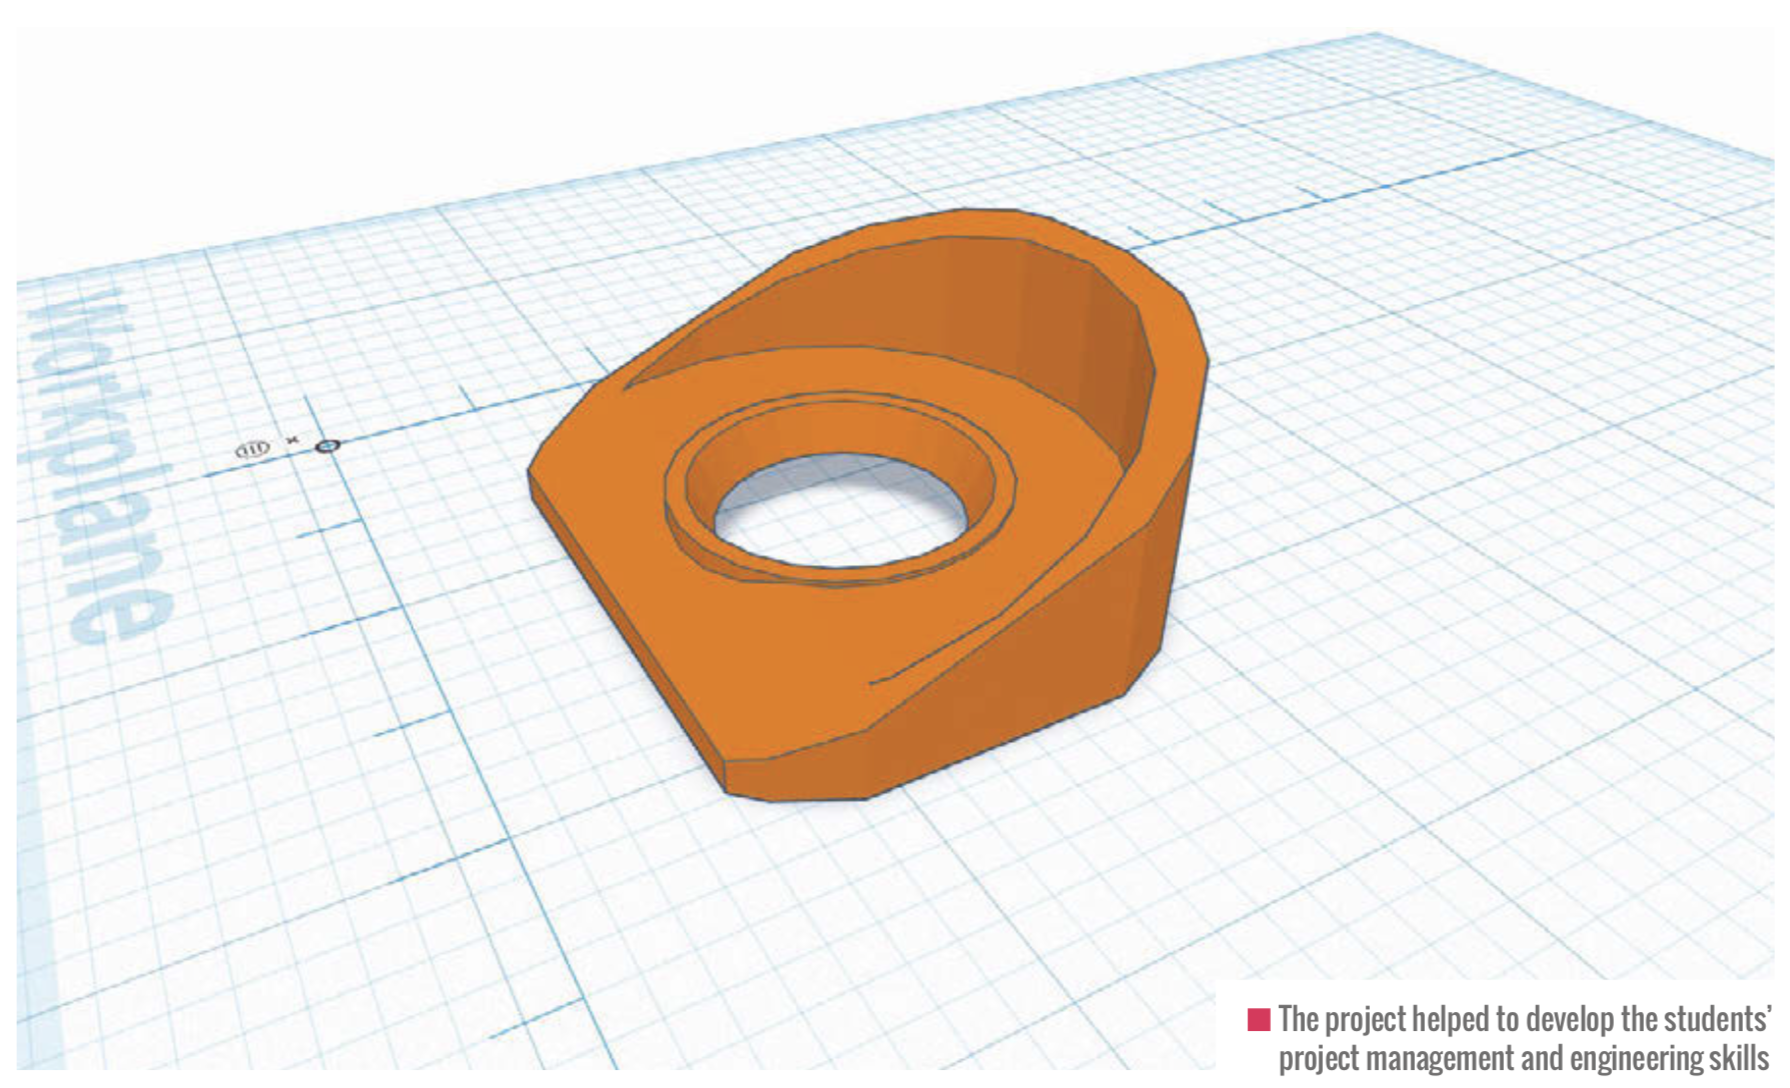
After cutting a hole for the camera, a small piece of glass was attached to a 3D-printed hood, ensuring no water entered the box. On the rear of the box, they printed a part to hold and seal the cable from the solar panel where it entered the box. It only took a few sessions before the group produced a functioning prototype. The project was then placed outside for a day to test the capability of the device.
The test appeared successful when the students checked the USB drive. The drive was full of high-quality images captured every ten minutes. When the drive was connected back to Raspberry Pi, a student noticed that all the parts inside the case moved. The high temperature on the day of the test had melted the glue used to attach everything. This unexpected problem challenged students to research a better alternative and reattach the pieces.
Once the students felt confident in their device’s functionality, it was handed over to the construction crew, who installed the camera on a twenty-foot pole. The installation went smoothly and the students anxiously waited to see the results.
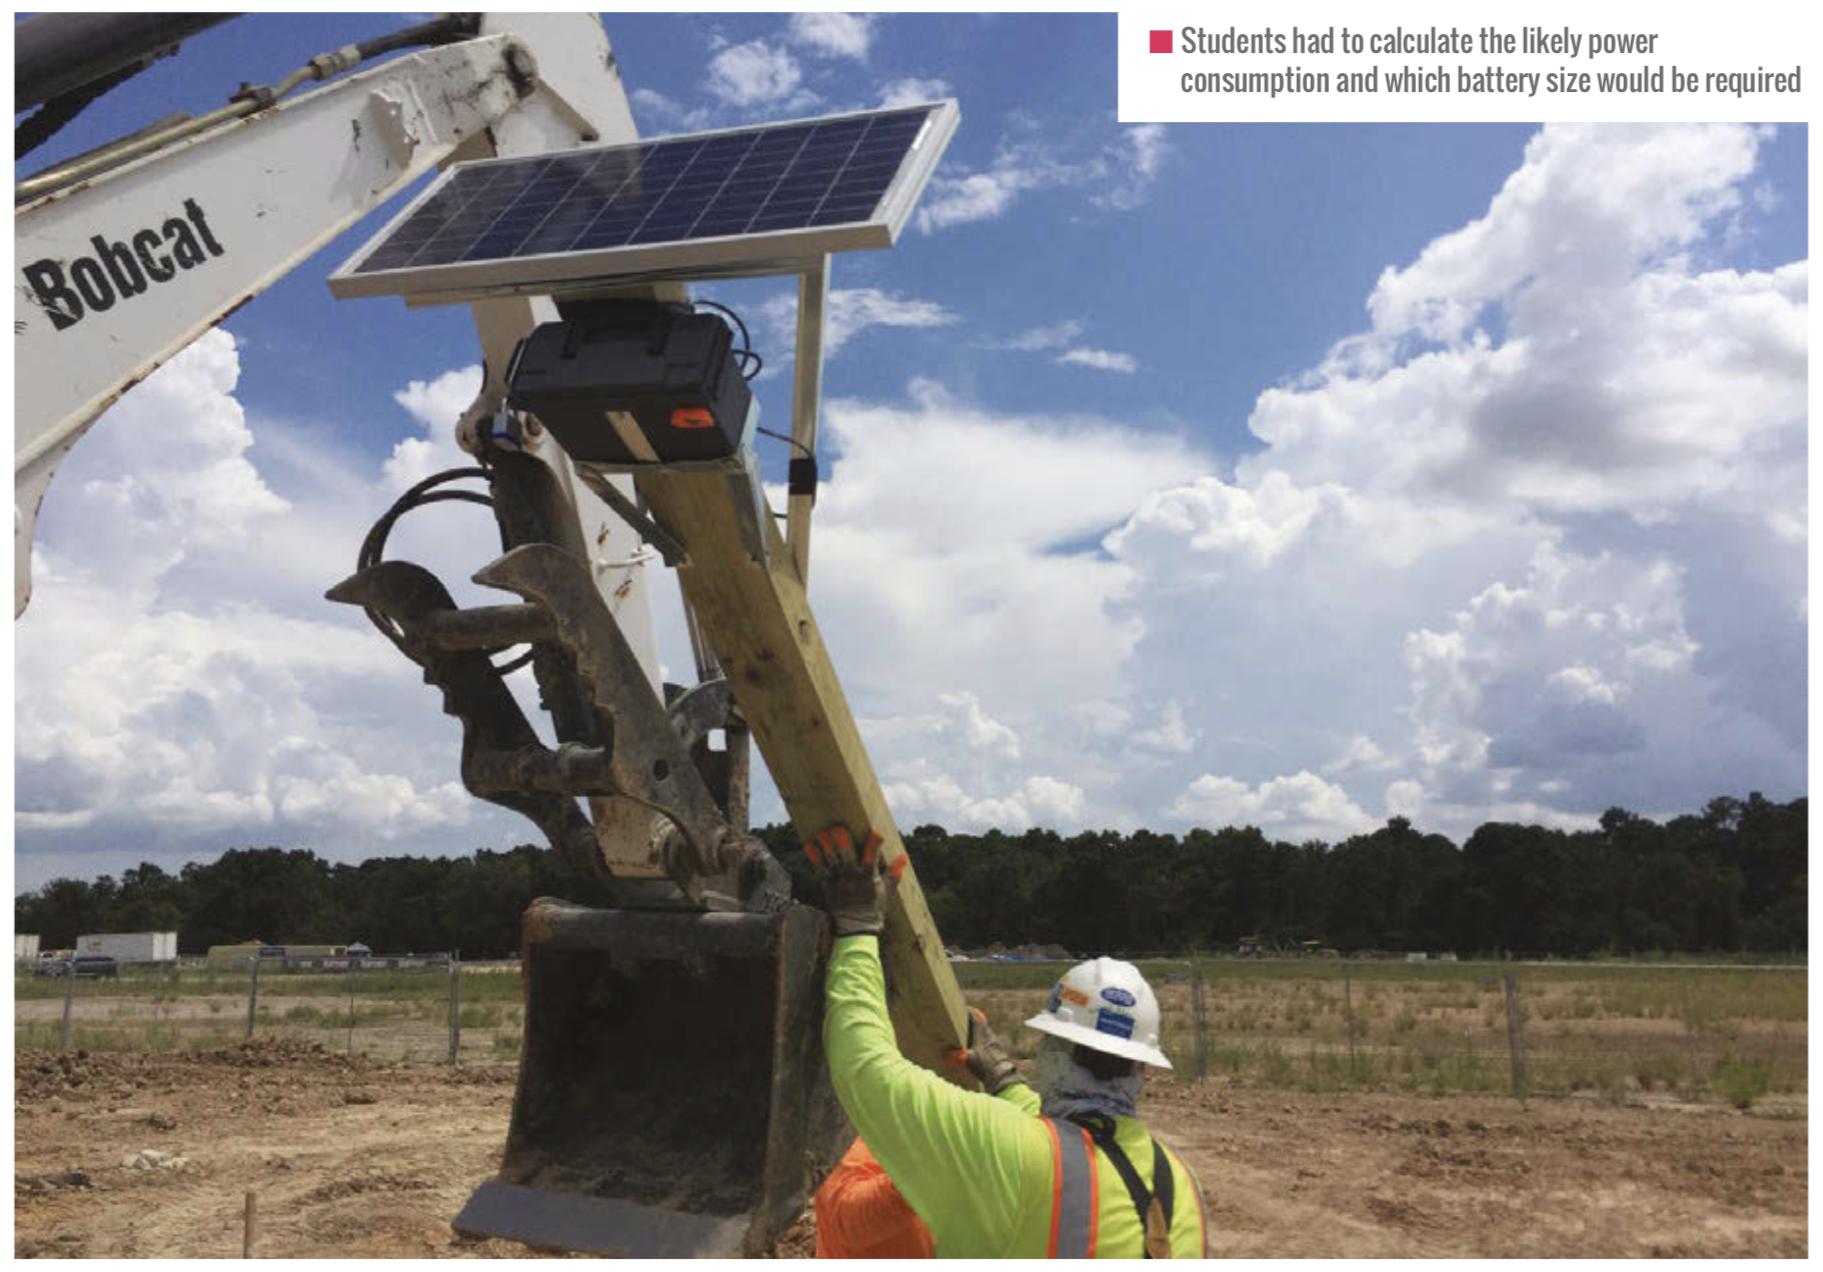
Less than a week after the camera went up, Houston was hit hard with the rains brought on by hurricane Harvey. The group was nervous to see whether the project they had constructed would survive. However, when they saw that their camera had survived and was working, they felt a great sense of pride.

They recognised that it was the collaborative effort of the group to problem-solve possible challenges that allowed their camera to not only survive but to capture a spectacular series of photos showing the impact of the hurricane in the location it was placed.
BakerRipleyTimeLapse2
This is “BakerRipleyTimeLapse2” by Brent Richardson on Vimeo, the home for high quality videos and the people who love them.
Overcoming many hiccups throughout the project was a great illustration of how the students learned how to learn and
to develop an academic mindset; a setback that at the beginning of the project might have seemed insurmountable was laughable in the end.
Throughout my experience as a classroom teacher, a museum educator, and now a director of a digital makerspace, I’ve seen countless students struggle to understand the relevance of learning, and this has led me to develop a strong desire to expand the use of deeper learning.
Sometimes it feels like a risk to facilitate learning rather than impart knowledge, but seeing a student’s development into a changed person, ready to help someone else learn, makes it worth the effort. Let’s challenge ourselves as educators to help students acquire knowledge and use it.
Issue 12 of Hello World is available now as a FREE PDF download. UK-based educators can also subscribe to receive Hello World directly to their door in all its shiny printed goodness. Visit the Hello World website for more information.
The post Using Raspberry Pi for deeper learning in education appeared first on Raspberry Pi.
It is time. Time to go to that little stack of gifts from well-wishers who have badged you as “techie” or noted that you “play computer games”. Armed with this information, they decided you’d like to receive one of our small and perfectly formed Raspberry Pis. You were thrilled. You could actually make a thing.
Except you haven’t. You had to go to that job thingy, and talk to that partner thingy, and wash and feed those children thingies. Don’t worry, we’re not offended. We know that embarking on your first coding project is daunting and that the community has taken off like a rocket so there are eight bajillion ideas floating around. Good job we’re here to help, then, isn’t?
Some of us have found ourselves spending more time with our online communities recently. Those whose digital family of choice is to be found on Reddit should see an uptick in their personal ‘Karma’ if they’re spending more time digging into “the front page of the internet”. If you’d like to see a real-world indicator of the fruits of your commenting/sharing/Let-Me-Google-That-For-You labour, a super-easy Raspberry Pi first-timer project is building a Karma counter, like this one we found on Reddit.

Now, Squiddles1227 is one of those flash 3D printer-owning types, but you could copy the premise and build your own crafty Karma-themed housing around your counter.
On a similar note (and featuring a comprehensive ‘How To’), GiovanniBauer on instructables.com used his Raspberry Pi to create an Instagram follower counter. Developed on Raspbian with Node.js, this project walk-through should get you started on whichever social media counter project you’d like to have a bash at.
We know this is a real-life Raspberry Pi first-timer project because the Reddit post title says so. Ninjalionman1 made an e-ink calendar using a Raspberry Pi Zero so they can see their daily appointments, weather report, and useful updates.
We mined the original Reddit thread to find you the comment linking to all the info you need about hardware and setup. Like I said, good job we’re here.
Raspberry Pi 3 and 4, as well as Raspberry Pi Zero W, come with built-in Bluetooth connectivity. This means you can build something to let your lockdown-weary self take your emotional-health-preserving music/podcasts/traditional chant soundtrack with you as you migrate around your living space. “Mornings in the lounge… mid-afternoons at the kitchen table…” – we feel you.
Circuitdigest.com posted this comprehensive walk-through to show you how a Raspberry Pi can convert an ordinary speaker with a 3.5mm jack into a wireless Bluetooth speaker.
PCWorld.com shared 10 Raspberry Pi projects they bet anyone can do, and we really like the look of this one. It shows you how to give a “dumb” TV extra smarts, like web browsing, which could be especially useful if screen availability is limited in a multi-user household.
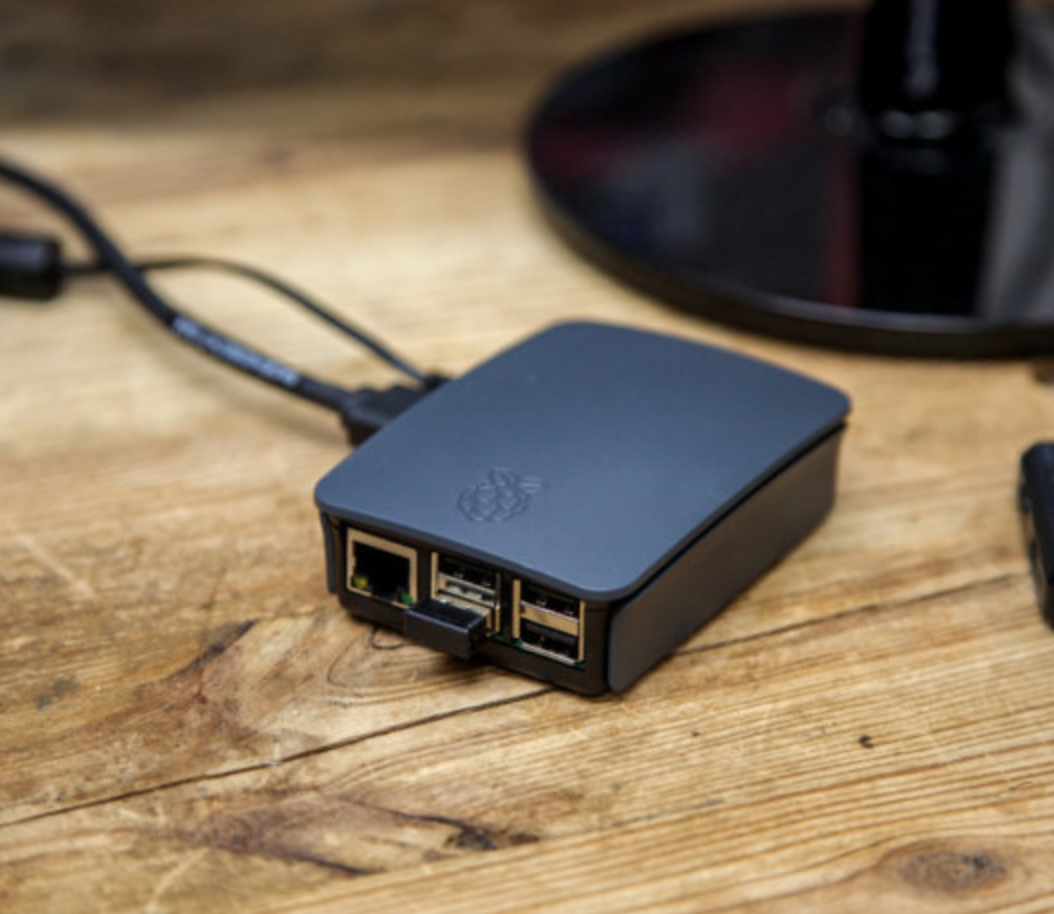
The PCWorld article recommends using a Raspberry Pi 2, 3 or 4, and points out that this is a much cheaper option than things like Chromebits and Compute Sticks.
Lastly, electromaker.io have hidden the coding education vegetables in the Minecraft tomato sauce using Raspberry Pi. The third post down on this thread features a video explaining how you can hack your kids’ favourite game to get them learning to code.

The video blurb also helpfully points out that Minecraft comes pre-installed on Raspbian, making it “one of the greatest Pi projects for kids.”
If you’re not quite ready to jump in and try any of the above, try working your way through these really simple steps to set up your Raspberry Pi and see what it can do. Then come back here and try one of these first-timer projects, share the results of your efforts, tag us, and receive a virtual round of applause!
The post Ashley’s top five projects for Raspberry Pi first-timers appeared first on Raspberry Pi.
Des criminels spécialisés en rançongiciels affirment ralentir leurs attaques et épargner les soins de santé pendant la crise COVID-19. Merci. Ou pas.
L'article Le bon, la brute et les truands a d'abord été publié sur WeLiveSecurity
Si vous travaillez à distance, vous pouvez adopter des gestes barrière numériques comme l’authentification multifacteur pour garder vos systèmes informatiques en bonne santé.
L'article Télétravail : renforcez la sécurité avec l’authentification multifactorielle a d'abord été publié sur WeLiveSecurity
While being holed up in the Vaults living off our stash of Nuke cola, we’ve come across this mammoth junk-build project, which uses Raspberry Pi Zero W to power a working Pipboy.
Pipboy scrap build
No Description
UK-based JustBuilding went full Robert House and, over several months, built the device’s body by welding together scrap plastic. Raspberry Pi Zero W serves as the brain, with a display header mounted to the GPIO pins. The maker wrote a Pipboy-style user interface, including demo screens, in Python — et voilà…
Lucky for him, semiconductors were already invented but, as JustBuilding admits, this is not what we’d call a beginner’s project. Think the Blue Peter show’s Tracey Island extravaganza, except you don’t have crafty co-presenters/builders, and you also need to make the thing do something useful (for our US readers who just got lost there, think Mr Rogers with glitter glue and outdoor adventure challenges).

The original post on Instructables is especially dreamy, as JustBuilding has painstakingly produced a really detailed, step-by-step guide for you to follow, including in-the-making photos and links to relevant Raspberry Pi forum entries to help you out where you might get stuck along the way.
And while Raspberry Pi can help you create your own post-apocalyptic wristwear, we’re still working on making that Stealthboy personal cloaking device a reality…

If you’re lucky enough to have access to a 3D printer, the following is the kind of Pipboy you can knock up for yourself (though we really like JustBuilding’s arts’n’crafts upcycling style):
3D Printed Pipboy 3000 MKIV with Raspberry Pi
Find out how to 3D print and build your own functional Pipboy 3000 using a Raspberry Pi and Adafruit 3.5″ PiTFT. The pypboy python program for the Raspberry …
The post Stay busy in your Vault with a Raspberry Pi Zero Pipboy appeared first on Raspberry Pi.
Connect your gaming PC to your TV with ease, thanks to Steam Link and Raspberry Pi.
Back in 2018, we asked Simon, our Asset Management Assistant Keeper of the Swag, Organiser of the Stuff, Lord Commander of the Things to give Steam Link on Raspberry Pi a try for us, as he likes that sort of thing and was probably going to do it anyway.
Valve’s Steam Link, in case you don’t know, allows users of the gaming distribution platform Steam to stream video games from their PC to a display of their choice via their home network, with no need for cumbersome wires and whatnot.
Originally produced as a stand-alone box in 2018, Valve released this tool as a free download to all Raspberry Pi users, making it accessible via a single line of code. Nice!
The result of Simon’s experiment was positive: he reported that setting up Steam Link was easy, and the final product was a simple and affordable means of playing PC games on his TV, away from his PC in another room.
Well, it’s 2020 and since many of us are staying home lately, so we figured it would be nice to remind you all that this streaming service is still available.
To set up Steam Link on your Raspberry Pi, simply enter the following into a terminal window:
sudo apt update
sudo apt install steamlink
The post Don’t forget about Steam Link on Raspberry Pi appeared first on Raspberry Pi.
When you develop a web app or a mobile app with Django, it is common to use the Django REST Framework for communication with the server-side. The client-side makes GET, POST, PUT, and DELETE requests to the REST API to read, create, update, or delete data there. The communication by Ajax is pretty uncomplicated, but how would you upload an image or another file to the server? I will show you that in this article by creating user avatar upload via REST API. Find the full code for this feature on Github.
We will start by installing Pillow for image handling to the virtual environment using the standard pip command:
(venv)$ pip install PillowCreate accounts app with a custom User model:
# myproject/apps/accounts/models.py
import os
import sys
from django.db import models
from django.contrib.auth.models import AbstractUser
from django.utils import timezone
from django.utils.translation import gettext_lazy as _

def upload_to(instance, filename):
    now = timezone.now()
    base, extension = os.path.splitext(filename.lower())
    milliseconds = now.microsecond // 1000
    return f"users/{instance.pk}/{now:%Y%m%d%H%M%S}{milliseconds}{extension}"

class User(AbstractUser):
    # …
    avatar = models.ImageField(_("Avatar"), upload_to=upload_to, blank=True)
You can add there as many fields as you need, but the noteworthy part there is the avatar field.
Update the settings and add the accounts app to INSTALLED_APPS, set the AUTH_USER_MODEL, and the configuration for the static and media directories:
# myproject/settings.py
INSTALLED_APPS = [
    # …
    "myproject.apps.accounts",
]

AUTH_USER_MODEL = "accounts.User"

STATICFILES_DIRS = [os.path.join(BASE_DIR, "myproject", "site_static")]
STATIC_ROOT = os.path.join(BASE_DIR, "myproject", "static")
STATIC_URL = "/static/"
MEDIA_ROOT = os.path.join(BASE_DIR, "myproject", "media")
MEDIA_URL = "/media/"
Next small steps:
makemigrations and migrate management commands.createsuperuser management command.Install Django REST Framework for the REST APIs to your virtual environment, as always, using pip:
(venv)$ pip install djangorestframeworkWe'll be using authentication by tokens in this example. So add Django REST Framework to INSTALLED_APPS in the settings and set TokenAuthentication as the default authentication in the REST_FRAMEWORK configuration:
# myproject/settings.py
INSTALLED_APPS = [
    # …
    "rest_framework",
    "rest_framework.authtoken",
    # …
]

REST_FRAMEWORK = {
    'DEFAULT_AUTHENTICATION_CLASSES': [
        'rest_framework.authentication.TokenAuthentication',
    ]
}In Django REST Framework, serializers are used for data validation, rendering, and saving. They are similar to Django forms. Prepare UserAvatarSerializer for avatar uploads:
# myproject/apps/accounts/serializers.py
from django.contrib.auth import get_user_model
from rest_framework.serializers import ModelSerializer
User = get_user_model()

class UserAvatarSerializer(ModelSerializer):
    class Meta:
        model = User
        fields = ["avatar"]

    def save(self, *args, **kwargs):
        if self.instance.avatar:
            self.instance.avatar.delete()
        return super().save(*args, **kwargs)
Now create an API view UserAvatarUpload for avatar uploads.
# myproject/apps/accounts/views.py
from rest_framework import status
from rest_framework.parsers import MultiPartParser, FormParser
from rest_framework.permissions import IsAuthenticated
from rest_framework.response import Response
from rest_framework.views import APIView
from .serializers import UserAvatarSerializer

class UserAvatarUpload(APIView):
    parser_classes = [MultiPartParser, FormParser]
    permission_classes = [IsAuthenticated]

    def post(self, request, format=None):
        serializer = UserAvatarSerializer(data=request.data, instance=request.user)
        if serializer.is_valid():
            serializer.save()
            return Response(serializer.data, status=status.HTTP_200_OK)
        else:
            return Response(serializer.errors, status=status.HTTP_400_BAD_REQUEST)
Make sure that the view uses MultiPartParser as one of the parser classes. That's necessary for the file transfers.
In the URL configuration, we will need those URL rules:
TemplateView.# myroject/urls.py
from django.conf.urls.static import static
from django.contrib import admin
from django.urls import path
from django.views.generic import TemplateView
from django.conf import settings
from myproject.accounts.views import UserAvatarUpload
from rest_framework.authtoken.views import obtain_auth_token
urlpatterns = [
path("", TemplateView.as_view(template_name="index.html")),
path("api/auth-token/", obtain_auth_token, name="rest_auth_token"),
path("api/user-avatar/", UserAvatarUpload.as_view(), name="rest_user_avatar_upload"),
path("admin/", admin.site.urls),
]
urlpatterns += static(settings.STATIC_URL, document_root=settings.STATIC_ROOT)
urlpatterns += static(settings.MEDIA_URL, document_root=settings.MEDIA_ROOT)I will illustrate the frontend using Bootstrap HTML and Vanilla JavaScript. Of course, you can implement the same using ReactJS, Vue, Angular, or other JavaScript framework and any other CSS framework.
The template for the index page has one login form with username and password or email and password fields (depending on your implementation), and one avatar upload form with a file selection field. Also, it includes a JavaScript file avatar.js for Ajax communication.
{# myproject/templates/index.html #}
<!doctype html>
{% load static %}
<html lang="en">
<head>
    <meta charset="utf-8">
    <meta name="viewport" content="width=device-width, initial-scale=1, shrink-to-fit=no">

    <link rel="stylesheet" href="https://stackpath.bootstrapcdn.com/bootstrap/4.4.1/css/bootstrap.min.css"
          integrity="sha384-Vkoo8x4CGsO3+Hhxv8T/Q5PaXtkKtu6ug5TOeNV6gBiFeWPGFN9MuhOf23Q9Ifjh" crossorigin="anonymous">

    <title>Hello, World!</title>
</head>
<body>
<div class="container">
    <div class="row">
        <div class="col-md-8">
            <p class="text-muted my-3"><small>Open Developer Console for information about responses.</small></p>
            <h1 class="my-3">1. Log in</h1>
            <form id="login_form">
                <div class="form-group">
                    <label for="id_email">Email address</label>
                    <input type="email" class="form-control" id="id_email" aria-describedby="emailHelp"
                           placeholder="Enter email"/>
                </div>
                <div class="form-group">
                    <label for="id_password">Password</label>
                    <input type="password" class="form-control" id="id_password" placeholder="Password"/>
                </div>
                <button type="submit" class="btn btn-primary">Log in</button>
            </form>

            <h1 class="my-3">2. Upload an avatar</h1>
            <form id="avatar_form">
                <div class="form-group">
                    <label for="id_avatar">Choose an image for your avatar</label>
                    <input type="file" class="form-control-file" id="id_avatar"/>
                </div>
                <button type="submit" class="btn btn-primary">Upload</button>
            </form>

        </div>
    </div>
</div>
<script src="{% static 'site/js/avatar.js' %}"></script>
</body>
</html>
Last but not least, create the JavaScript file avatar.js. It contains these things:
// myproject/site_static/site/js/avatar.js
let userToken;

document.getElementById('login_form').addEventListener('submit', function(event) {
    event.preventDefault();
    let email = document.getElementById('id_email').value;
    let password = document.getElementById('id_password').value;

    fetch('http://127.0.0.1:8000/api/auth-token/', {
        method: 'POST',
        headers: {
            'Content-Type': 'application/json',
        },
        body: JSON.stringify({
            "username": email,
            "password": password,
        })
    }).then( response => {
        return response.json();
    }).then(data => {
        console.log(data);
        userToken = data.token;
        console.log('Logged in. Got the token.');
    }).catch((error) => {
        console.error('Error:', error);
    });
});

document.getElementById('avatar_form').addEventListener('submit', function(event) {
    event.preventDefault();
    let input = document.getElementById('id_avatar');

    let data = new FormData();
    data.append('avatar', input.files[0]);

    fetch('http://127.0.0.1:8000/api/user-avatar/', {
        method: 'POST',
        headers: {
            'Authorization': `Token ${userToken}`
        },
        body: data
    }).then(response => {
        return response.json();
    }).then(data => {
        console.log(data);
    }).catch((error) => {
        console.error('Error:', error);
    });
});
In the JavaScript file, we are using fetch API for the REST API requests. The noteworthy part there is the FormData class that we use to send the file to the server.
Now run the local development server and go to the http://127.0.0.1:8000. There you will have something like this:
![]()
As more than a half Internet usage happens on mobile devices, there is a demand to switch from usual HTML websites and platforms to mobile apps. Whether you create a native mobile app, a hybrid app, or Progressive Web App, you will likely have to communicate with the server via REST API or GraphQL. It is pretty clear how to transfer textual data from and to a remote server. But after this exercise, we can also transfer binary files like images, PDF or Word documents, music, and videos.
Happy coding!
Cover Photo by Dan Silva
Let us test your basic knowledge of Unix systems, including commands.
The post Unix Basics Quiz appeared first on nixCraft.
Les chercheurs d'ESET mettent en lumière des techniques d'obfuscation uniques découvertes lors de l'analyse d'un nouveau module de cryptominage distribué par le botnet du groupe Stantinko.
L'article Le nouveau cryptomineur de Stantinko utilise des techniques d’obfuscation uniques a d'abord été publié sur WeLiveSecurity
The post Ansible zypper update all packages on OpenSUSE/SUSE appeared first on nixCraft.
Comme tous les trimestres, Canard PC Hardware est en kiosque. Si vous êtes abonné, vous l’avez peut-être déjà reçu, mais dans le cas contraire, il est disponible chez votre revendeur préféré. Vos marchands de journaux ont le droit d’être ouverts et quand ils le peuvent matériellement, ils le sont, donc vous y trouverez votre magazine. Mais restez prudents : respectez les consignes sanitaires, évitez de multiplier les sorties, groupez vos courses à faire.
 Dans ce numéro, il y a deux grands axes. Premièrement, la sauvegarde, avec un gros dossier sur le meilleur moyen de protéger vos données, des conseils, des guides d’achats et des explications sur ce qui peut arriver à vos données. Le but est bien évidemment de vous fournir les meilleurs outils pour vous éviter de perdre des informations, des données, des photos, etc. L’autre dossier important porte sur l’accessibilité dans le monde numérique, et plus spécifiquement dans le domaine des jeux vidéo. Nous avons testé la manette conçue par Microsoft pour les personnes en situation de handicap physique et interviewé des joueurs qui doivent utiliser ces périphériques, avec l’aide de notre collège Ellen Replay. Les initiatives des constructeurs sont importantes dans ce cas de figure, et vous verrez que différentes solutions existent.
Dans la suite, nous avons pu tester pas mal de processeurs et de cartes graphiques ce trimestre, avec des gammes très éloignées : Pentium et Athlon d’un côté pour ceux qui ont un budget un peu faible, Threadripper 32 cœurs, Ryzen 16 cœurs et Radeon RX 5600 XT pour les autres. En plus de nos guides d’achats habituels, vous trouverez aussi nos tests flash, avec un routeur 4G, une brosse à dents connectée, un écran de 43 pouces pour les joueurs, un écran portable ou des périphériques Wi-Fi 6. Dans la suite du magazine, nous avons aussi décidé de revenir sur le bug de l’an 2000 et son descendant, le bug de l’an 2020. Oni vous parlera de suicide de borne d’arcade dans un dossier sur la sécurité dans les vieux jeux vidéo, et Dandu vous montrera quelques photos d’un reportage dans un centre de recyclage de PC en Écosse.
 En vrac, Sonia vous parlera de Lovebox (non, ce n’est pas le nouveau produit d’un FAI), mais vous trouverez aussi des tests de périphériques (webcam, souris, etc.), une config’ pour ceux qui qui ne veulent pas ouvrir leur portefeuille et la suite de notre historique sur les versions de Windows que vous ne connaissez (peut-être) pas. Enfin, certains lecteurs apprécieront, nous devons vous annoncer le retour d’une page très demandée : le résumé des performances des GPU dans nos guides d’achats.
Nous espérons que ce nouveau numéro vous plaira et nous vous invitions à venir en parler sur le forum pour nous donner votre avis et vos impressions.
At the Raspberry Pi Foundation, our mission is to put the power of computing and digital making into the hands of people all over the world. We know that a lot of families around the globe are navigating school closures and practicing social distancing right now to keep their communities healthy and safe.
So in today’s post, we put together a list for you with some of our free online projects and resources that digital makers of all ages and experience levels can explore at home.
![]()
For most of these projects, you don’t need any new software or hardware. And many of our online resources are available in multiple languages, so young learners can use them even if their mother language isn’t English!
![]()
![]()
![]()
![]()
Our team is working hard to bring you more online learning experiences to support you, your children, and everyone in the community at this time. You can read our CEO Philip Colligan’s message about how we are responding to the novel coronavirus. And for people who are involved in running Code Clubs, CoderDojos, or Raspberry Jams, we’ve specifically put together guidance on how to keep your learners engaged.
We want to make sure digital makers of all ages have the resources they need to explore and create with code. What do you think of these activities, and what else would you like to see? Tell us in the comments below!
The post Activities you can do at home this week! appeared first on Raspberry Pi.
In HackSpace magazine issue 28 we had a look at how to create an ultrasonic controller for a version of Pong called Boing!. This month, we’re going to take a step further forward through video game history and look at the game Frogger. In this classic game, you control a frog as it makes its way across logs, roads, and train tracks, avoiding falling in the water or getting hit.
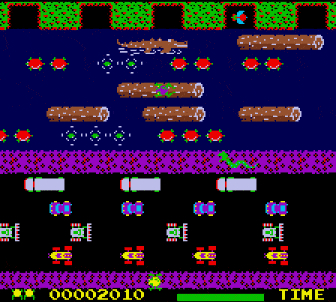
The tribute to Frogger in the new Code the Classics Volume 1 book is called Infinite Bunner, and works in much the same way, except you control a bunny.
Jump along the logs, dodge the traffic, avoid the trains, and keep your bunny alive for as long as possible
All this hopping got us thinking about a controller. Our initial idea was that since the animals jump, so should the controller. An accelerometer can detect freefall, so it shouldn’t be too hard to convert that into button presses. However, it turns out that computer-controlled frogs and rabbits can jump much, much faster than humans can, and we really struggled to get a working game mechanic, so we compromised a little and worked with ‘flicks’.
The basic idea is that you tilt the controller left or right to move left or right, but you have to flick it up to register a jump (simply holding it upright won’t work).
We’ve used a Circuit Playground Bluefruit as our hardware, but it would work equally well with a Circuit Playground Express. There are two key parts to the software. The first is reading in accelerometer values and use these to know what orientation the board is in, and the second is the board mimicing a USB keyboard and sending keystrokes to any software running on it.
The first step is to get Infinite Bunner working on your machine.
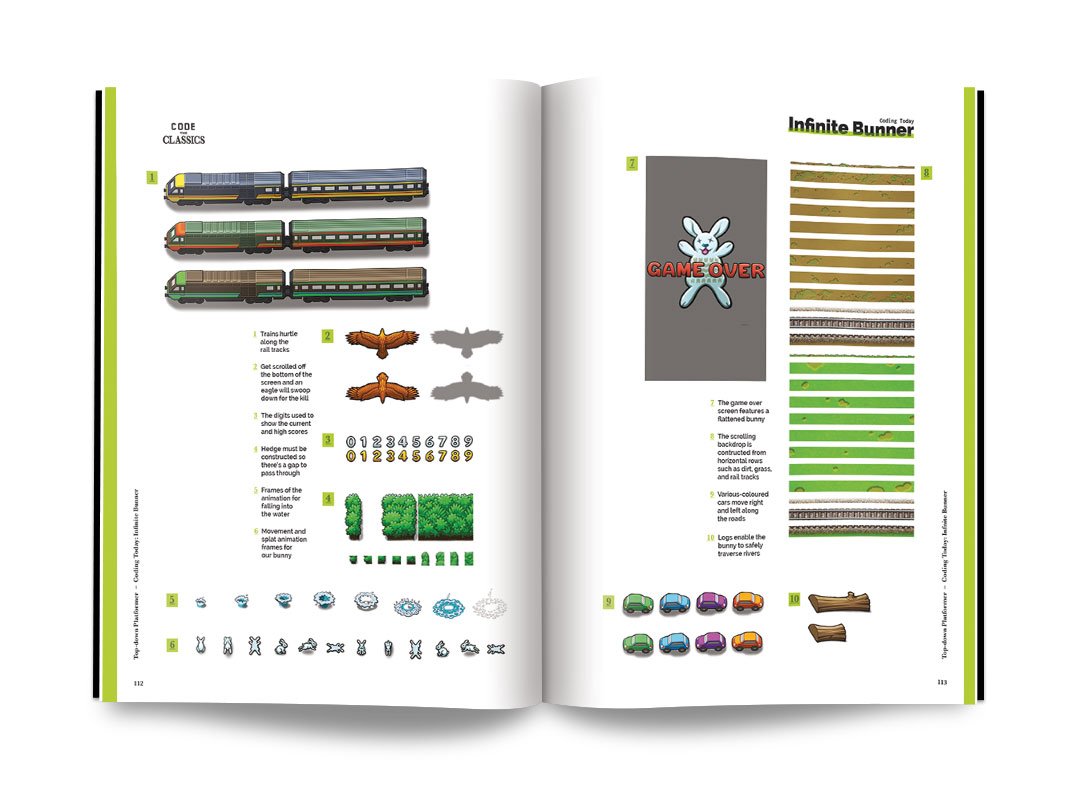
Get your copy of Code the Classics today
You can download the code for all the Code the Classics Volume 1 games here. Click on Clone or Download > Download ZIP. Unzip the download somewhere.
You’ll need Python 3 with Pygame Zero installed. The process for this differs a little between different computers, but there’s a good overview of all the different options on page 186 of Code the Classics.
Subscribe to HackSpace magazine for twelve months and you get a Circuit Playground Express for free! Then you can make your very own Infinite Bunner controller
Once everything’s set up, open a terminal and navigate to the directory you unzipped the code in. Then, inside that, you should find a folder called bunner-master and move into that. You can then run:
python3 bunner.py
Have a few goes playing the game, and you’ll find that you need the left, right, and up arrow keys to play (there is also the down arrow, but we’ve ignored this since we’ve never actually used it in gameplay – if you’re a Frogger/Bunner aficionado, you may wish to implement this as well).
Reading the accelerometer is as easy as importing the appropriate module and running one line:
from adafruit_circuitplayground import cpx, y, z = cp.acceleration
Sending key presses is similarly easy. You can set up a keyboard with the following:
from adafruit_hid.keyboard import Keyboard
from adafruit_hid.keyboard_layout_us import KeyboardLayoutUS
from adafruit_hid.keycode import Keycode

keyboard = Keyboard(usb_hid.devices)
Then send key presses with code such as this:
time.keyboard.press(Keycode.LEFT_ARROW) time.sleep(0.1)
keyboard.release_all()
The only thing left is to slot in our mechanics. The X-axis on the accelerometer can determine if the controller is tilted left or right. The output is between 10 (all the way left) and -10 (all the way right). We chose to threshold it at 7 and -7 to require the user to tilt it most of the way. There’s a little bit of fuzz in the readings, especially as the user flicks the controller up, so having a high threshold helps avoid erroneous readings.
The Y-axis is for jumping. In this case, we require a ‘flap’ where the user first lifts it up (over a threshold of 5), then back down again.
The full code for our controller is:
import time
from adafruit_circuitplayground import cp
import usb_hid
from adafruit_hid.keyboard import Keyboard
from adafruit_hid.keyboard_layout_us import KeyboardLayoutUS
from adafruit_hid.keycode import Keycode

keyboard = Keyboard(usb_hid.devices)

jumping = 0
up=False
while True:
    x, y, z = cp.acceleration
    if abs(y) > 5:
        up=True
    if y < 5 and up:
        keyboard.press(Keycode.UP_ARROW)
        time.sleep(0.3)
        keyboard.release_all()
        up=False
    if x < -7 :
        keyboard.press(Keycode.LEFT_ARROW)
        time.sleep(0.1)
        keyboard.release_all()
    if x < 7 : keyboard.press(Keycode.RIGHT_ARROW)
        time.sleep(0.1)
        keyboard.release_all()
        time.sleep(0.1)
    if jumping > 0:
        jumping=jumping-1
It doesn’t take much CircuitPython to convert a microcontroller into a games controller
The final challenge we had was that there’s a bit of wobble when moving the controller around – especially when trying to jump repeatedly and quickly. After fiddling with thresholds for a while, we found that there’s a much simpler solution: increase the weight of the controller. The easiest way to do this is to place it inside a book. If you’ve ever held a copy of Code the Classics, you’ll know that it’s a fairly weighty tome. Just place the board inside and close the book around it, and all the jitter disappears.
That’s all there is to the controller. You can use it to play the game, just as you would any joypad. Start the game as usual, then start flapping the book around to get hopping.
The latest issue of HackSpace magazine is out today and can be purchased from the Raspberry Pi Press online store. You can also download a copy if you want to see what all the fuss is about.
Code the Classics is available from Raspberry Pi Press as well, and comes with free UK shipping. And here’s a lovely video about Code the Classics artist Dan Malone and the gorgeous artwork he created for the book:
Code the Classics: Artist Dan Malone
No Description
The post Build a physical game controller for Infinite Bunner appeared first on Raspberry Pi.
The hplip package prior to version 3.20.3-2 was missing the compiled python modules. This has been fixed in 3.20.3-2, so the upgrade will need to overwrite the untracked pyc files that were created. If you get errors such as these
hplip: /usr/share/hplip/base/__pycache__/__init__.cpython-38.pyc exists in filesystem
hplip: /usr/share/hplip/base/__pycache__/avahi.cpython-38.pyc exists in filesystem
hplip: /usr/share/hplip/base/__pycache__/codes.cpython-38.pyc exists in filesystem
...many more...
when updating, use
pacman -Suy --overwrite /usr/share/hplip/\*
to perform the upgrade.
La pandémie de la COVID-19 ayant amené de nombreuses organisations à inviter leurs employés à opter pour le télétravail, un réseau privé virtuel est essentiel pour contrer les risques accrus en matière de sécurité.
L'article Travail à domicile: Comment mettre en place un VPN a d'abord été publié sur WeLiveSecurity
Looking to build their own ergonomic mechanical split keyboard, Gosse Adema turned to the Raspberry Pi Zero W for help.
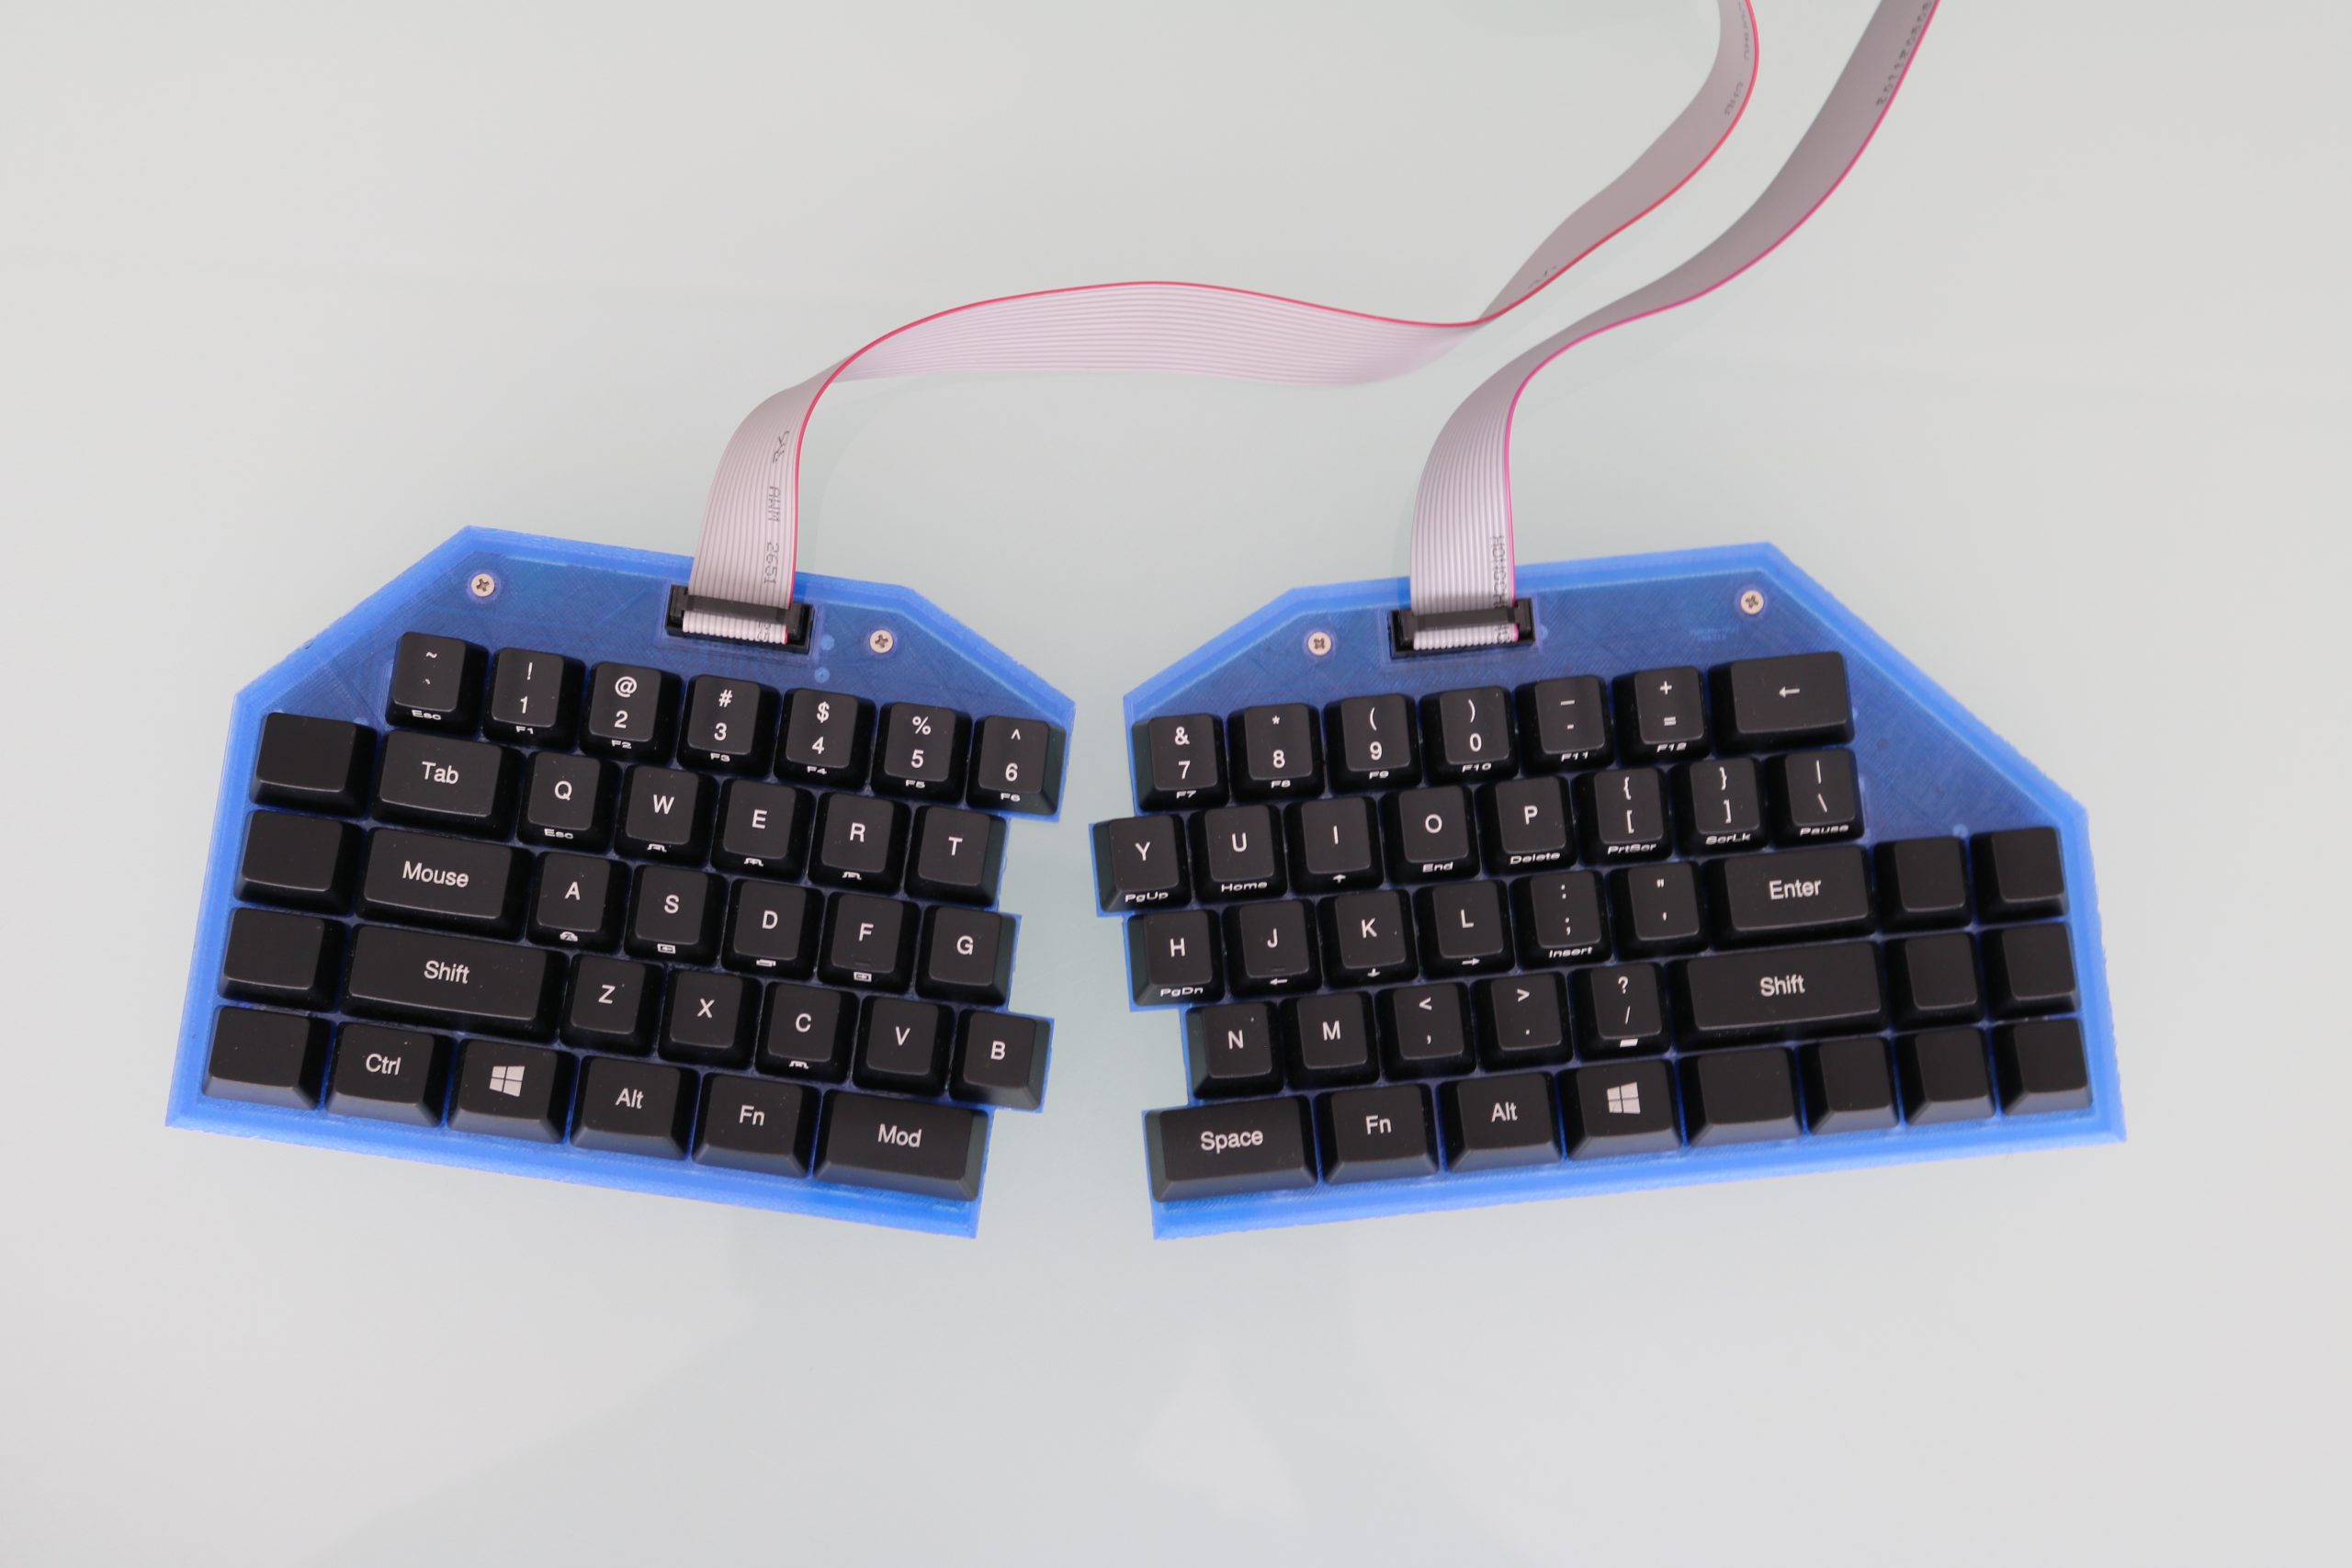
Gosse has been happily using a Microsoft Natural Elite keyboard for years. You know the sort, they look like this:

Twenty years down the line, the keyboard has seen better days and, when looking for a replacement, Gosse decided to make their own.
This is my the first mechanical keyboard project. And this will be for daily usage. Although the possibilities are almost endless, I limit myself to the basic functionality: An ergonomic keyboard with mouse functions.
While searching for new switched, Gosse came across a low-profile Cherry MX that would allow for a thinner keyboard. And what’s the best device to use when trying to keep the profile of your project as thin as possible? Well, hello there, Raspberry Pi Zero W, aren’t you looking rather svelte today.

After deciding to use a Raspberry Pi as the keyboard controller over other common devices, Gosse took inspiration from an Adafruit tutorial on turning Raspberry Pi into a USB gadget, and from “the usbarmory Github page of Chris Kuethe”, which describes how to create a USB gadget with a keyboard.
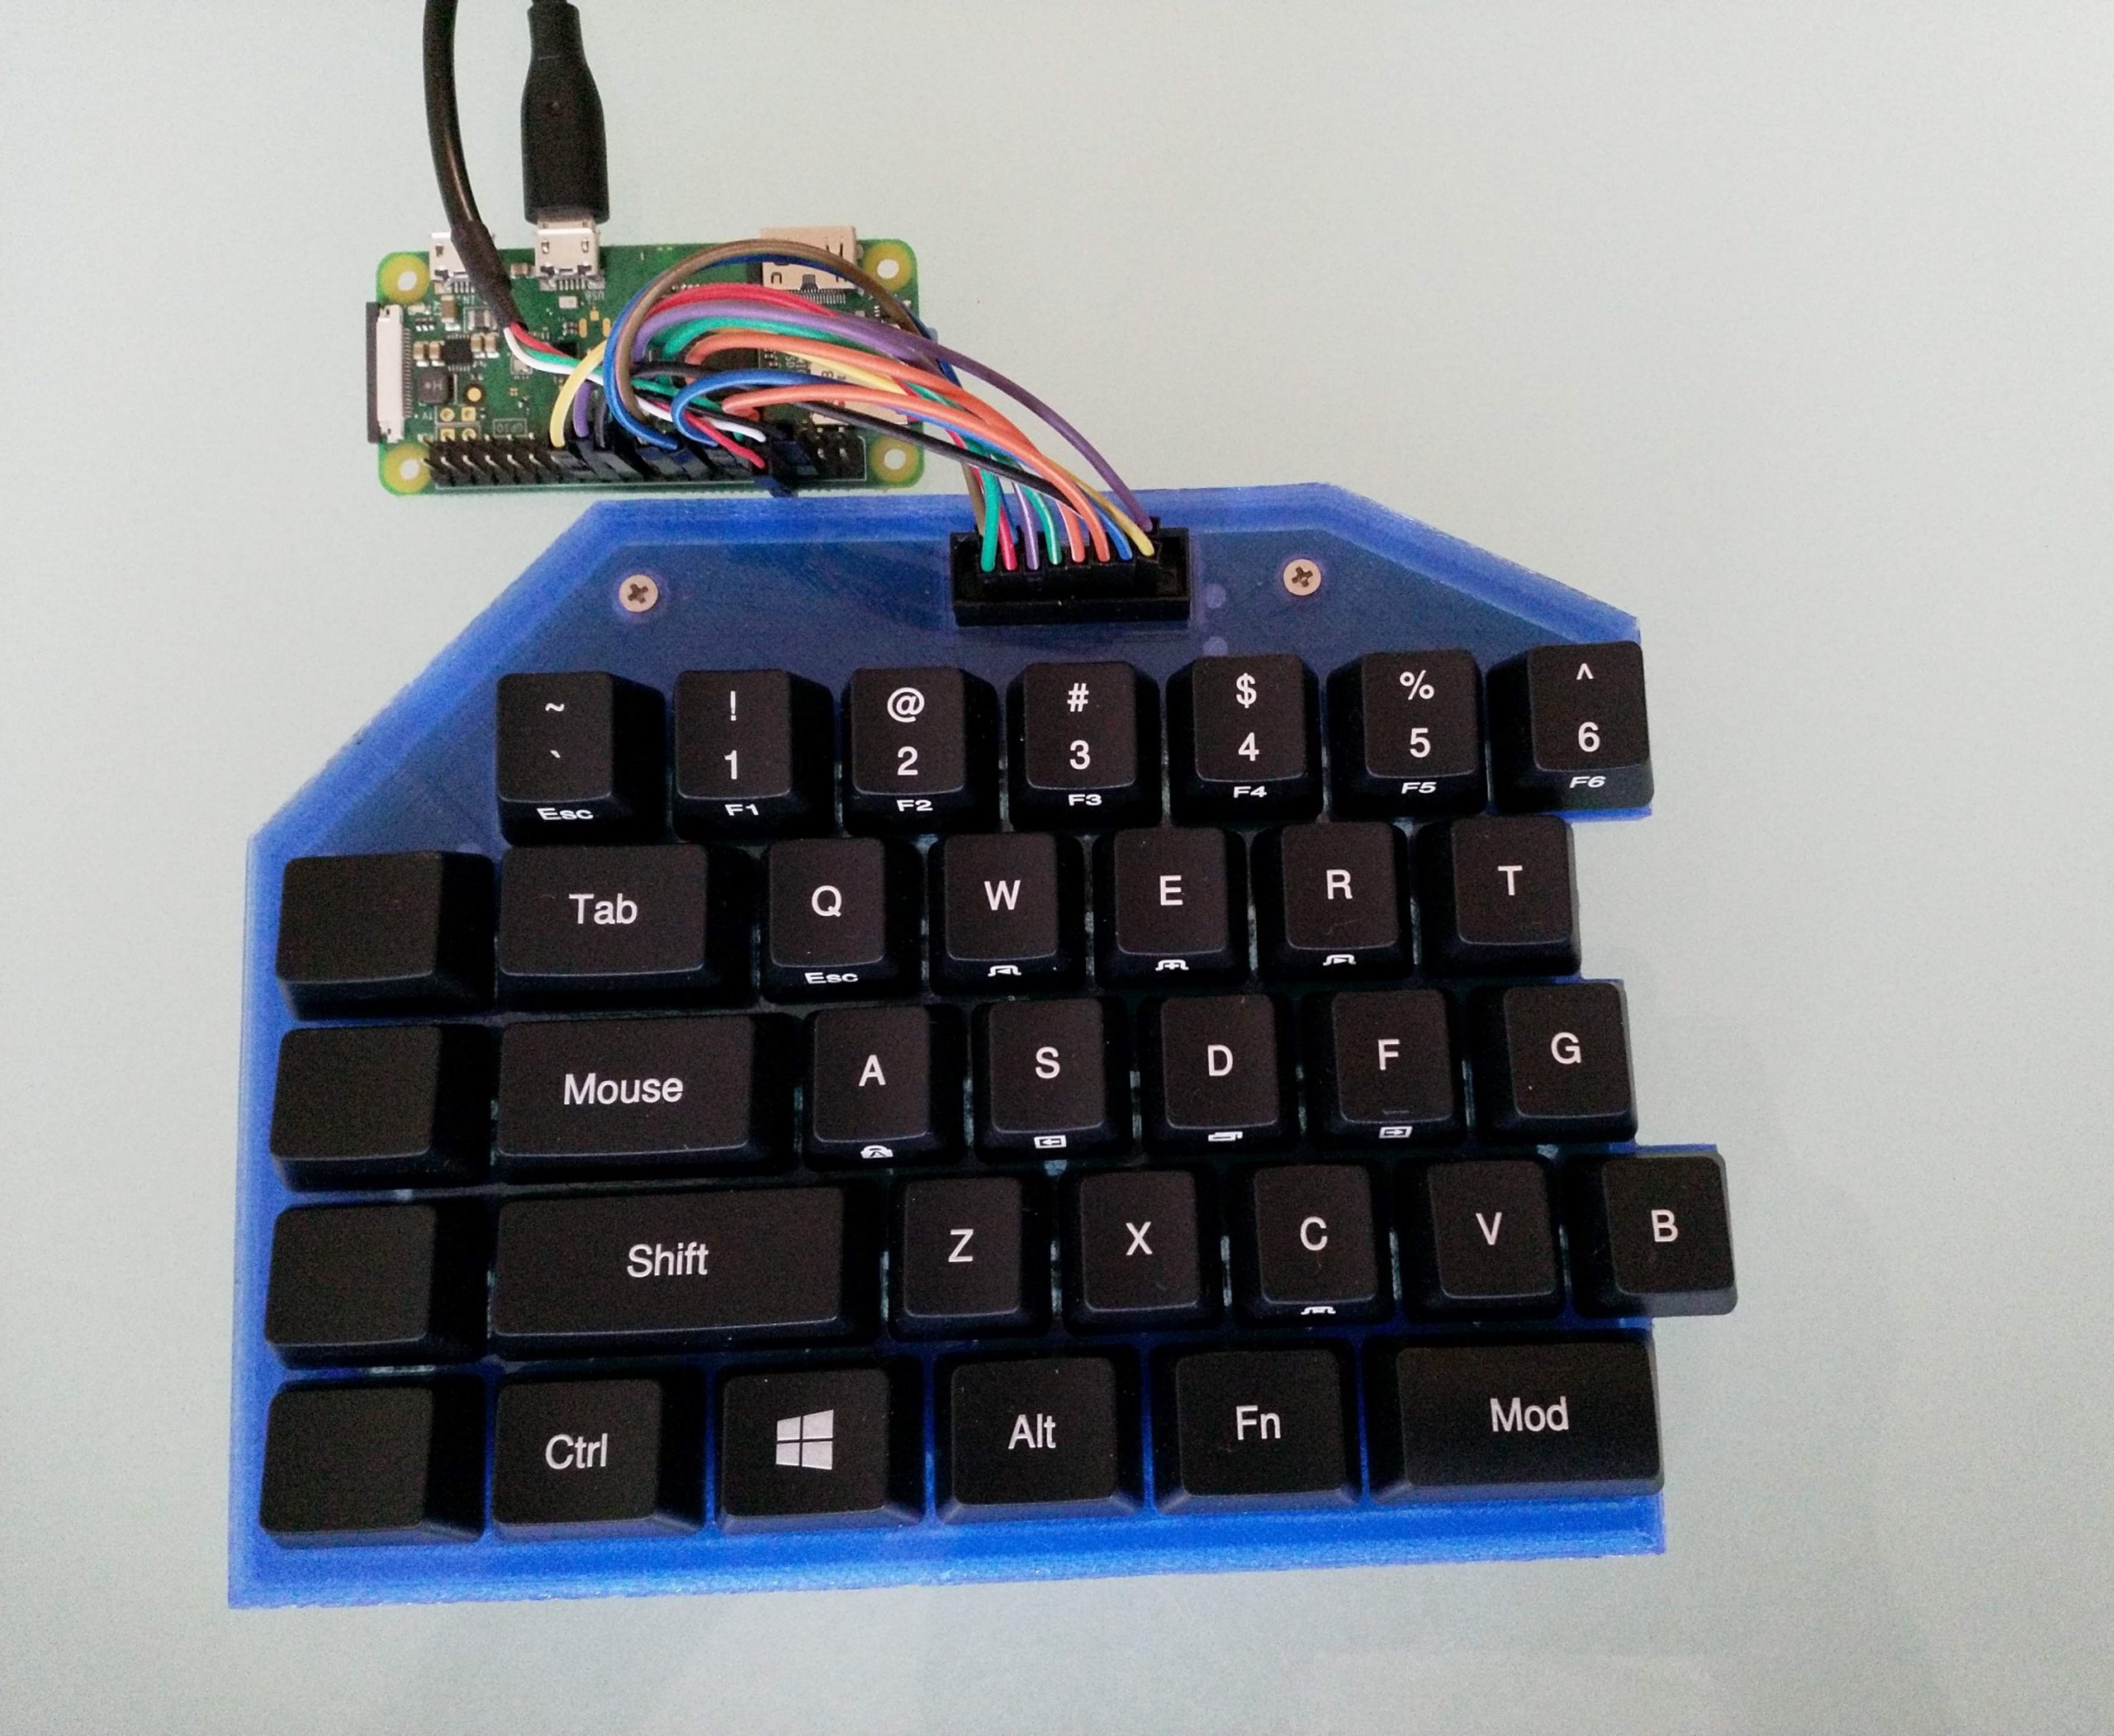
There is a lot *A LOT* of information on how Gosse built the keyboard on Instructables and, if we try to go into any detail here, our word count is going to be in the thousands. So, let’s just say this: the project uses some 3D printing, some Python code, and some ingenuity to create a lovely-looking final keyboard. If you want to make your own, Gosse has provided absolutely all the information you need to do so. So check it out, and be sure to give Gosse some love via the comments section on Instructables.
Also, if you’re unsure of how a mechanical keyboard differs from other keyboards, we made this handy video for you all!
How do mechanical keyboards work?
So, what makes a mechanical keyboard ‘mechanical’? And why are some mechanical keyboards more ‘clicky’ than others? Custom PC’s Edward Chester explains all. …
The post Building a split mechanical keyboard with a Raspberry Pi Zero controller appeared first on Raspberry Pi.
Alors que la pandémie de COVID-19 oblige de nombreux salariés à adopter le télétravail, comment votre organisation peut agir pour conserver sa productivité et sa sécurité?
L'article COVID‑19 et l’âge d’or du télétravail a d'abord été publié sur WeLiveSecurity