![]()
![]()
Earthsounds : les sons de la Terre est disponible sur Apple TV+ à partir de ce 23 février. Cette série documentaire raconte la nature de manière originale, en plus d'être narrée par Tom Hiddleston.
Enlarge / Andrew Cunningham's modded and restored Game Boy Advance could, with enough time, sing out all the data loaded into a cartridge. (credit: Andrew Cunningham)
Sometimes, a great song can come from great pain. The Game Boy Advance (GBA), its software having crashed nearly two hours ago, will, for example, play a tune based on the game inside it. And if you listen closely enough—using specialty hardware and code—you can tell exactly what game it was singing about. And then theoretically play that same game.
This was discovered recently by TheZZAZZGlitch, whose job is to "sadistically glitch and hack the crap out of Pokémon games." It's "hardly a ready-to-use solution," the modder notes, as it requires a lot of tuning specific to different source formats. So while there are certainly easier ways to get GBA data from a cartridge, none make you feel quite so much like an audio datamancer.
TheZZAZZGlitch's demonstration of re-creating Game Boy Advance ROM data using the sounds from a crashing system.
After crashing a GBA and recording it over four hours, the modder saw some telltale waveforms in a sound file at about the 1-hour, 50-minute mark. Later in the sound-out, you can hear the actual instrument sounds and audio samples the game contains, played in sequence. Otherwise, it's 8-bit data at 13,100 Hz, and at times, it sounds absolutely deranged.
Enlarge / Sonos notes that its Arc soundbar pairs "Dolby Atmos and the upward-firing drivers," which some users have not enjoyed during cacophonous pops. (credit: Sonos)
A bang, a gunshot, a "pop of death": Some owners of Sonos' Arc and second-gen Beam soundbars have been dealing with a striking audio disruption with their audio systems since at least December 2020.
The issue now has a fix, and it should already be available to users. Updating a Sonos mobile or desktop app and then checking for system updates should push the changes to Sonos speakers.
A Sonos staff member writes that the Arc and Beam soundbars "in certain home theater configurations process Dolby MAT," which delivers Atmos audio over HDMI connections. Sonos products could receive corrupted audio from that connection but were failing to filter out those bits, playing them instead. The corrupted audio "can manifest as a popping sound." The Sonos devices' improved Dolby decoder should no longer force listeners to hear what it sounds like when digital audio transmissions go awry.
![]()
Il y a quelque temps, j’ai découvert un programme qui risque de changer votre vie en tant qu’utilisateur Windows. Cela s’appelle SoundSwitch et c’est un petit outil magique qui permet de passer rapidement d’un périphérique audio à un autre à l’aide de raccourcis clavier.
Pour activer SoundSwitch, il suffit d’utiliser le raccourci par défaut. Plus besoin de naviguer à travers plusieurs écrans pénibles pour modifier vos paramètres audio.
Après avoir configuré SoundSwitch, vous pouvez donc utiliser les touches de raccourci suivantes :
🔊 Pour faire défiler les appareils de lecture, appuyez sur Ctrl + Alt + F11 ou double-cliquez sur l’icône de SoundSwitch dans la barre d’état système.
🎙 Pour faire défiler les appareils d’enregistrement, appuyez sur Ctrl + Alt + F7.
🔇 Pour couper le microphone par défaut, appuyez sur Ctrl + Alt + M.
Pour les mordus de jeux vidéo, c’est un vrai bonheur. Imaginez-vous en pleine partie et devant basculer le son d’un casque à des haut-parleurs ou inversement. Vous n’avez pas vraiment le temps de vous perdre dans les paramètres du système. SoundSwitch vous offre cette fluidité avec une simple combinaison de touches. Et c’est pareil pour changer de périphérique d’enregistrement (genre votre micro)
Et il ne s’arrête pas là, car SoundSwitch parle également plusieurs langues, dont l’anglais, le français, l’allemand, l’espagnol, le portugais, l’italien et le chinois. Et si vous voulez l’avoir dans votre langue maternelle, vous pouvez même contribuer au projet pour aider à sa traduction.
SoundSwitch propose différents types de notifications pour vous signaler le changement de périphérique. L’affichage par défaut, recommandé pour les gamers, utilise une popup personnalisée toujours visible.
Parmi les autres notifications, il y a la bulle d’aide de Windows, celle que l’on connaît bien depuis notre rencontre avec Clippy, l’assistant de Microsoft. Dans le cas de Windows 7, cette bulle apparaît à côté de l’icône de la barre d’état système. Pour Windows 10, elle s’agrémente d’une animation glissant depuis le coin droit de l’écran.
Pour ne pas déranger les autres utilisateurs, SoundSwitch propose également de jouer un son plutôt discret pour signaler le changement de périphérique. Vous pouvez même spécifier le son de votre choix ! Et bien sûr, vous pouvez opter pour une notification silencieuse si vous le désirez.
Pour configurer SoundSwitch, faites un clic droit sur l’icône dans la barre des tâches et sélectionnez « Paramètres ». Vous pourrez alors choisir les périphériques audio à basculer et choisir les combinaisons de touches qui vous arrangeront le plus. N’oubliez pas de cocher la case « Démarrer automatiquement avec Windows » pour profiter de cette merveille à chaque démarrage de votre ordinateur.
Le développeur Jeroen Pelgrims et d’autres contributeurs passionnés méritent tout votre soutien alors si vous trouvez Soundswitch utile, n’hésitez pas à faire un don sur le site officiel.
SoundSwitch n’attend que vous et est à découvrir ici.
![]()
Je ne sais pas si vous connaissez Soundcloud, mais c’est un super site pour les musiciens et podcasters qui souhaitent faire découvrir leurs morceaux. Bon, ça existe depuis un bail donc je suis sûr que vous y êtes déjà allé, notamment sur ma page à moi.
Sauf que voilà, on ne peut pas toujours télécharger la musique qui s’y trouve. Ça dépend des artistes. Mais vous me connaissez, j’ai toujours une petite bidouille pour contourner l’affaire.
Et aujourd’hui c’est donc Soundcloud-dl, un logiciel écrit en Go qui utilise l’API de Soundcloud pour télécharger votre musique préférée. Vous pouvez l’installer comme ceci :
go install github.com/AYehia0/soundcloud-dl@latestMais chez moi, impossible de trouver où il a mis le binaire, donc j’ai préféré le compiler comme ceci :
git clone https://github.com/AYehia0/soundcloud-dl.git
cd soundcloud-dl
go build
Et voilà. Après y’a plus qu’à lancer :
chmod +x soundcloud-dl
./soundcloud-dl
Faites suivre la commande par l’URL du morceau que vous voulez télécharger, puis l’application vous proposera de choisir un niveau de qualité audio.
Et voilà, vous aurez un beau .ogg a écouter sur votre PC.
The Sky Vane provides the soundtrack to an immersive sky-driven experience. Just lie down on the grass, gaze up at the sky, and listen to the changing soundscape through the day.
A Raspberry Pi powers the arresting structure in the middle of the circle of comfy skygazing mats in the photo above, and is connected to an array of atmospheric sensors. These sensors detect changes in light, temperature, pressure, and humidity. Then they send real-time data to the Raspberry Pi computer in order to create a dynamic soundtrack.
The Sky Vane’s creators produced a carefully written soundtrack for the experience. Raspberry Pi triggers changes to the number of musical layers, sequences, audio effects processing, and so on, based on the information the sensors read. That’s the “dynamic” bit. A huge gust of wind, for example, leads to a different musical change than the setting sun.
A portable Minirig sound system generates a seriously high-fidelity audio experience that can be heard clearly within a 25-metre radius of The Sky Vane.
The Sky Vane is the latest installation from pyka, a collective of ‘Experience Designers’ who create digital artefacts that enable you to explore the world of sound. Commissioned by Tin Shed Theatre Company and Our Living Levels, The Sky Vane’s big debut was at the Big Skies 2021 event in south Wales.
When they were planning this installation, the creators at pyka weren’t sure how it would go down in a post-pandemic world. They’re used to building things that bring people together, but they were mindful of people’s anxiety around shared public activities. This led to a design that promotes quiet contemplation and mindfulness whilst enjoying the freedom of the outdoors. We think it’s lovely.
The post Listen to the weather change with The Sky Vane appeared first on Raspberry Pi.
If your amazing project is a little too quiet, add high-fidelity sound with Raspberry Pi and the help of this handy guide from HackSpace magazine, written by PJ Evans.
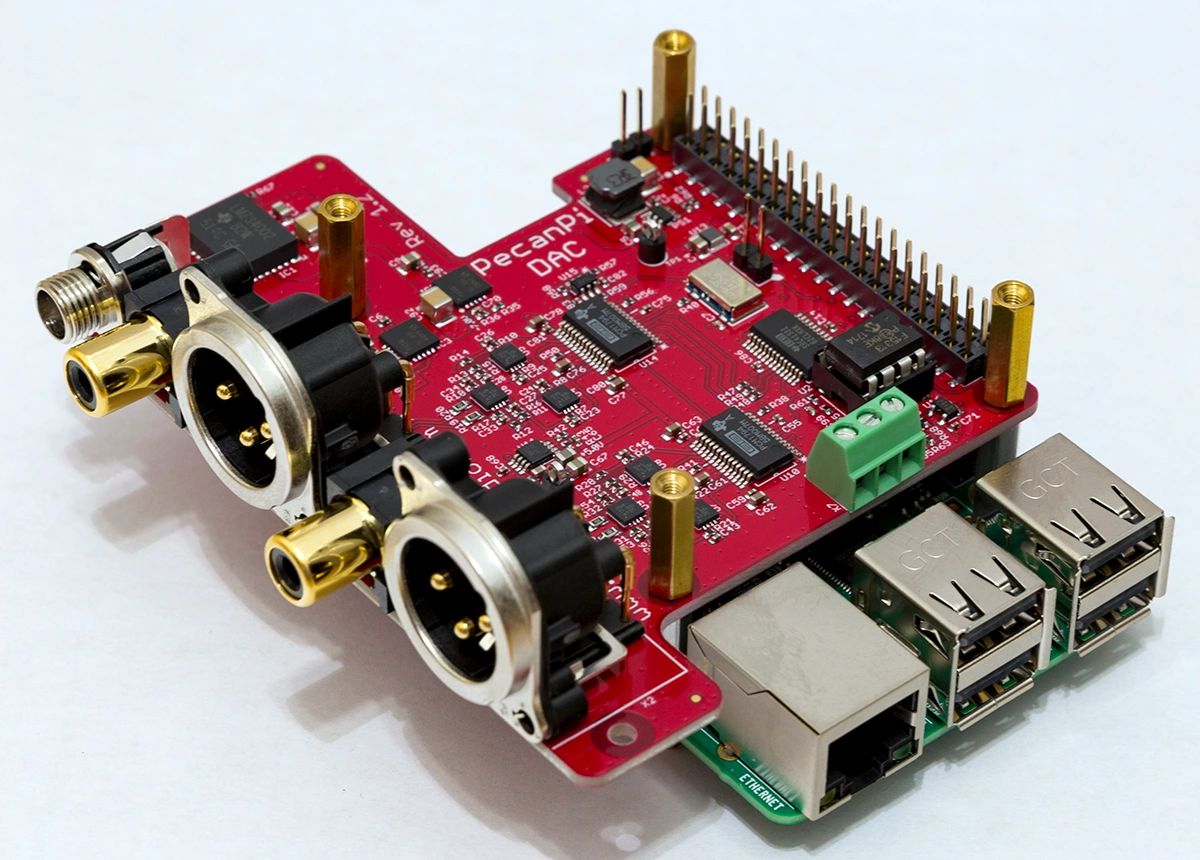
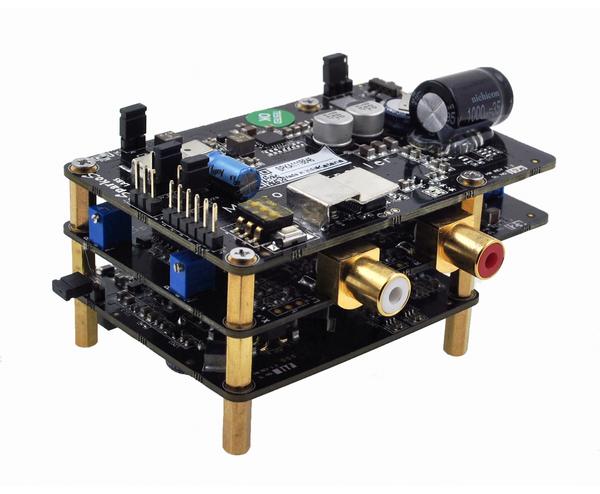
The PecanPi HAT features best-in-class components and dual DACs for superior audio reproduction
It’s no surprise that we love microcontrollers at HackSpace magazine. Their versatility and simplicity make them a must for electronics projects. Although a dab hand at reading sensors or illuminating LEDs, Arduinos and their friends do struggle when it comes to high-quality audio. If you need to add music or speech to your project, it may be worth getting a Raspberry Pi computer to do the heavy lifting. We’re going to look at the various audio output options available for our favourite small computer, from a simple buzz, through to audiophile bliss.

Need to keep it simple and under a pound?
An active buzzer is what you need
The simplest place to start is with the humble buzzer. A cheap active buzzer can be quickly added to Raspberry Pi’s GPIO. It’s surprisingly easy too. Try connecting a buzzer’s red wire (positive) to GPIO pin 22 (Broadcom numbering) and the black wire (ground) to any GND pin. Now, install the GPIO Zero Python library by typing this at the command line:
sudo apt install python3-gpiozero
Create a file called buzz.py in your favourite editor and enter the following:
import time
from gpiozero import Buzzer
buzzer = Buzzer(22)
buzzer.on()
time.sleep(1)
buzzer.off()
Run it at the command line:
python3 buzz.py
You should hear a one-second buzz. See if you can make Morse code sounds by changing the duration of the sleep statement.
Raspberry Pi computers, with the exception of the Zero range, all have audio output on board. The original Raspberry Pi featured a stereo 3.5mm socket, and all A and B models since feature a four-pole socket that also includes composite video. This provides your cheapest route to getting audio from your Raspberry Pi computer.
A low-cost passive speaker can be directly plugged in to provide sound, albeit probably quieter than you’d like. Of course, add an amplifier or active speaker and you have sound as loud as you like. This is the most direct way of adding sound to your project, but how to get the sound out?
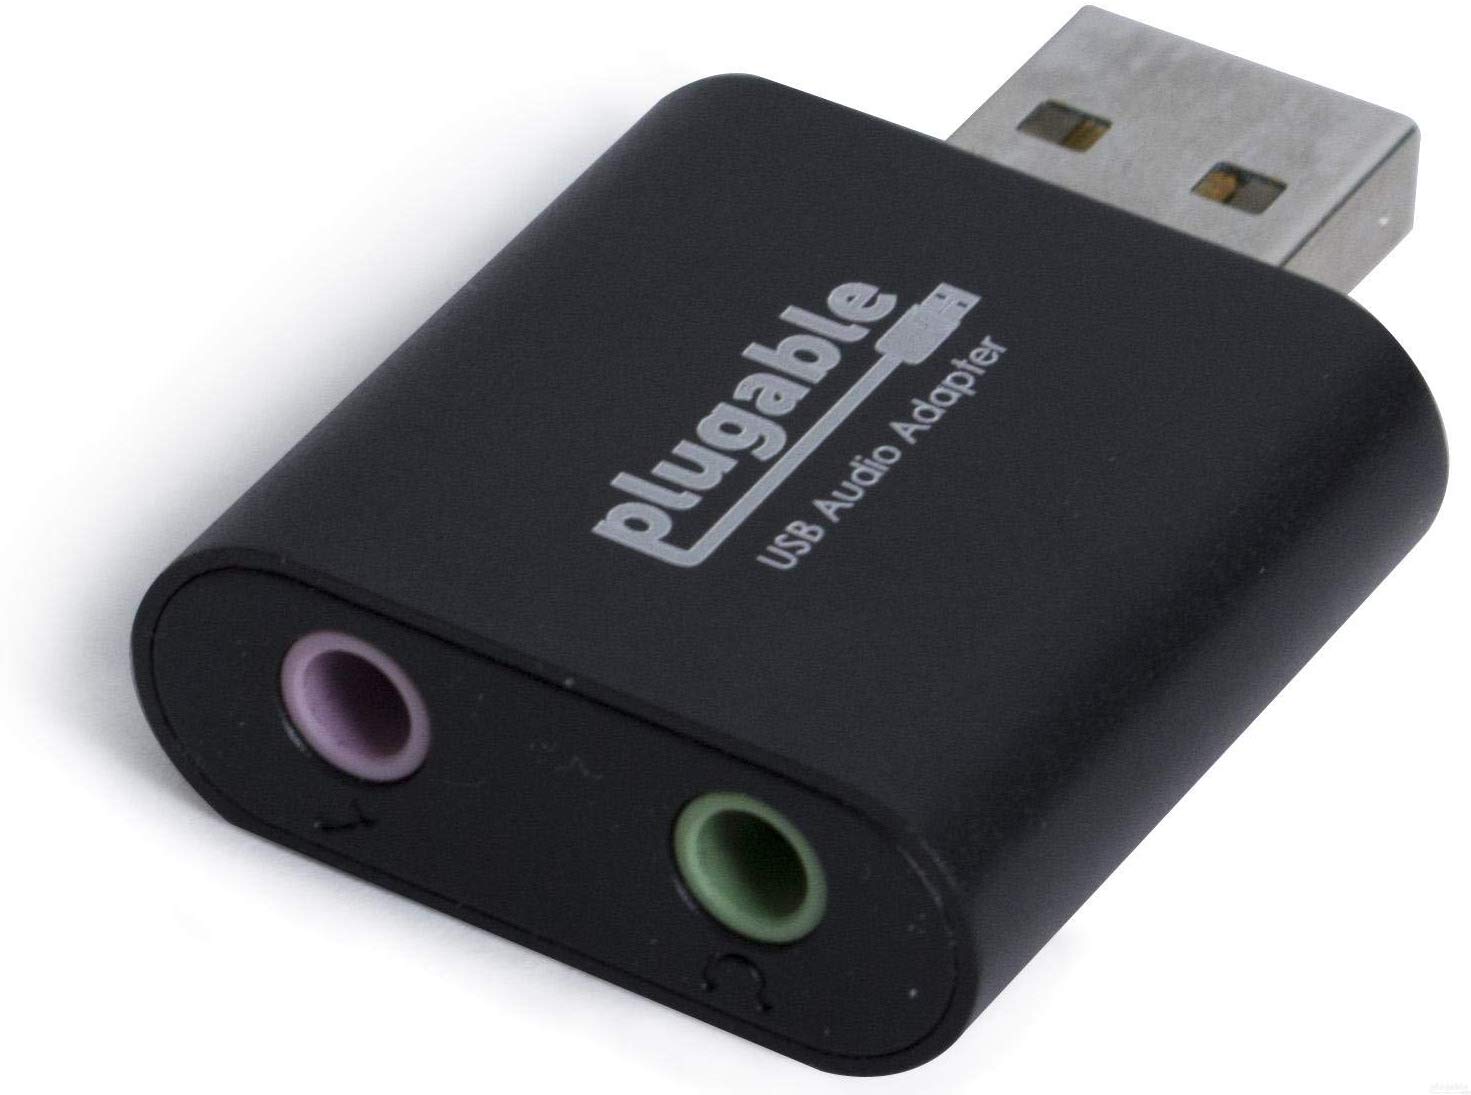
Need a simple solution? USB audio devices come in all shapes and sizes but are mostly plug-and-play
Normally, the Raspbian operating system will recognise that an audio device has been connected and route audio through it. Sometimes, especially if you’ve connected an HDMI monitor with sound capability (e.g. an HDMI TV), sound will not come out of the correct device.
To fix this, open up a terminal window and run sudo raspi-config. When the menu appears, go to Advanced Options and select Audio, then select the option to force the output through the audio jack. You may need to reboot Raspbian for all changes to take effect.
A USB sound device is another simple choice for audio playback on Raspberry Pi. Literally hundreds are available, and a basic input/output device with better audio quality than the on-board system can be purchased for a few pounds online. Installation tends to be no more complicated than plugging the device into the USB port. You may need to select the new output, as the underlying audio system, ALSA (see the ALSA and PulseAudio section for more), may mute it by default. To fix this, run alsamixer from the command line, press F6 to select the new sound device, and if you see ‘MM’ at the bottom of the volume indicator, press M to unmute and adjust the volume with the cursor keys.
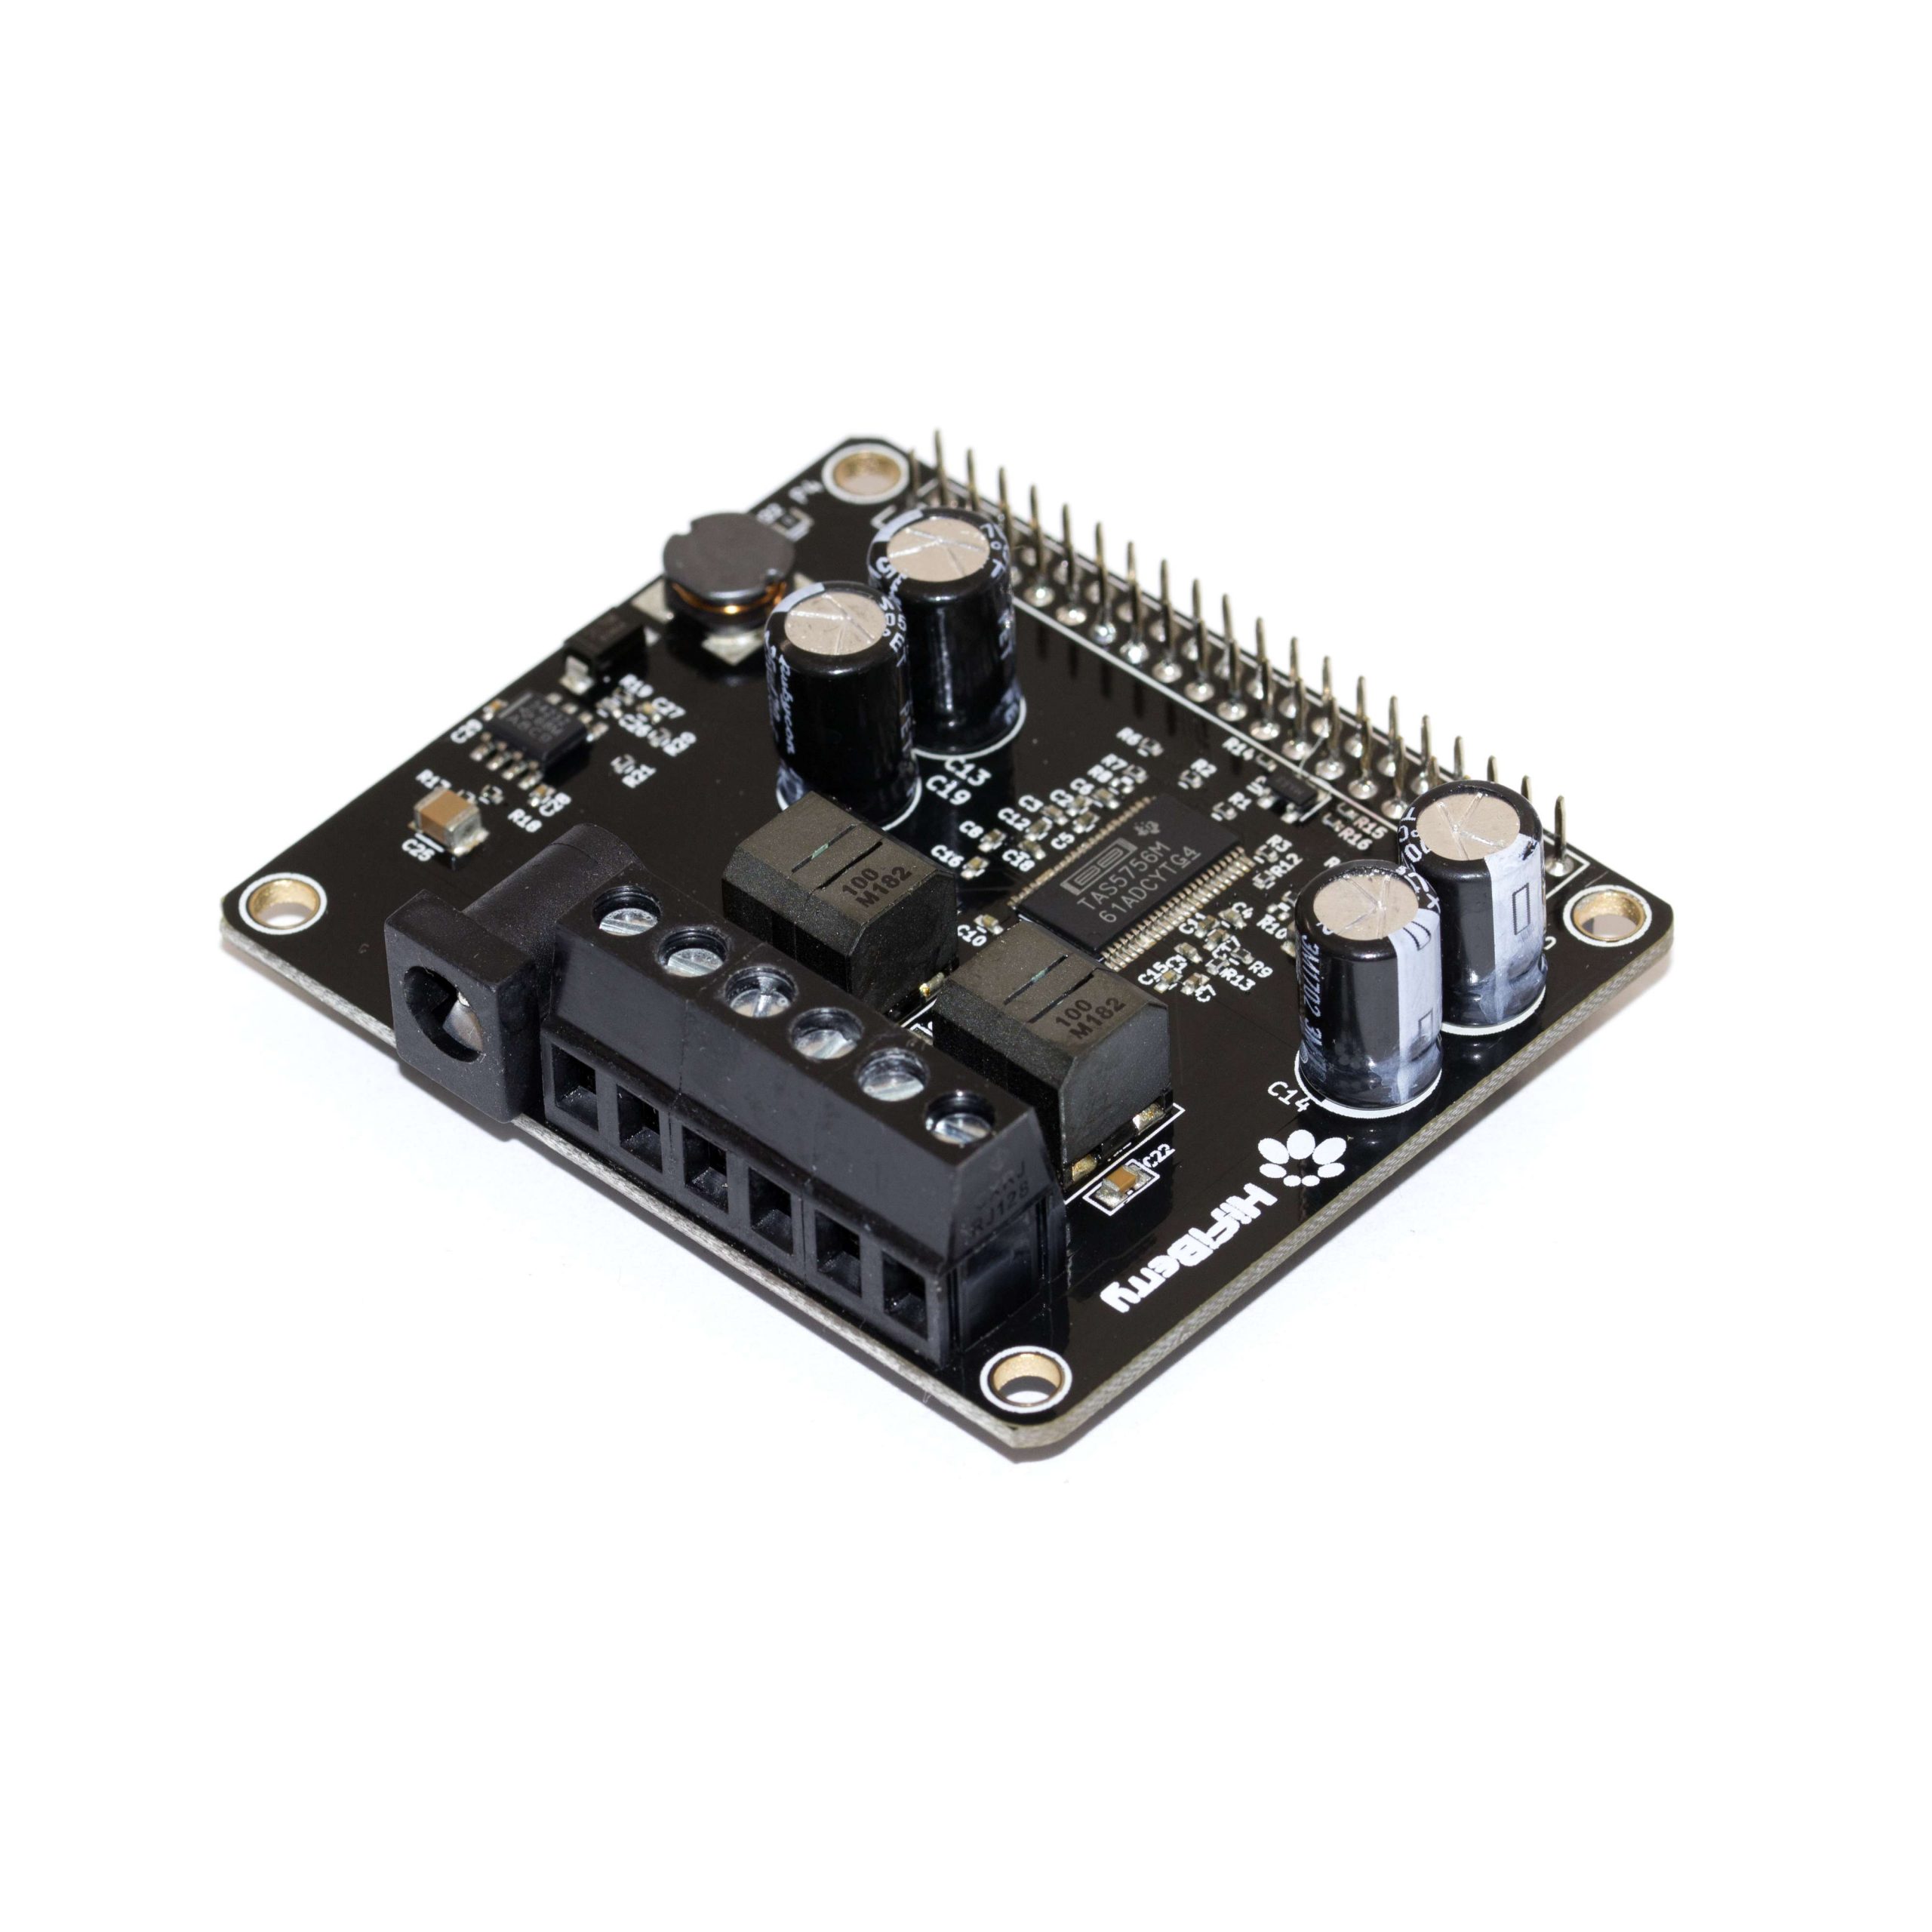
Many DACs also come with on-board amplifiers. Perfect for passive speakers
Unsurprisingly, when choosing your USB sound device, you can start at a few pounds and go right up to professional equipment costing hundreds. As they are low-power, USB devices do not tend to feature amplification, unless they have a separate power source.
The simplest way to play audio on Raspbian is to use OMXPlayer. This is a dedicated hardware-accelerated command-line tool that takes full advantage of Raspberry Pi’s capabilities. It sends audio to the analogue audio jack by default, so playing back an MP3 file is as simple as running:
omxplayer /path/to/audio/file.wav
There are many command-line options that allow you to control how the audio is played. Want the audio to loop forever? Just add --loop to the command. You’ll notice that when it’s running, OMXPlayer provides a user interface of sorts, allowing you to control playback from within the terminal. If you’d just like it to run in the background without user input, run the command like this:
omxplayer --no-keys example.wav &
Here, —-no-keys removes the interface, and the ampersand (&) tells the operating system to run the job ‘in the background’ so that it won’t block anything else you want to do.
OMXPlayer is a great choice for Raspbian, but other players such as mpg321 are available, so find the tool that’s best for you.
Another useful utility is speaker-test. This can produce white noise or vocal confirmation so you can check your speakers are working properly. It’s as simple as this:
speaker-test -t wav -c 2
The first parameter sets the sound to be a voice, and the -c tests stereo channels only: front left and front right.
If space is an issue, a Raspberry Pi 4, amplifier, and speaker may not be what you have in mind. After all, your cool wearable project is going to be problematic if you’re trailing an amplifier on a cart with a 50-metre extension lead powering everything. Luckily, the clever people at Pimoroni have you covered. The Speaker pHAT is a Raspberry Pi Zero-sized HAT that not only adds audio capability to the smallest of the Raspberry Pi family, but also sports a 3 W speaker. Now you can play any audio with a tiny device and a USB battery pack.
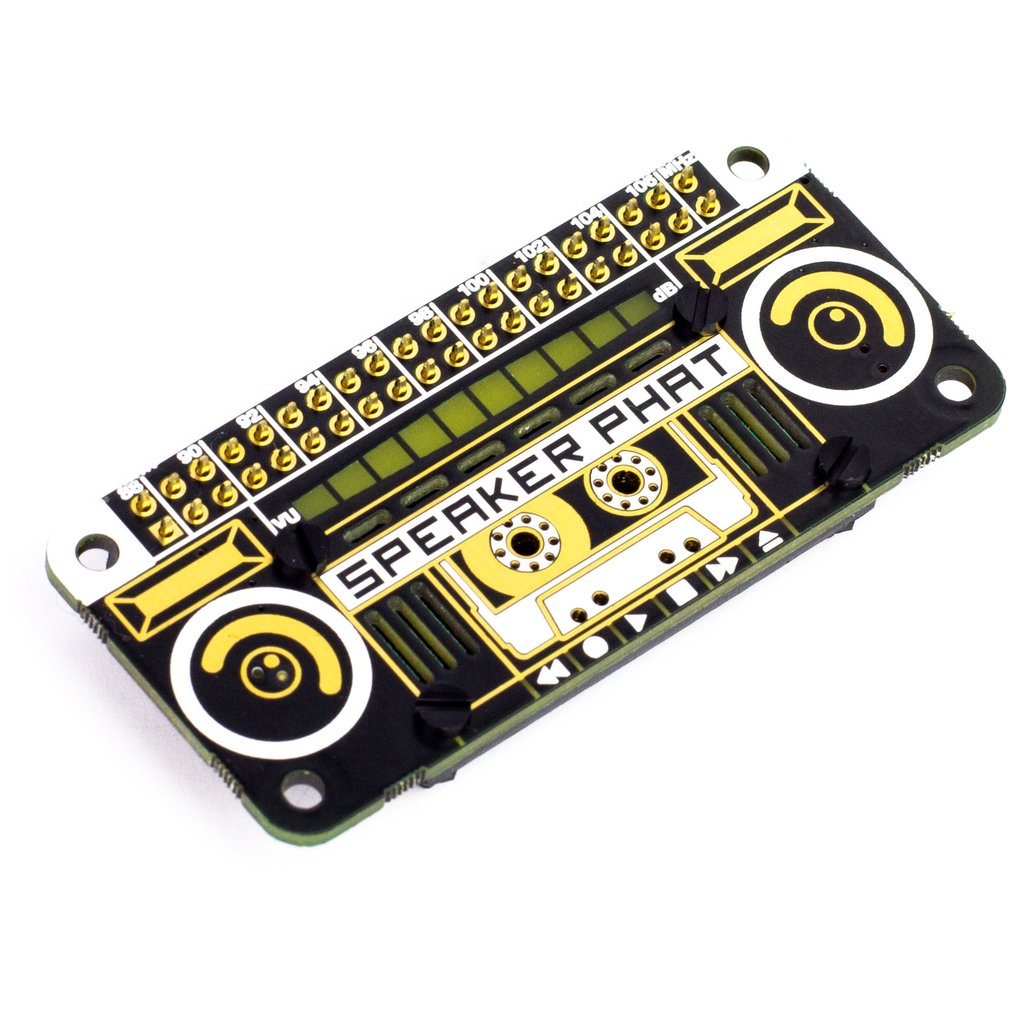
Small, cheap, and fun, the Speaker pHat features a 3 W speaker and LED VU meter
The installation process is fully automated, so no messing around with drivers and config files. Once the script has completed, you can run any audio tool as before, and the sound will be routed through the speaker. No, the maximum volume won’t be troubling any heavy metal concerts, but you can’t knock the convenience and form factor.
An easy way to get superior audio quality using a Raspberry Pi computer is Bluetooth. Recent models such as the 3B, 4, and even the Zero W support Bluetooth devices, and can be paired with most Bluetooth speakers, even from the command line. Once connected, you have a range of options on size and output power, plus the advantage of wireless connectivity.
Setting up a Bluetooth connection, especially if you are using the command line, can be a little challenging (see the Bluetooth cheatsheet section). There is a succinct guide here: hsmag.cc/N6p2IB. If you are using Raspbian Desktop, it’s a lot easier. Simply click on the Bluetooth logo on the top-right, and follow the instructions to pair your device.
If you find OMXPlayer isn’t outputting any audio, try installing mpg321:
sudo apt install mpg321
And try again:
mpg321 /path/to/audio/file.mp3
If your project needs good audio, and the standard 3.5 mm output just isn’t cutting it, then it’s time to look at the wide range of DACs (digital-to-analogue converters) available in HAT format. It’s a crowded market, and the prices vary significantly depending on what you want from your device. Let’s start at the lower end, with major player HiFiBerry’s DAC+ Zero. This tiny HAT adds 192kHz/24-bit playback via two RCA phono ports for £12.50. If you’re serious about your audio, then you can consider the firm’s full HAT format high-resolution DAC+ Pro for £36, or really go for it with the DSP (digital sound processing) version for £67. All of these will require amplification, but the sound quality will rival audio components of a much higher price.
Money no object? The Allo Katana is a monster DAC, and weighs in at £240, but outperforms £1000 equivalents
If money is no object and your project requires the best possible reproduction, then you can consider going full audiophile. There are some amazing high-end HATs out there, but one of the best-performing ones we’ve seen is the PecanPi DAC. Its creator Leonid Ayzenshtat sourced each individual component carefully, always choosing the best-in-class. He even used a separate DAC for each audio channel. The resulting board may make your wallet wince at around £200 for the bare board, but the resulting audio is good enough to be used in professional recording studios. If you’ve restored a gorgeous old radio back to showroom condition, you could do a lot worse than add the board in with a great amp and speaker.
There’s often confusion between these two systems. Raspbian comes pre-installed with ALSA (Advanced Linux Sound Architecture), which is the low-level software that makes sound work. It comes with a range of utilities to control output device, volume, and more. PulseAudio is a software layer that sits on top of ALSA to provide more features, including streaming capabilities. Chances are, if you need to do something a bit more clever than just play audio, you’ll need to install a PulseAudio server.
If you want to pair a Bluetooth audio device (A2DP) on the command line, it can be a little hairy. Here’s a quick guide:
First-time installation:
sudo apt-get install pulseaudio pulseaudio-module-bluetooth
sudo usermod -G bluetooth -a pi
sudo reboot
Start the PulseAudio server:
pulseaudio --start
Run the Bluetooth utility:
bluetoothctl
Put your speaker into pairing mode. Now, within the utility, run the following commands (pressing Enter after each one):
power on
agent on
scan on
Now wait for the list to populate. When you see your device…pair <dev>
Where <dev> is the displayed long identifier for your device. You can just type in the first few characters and press Tab to auto-complete. Do the same for the following steps.
trust <dev>
connect <dev>
Wait for the confirmation, then enter:
quit <dev>
Now try to play some audio using aplay (for WAV files) or mpg321 (for mp3). These instructions are adapted from the guide by Actuino at hsmag.cc/N6p2IB.
There are command-line players available for just about every audio format in common use. Generally, MP3 provides the best balance of quality and space, but lower bit-rates result in lower sound quality. WAV is completely uncompressed, but can eat up your SSD card. If you don’t want to compromise on audio quality, try FLAC, which is identical in quality to WAV, but much smaller. To convert between audio types, consider installing FFmpeg, a powerful audio and video processing tool.
This article comes direct from HackSpace magazine issue 28, out now and available in print from your local newsagent, the Raspberry Pi Store in Cambridge, and online from Raspberry Pi Press.

If you love HackSpace magazine as much as we do, why not have a look at the subscription offers available, including the 12-month deal that comes with a free Adafruit Circuit Playground! Subscribers in the USA can now get a 12-month subscription for $60 when joining by the end of March!
![]()
And, as always, you can download the free PDF from the Raspberry Pi Press website.
The post How to play sound and make noise with your Raspberry Pi appeared first on Raspberry Pi.
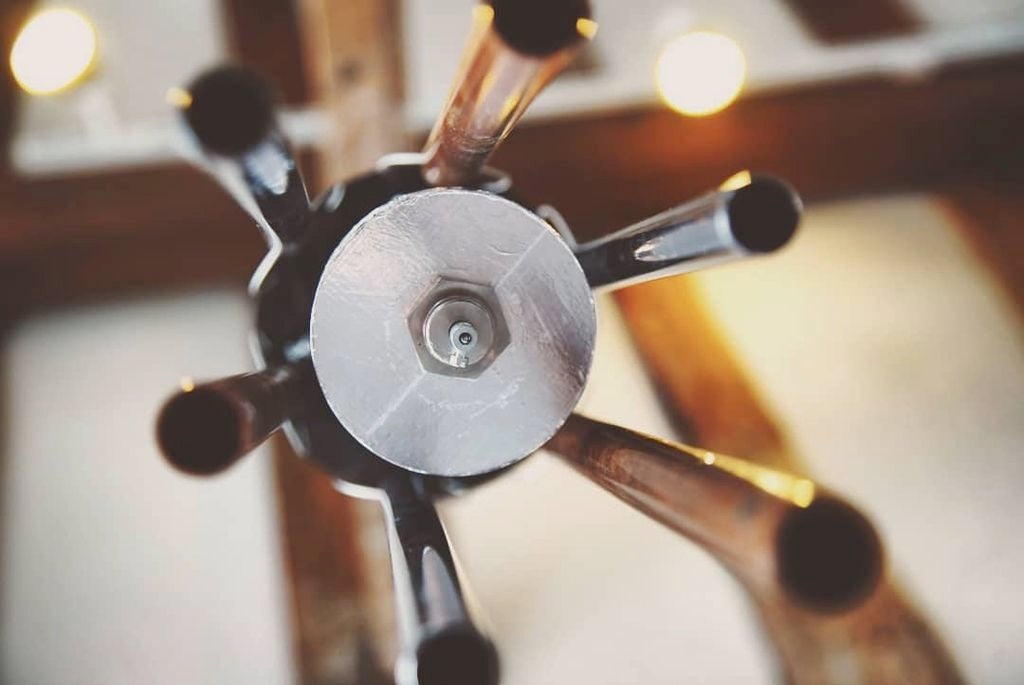
Grab yourself a Raspberry Pi, a Makey Makey, and some copper pipes: it’s interactive wind chime time!
Perpetual Chimes
Perpetual Chimes is a set of augmented wind chimes that offer an escapist experience where your collaboration composes the soundscape. Since there is no wind indoors, the chimes require audience interaction to gently tap or waft them and encourage/nurture the hidden sounds within – triggering sounds as the chimes strike one another.
I don’t like wind chimes. There, I said it. I also don’t like the ticking of the second hand of analogue clocks, and I think these two dislikes might be related. There’s probably a name for this type of dislike, but I’ll leave the Googling to you.
Sound designer Frazer Merrick’s interactive wind chimes may actually be the only wind chimes I can stand. And this is due, I believe, to the wonderful sounds they create when they touch, much more wonderful than regular wind chime sounds. And, obviously, because these wind chimes incorporate a Raspberry Pi 3.
Perpetual Chimes is a set of augmented wind chimes that offer an escapist experience where your collaboration composes the soundscape. Since there is no wind indoors, the chimes require audience interaction to gently tap or waft them and encourage/nurture the hidden sounds within — triggering sounds as the chimes strike one another. Since the chimes make little acoustic noise, essentially they’re broken until you collaborate with them.
Follow the Instructables tutorial to create your own!
The post Raspberry Pi interactive wind chimes appeared first on Raspberry Pi.
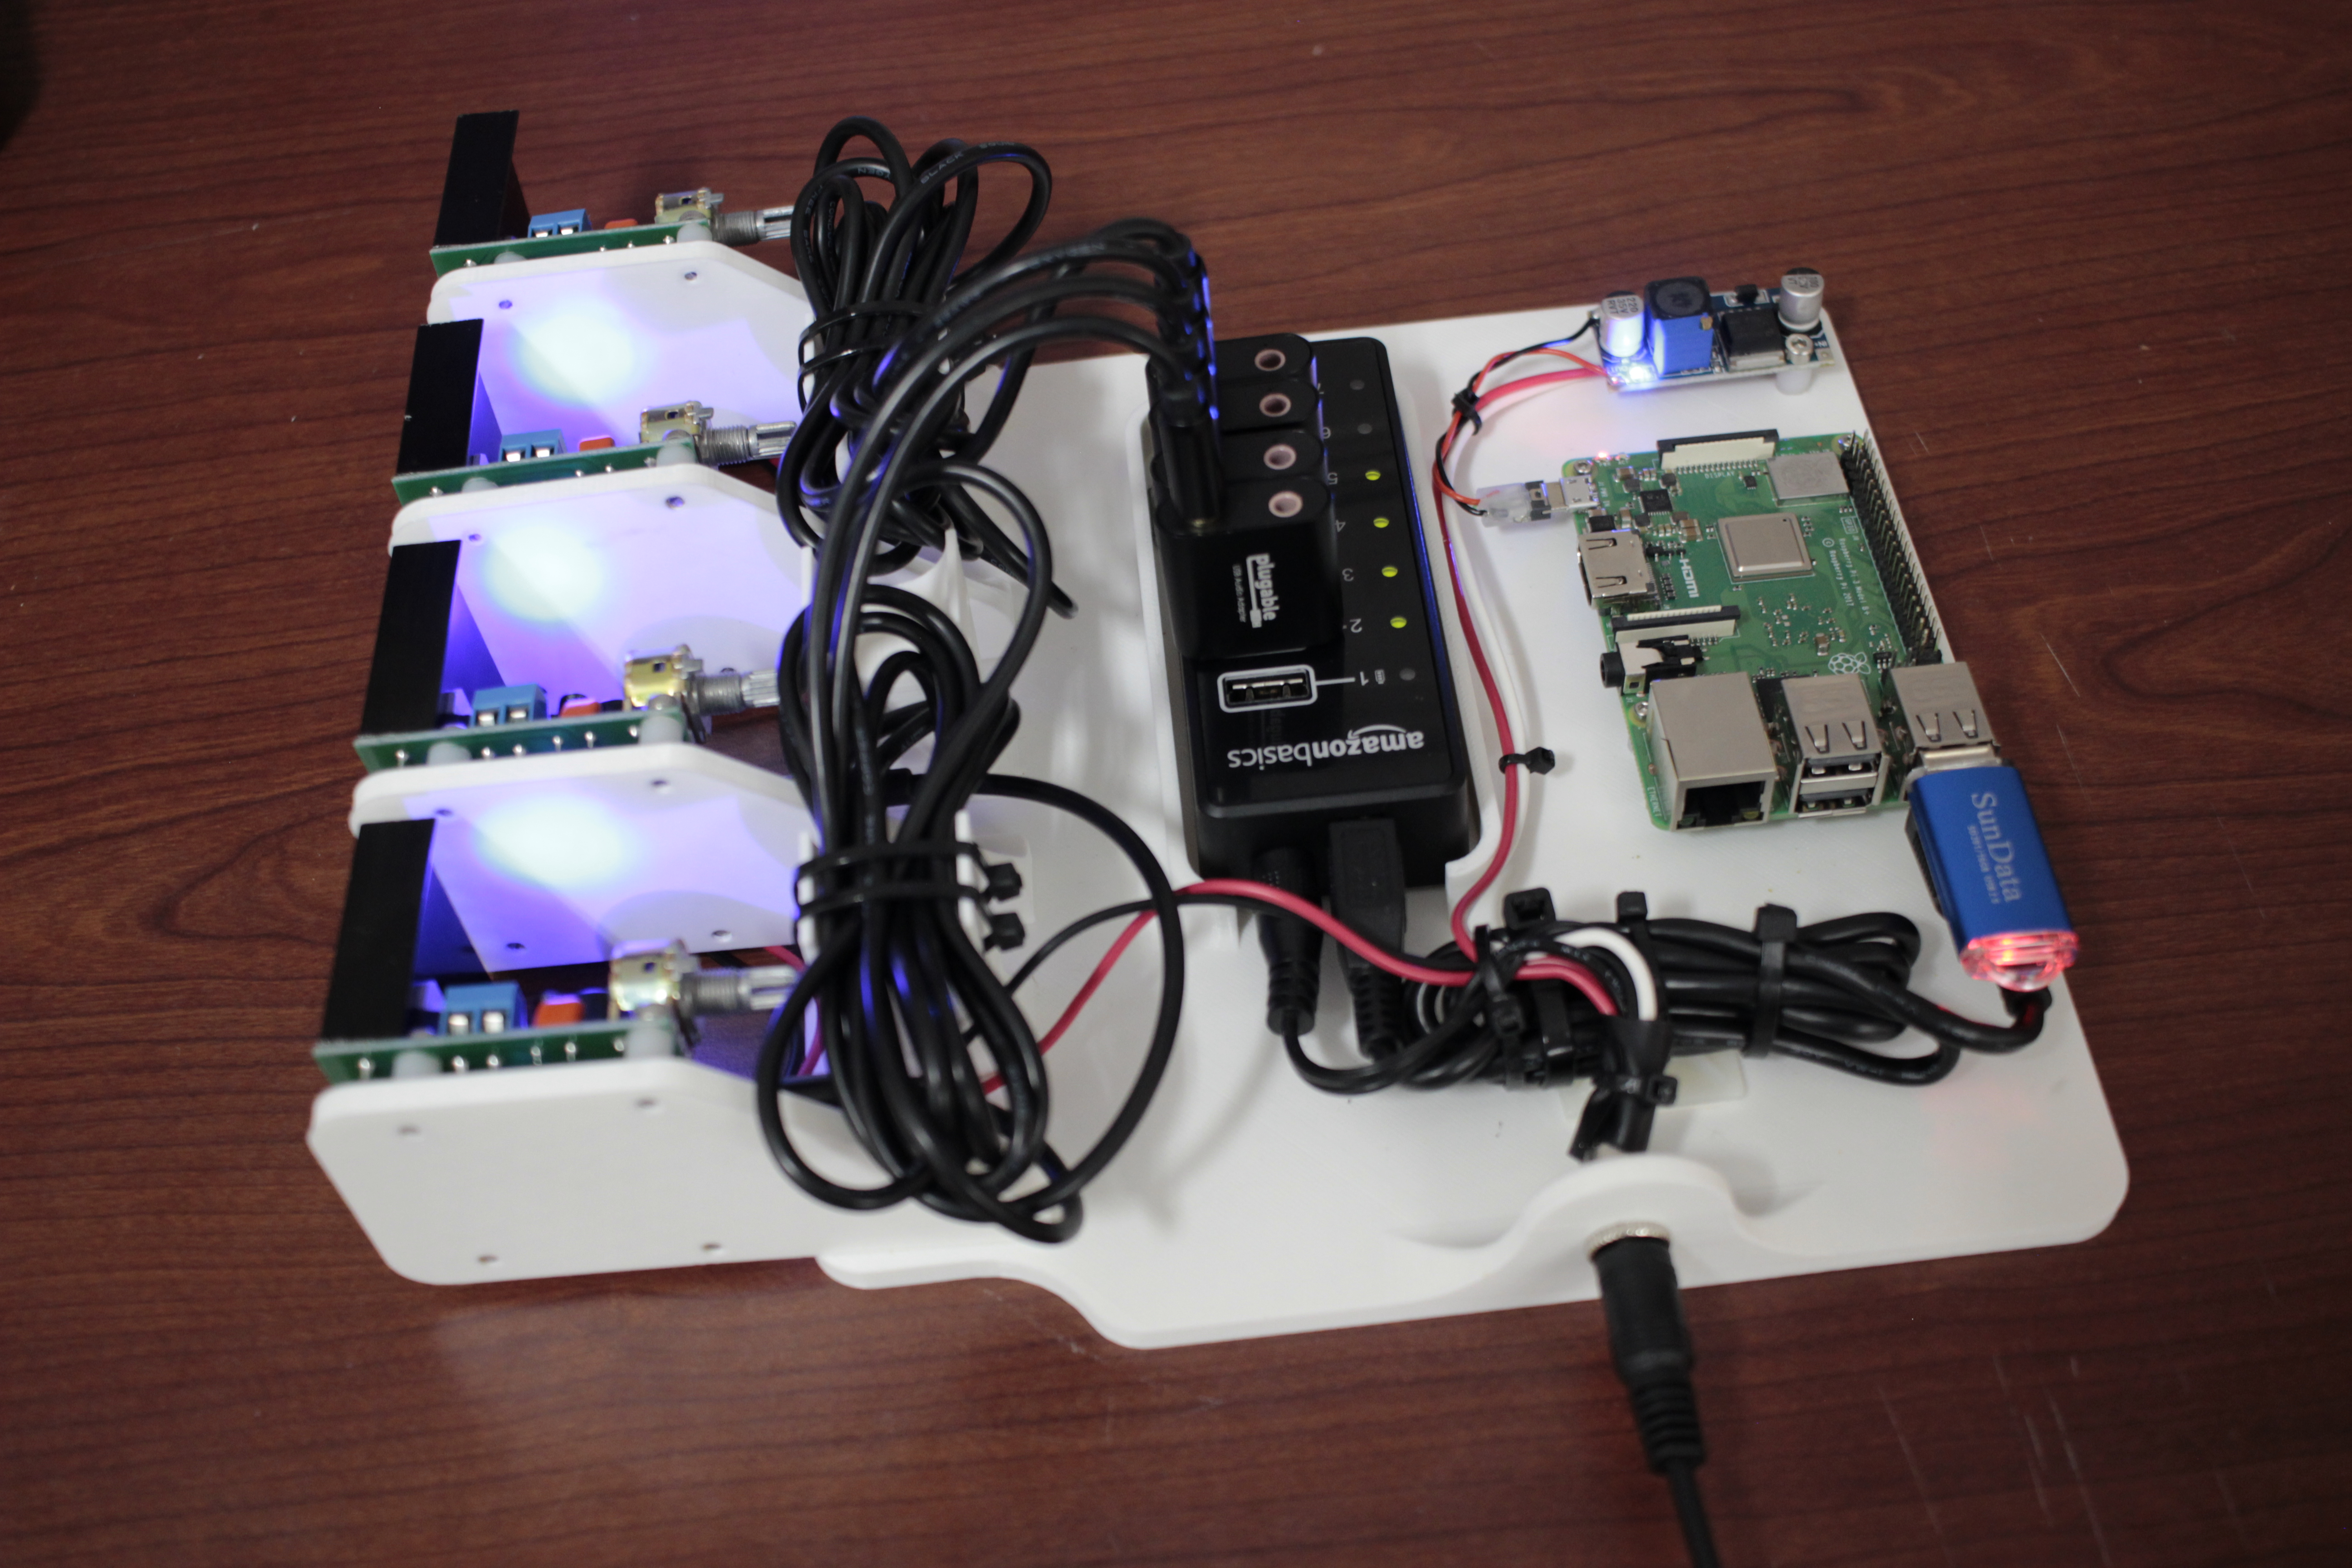
Playing sound through a Raspberry Pi is a simple enough process. But what if you want to play multiple sounds through multiple speakers at the same time? Lucky for us, Devon Bray figured out how to do it.
Play multiple audio files simultaneously with Raspberry Pi
Artist’s Website: http://www.saradittrich.com/ Blog Post: http://www.esologic.com/multi-audio/ Ever wanted to have multiple different sound files playing on different output devices attached to a host computer? Say you’re writing a DJing application where you want one mix for headphones and one for the speakers.
While working with artist Sara Dittrich on her These Blobs installation for Provincetown Art Association and Museum, Devon was faced with the challenge of playing “8 different mono sound files on 8 different loudspeakers”. Not an easy task, and one that most online tutorials simply do not cover.

These Blobs by Sara Dittrich
Turning to the sounddevice Python library for help, Devon got to work designing the hardware and code for the project.
The job was to create some kind of box that could play eight different audio files at the same time on eight different unpowered speakers. New audio files had to be able to be loaded via a USB thumb drive, enabling the user to easily switch files without having to use any sort of UI. Everything also had to be under five inches tall and super easy to power on and off.
Devon’s build uses a 12v 10 amp power supply controlled via a DC/DC converter. This supply powers the Raspberry Pi 3B+ and four $15 audio amplifiers, which in turn control simple non-powered speakers designed for use in laptops. As the sound is only required in mono, the four amplifiers can provide two audio tracks each, each track using a channel usually reserved for left or right audio output.
A full breakdown of the project can be seen in the video above, with more information available on Devon’s website, including the link to the GitHub repo.
And you can see the final project in action too! Watch a video of Sara Dittrich’s installation below, and find more of her work on her website.
These Blobs
Poem written and recorded by Daniel Sofaer, speakers, conduit, clay, spray paint, electrical components; 4′ x 4′ x 5′ ft.
The post Play multiple sounds simultaneously with a Raspberry Pi appeared first on Raspberry Pi.