Sian Wheatcroft created an interactive story display to enable children to explore her picture book This Bear, That Bear. She explains the project, and her current work in teaching, in the newest issue of Hello World magazine, available now.

The task of promoting my first children’s picture book, This Bear, That Bear, was a daunting one. At the time, I wasn’t a teacher and the thought of standing in front of assembly halls and classrooms sounded terrifying. As well as reading the book to the children, I wanted to make my events interactive using physical computing, showing a creative side to coding and enabling a story to come to life in a different way than what the children would typically see, i.e. animated retellings.
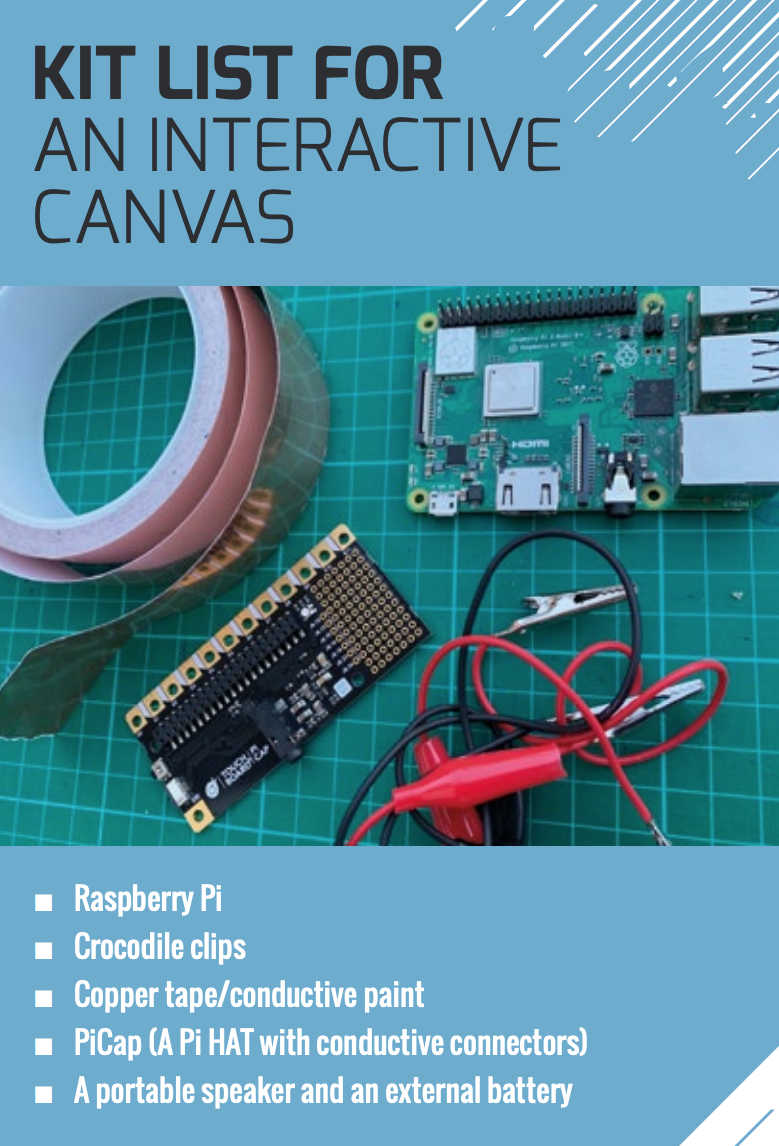
Coming from a tech-loving family, I naturally gravitated towards the Raspberry Pi, and found out about Bare Conductive and their PiCap. I first envisaged using their conductive paint on the canvas, enabling users to touch the paint to interact with the piece. It would be some sort of scene from the book, bringing some of the characters to life. I soon scrapped that idea, as I discovered that simply using copper tape on the back of the canvas was conductive enough, which also allowed me to add colour to the piece.
I enlisted the help of my two sons (two and five at the time) — they gladly supplied their voices to some of the bears and, my personal favourite on the canvas, the ghost. The final design features characters from the book — when children touch certain areas of the canvas, they hear the voices of the characters.
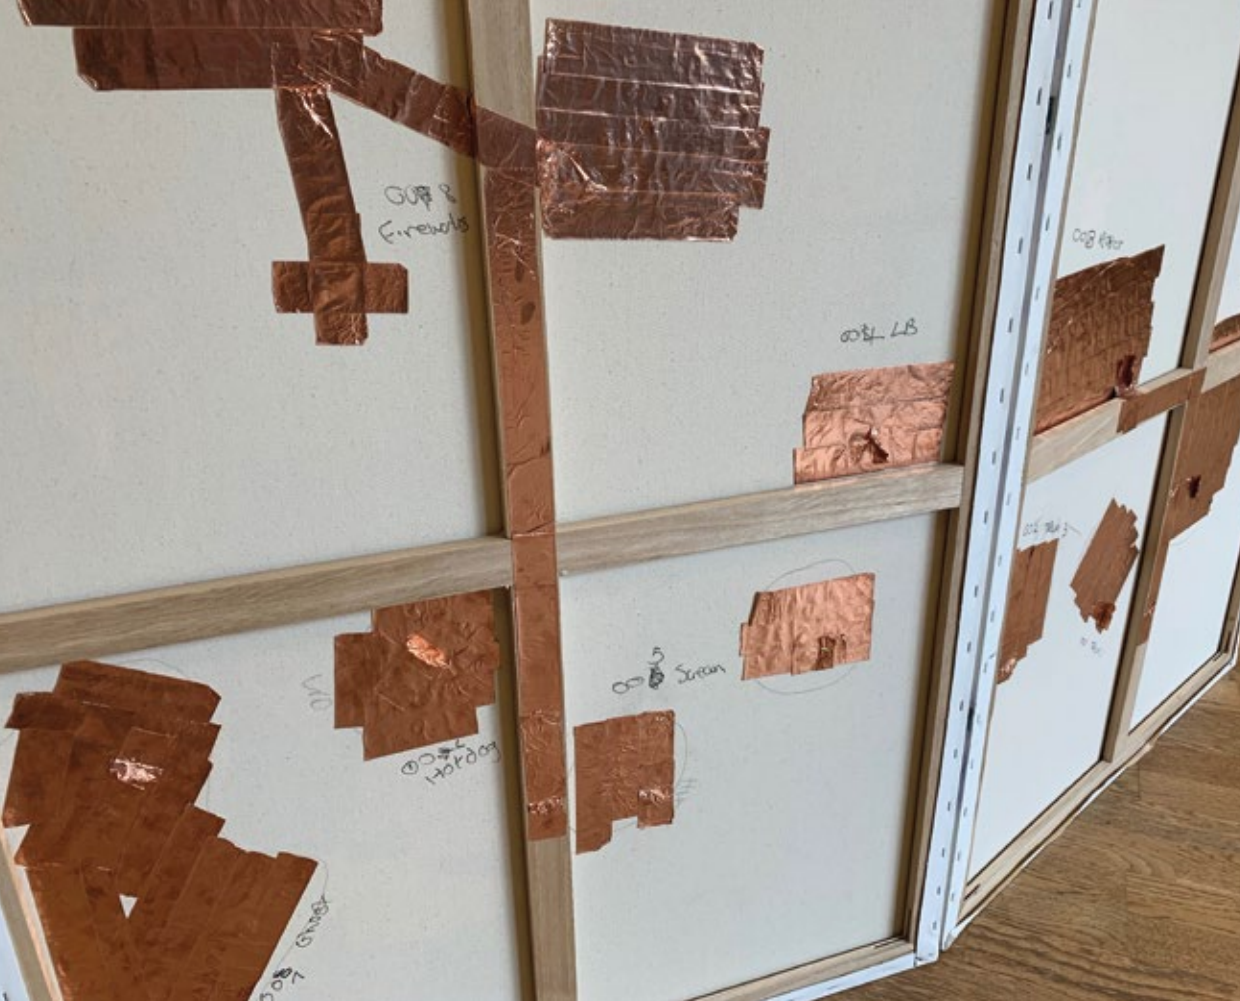
The back of the canvas, covered in copper tape
Getting the project up and running went pretty smoothly. I do regret making the piece so large, though, as it proved difficult to transport across the country, especially on the busy London Underground!
The project added a whole other layer to the events I was taking part in. In schools, I would read the book and have props for the children to wear, allowing them to act out the book as I read aloud. The canvas then added further interaction, and it surprised me how excited the children were about it. They were also really curious and wanted to know how it worked. I enjoyed showing them the back of the canvas with all its copper tape and crocodile clips. They were amazed by the fact it was all run on the Raspberry Pi — such a tiny computer!
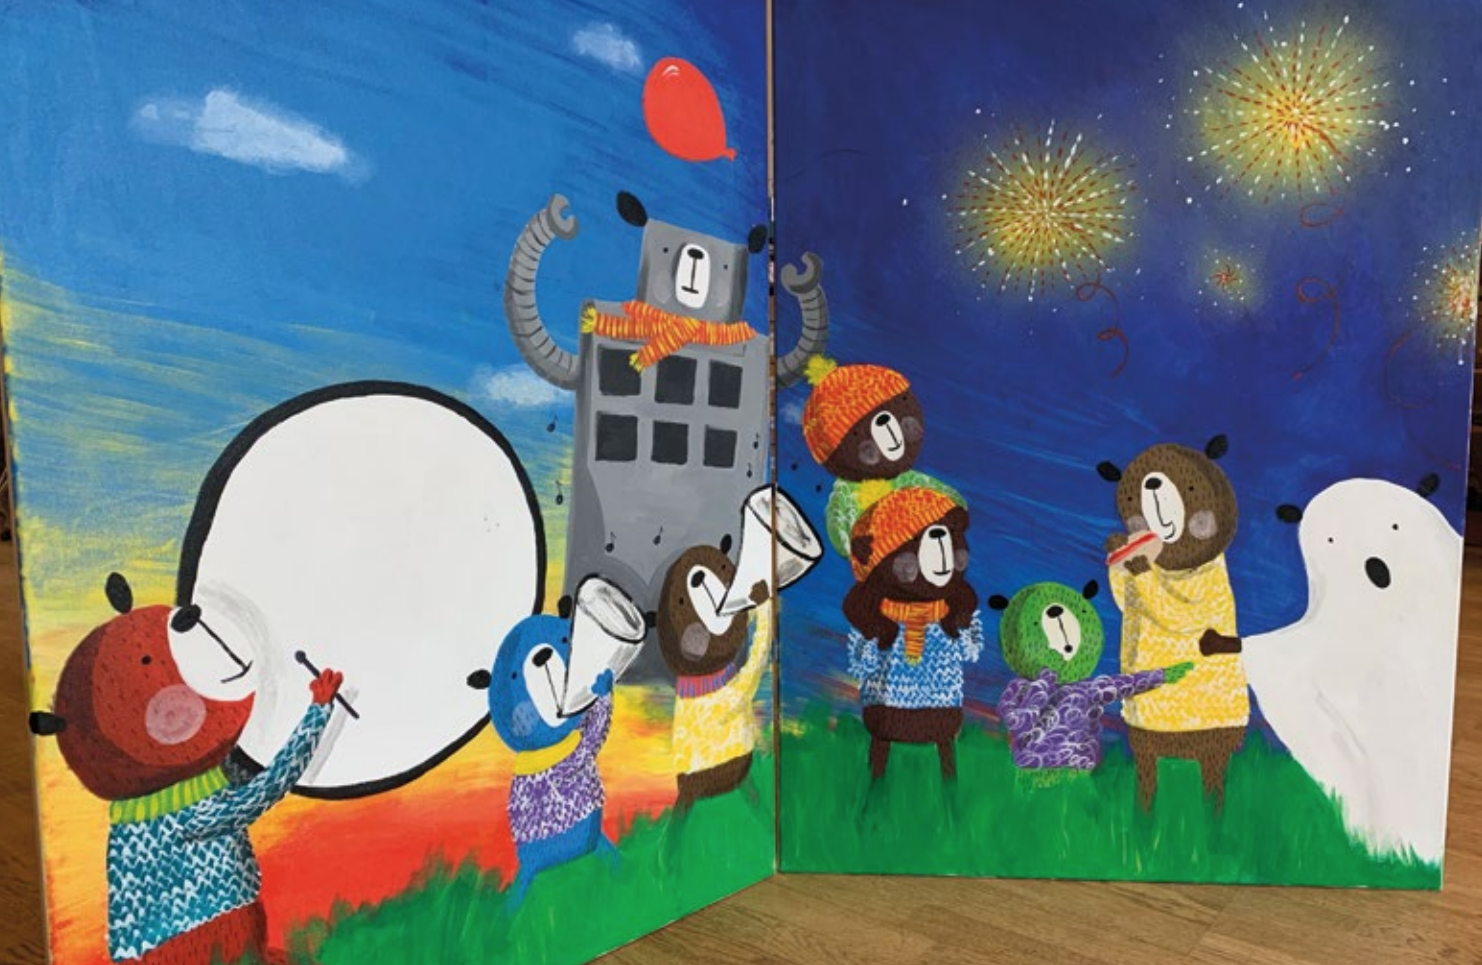
The front of the interactive canvas
Fast-forward a few years, and I now find myself in the classroom full-time as a newly qualified teacher. The canvas has recently moved out of the classroom cupboard into my newly developed makerspace, in the hope of a future project being born.
I teach in Year 3, so coding in Python or using the command line on Raspbian may be a little beyond my students. However, I have a keen interest in project-based learning and am hoping to incorporate a host of cross-curricular activities with my students involving the canvas.
I hope to instil a love for digital making in my students and, in turn, show senior leaders what can be done with such equipment and projects.
This work really lends itself to a literacy project that other educators could try. Perhaps you’re reading a picture book or a more text-based piece: why not get the students to design the canvas using characters from the story? The project would also work equally well with foundation subjects like History or Science. Children could gather information onto the canvas, explaining how something works or how something happened. The age of the children would influence the level of involvement they had in the rest of the project’s creation. The back end could be pre-made — older children could help with the copper tape and wiring, while younger children could stop at the design process.
Part of the project is getting the children to create sounds to go with their design, enabling deeper thinking about a story or topic.
It’s about a collaborative process with the teacher and students, followed by the sharing of their creation with the broader school community.
The brand-new issue of Hello World is available right now as a free PDF download from the Hello World website.

UK-based educators can also subscribe to receive Hello World as printed magazine FOR FREE, direct to their door. And those outside the UK, educator or not, can subscribe to receive free digital issues of Hello World in their inbox on the day of their release.
Head to helloworld.raspberrypi.org to sign up today!
The post Bringing a book to life with Raspberry Pi | Hello World #9 appeared first on Raspberry Pi.
In Hello World issue 7, Steven Weir introduces a Raspberry Pi into the classroom to monitor a classic science experiment.
![]()
A Raspberry Pi can be used to monitor the reaction between hydrochloric acid and sodium thiosulphate to complement a popular GCSE Chemistry practical.
The rate of reaction between hydrochloric acid and sodium thiosulphate is typically studied as part of GCSE Chemistry. The experiment involves measuring the time required for the reaction mixture to turn cloudy, due to the formation of sulphur as a precipitate. Students can then change the temperature or concentration of the reactants to study their effect on the rate of reaction. The time for the reaction mixture to turn cloudy is normally facilitated by recording the time a hand-drawn cross takes to become obscured when placed underneath a glass vessel holding the reaction mixture. This timing is prone to variability due to operator judgement of when the cross first becomes obscured. This variability can legitimately be discussed as part of the lesson. However, the element of operator judgement can be avoided using a Raspberry Pi-monitored chemical reactor.
Attached to a glass jar of approximate 80ml volume (the size is not critical) are two drinking straws, of which one houses a white LED (light-emitting diode) and the other a LDR (light-dependent resistor). The jar is covered in black tape to minimise intrusion of ambient light. The reactor is shown in Figure 1, along with details of other electrical components and connection instructions to a Raspberry Pi.
Figure 1
A: Reactor covered in black tape
B: Drinking straw attached to the reactor, with a further straw inserted housing a white LED
C: Drinking straw attached to the reactor, with a further straw inserted housing a LDR
D: 220Ω resistor to connect to the LED and GPIO 23
E: Wire to connect to ground
F: Wire to connect to 3.3v supply
G: 1µF capacitor to connect to ground
H: Crocodile clip to connect to GPIO 27 (NB: the other end of the wire is situated in between the capacitor and the LDR)
The Python code shown in Figure 2 should be run prior to addition of chemicals to the reactor. Instructions appear on the screen to prompt chemical additions and to start data collection.
Figure 2: Python code for the chemical reactor
Figure 3 shows the results from the experiment when 25ml 0.1M hydrochloric acid is reacted with 25ml 0.15M sodium thiosulphate at 20°C. The reaction is complete at the time the light transmission first reads 0, (i.e. complete obscuration of the light by the precipitate formation) — in this example, that time is 45.4s. For more advanced students, tangents can be drawn at various points on the curve, and gradients calculated to determine the maximum rate of reaction from various reaction conditions.
Figure 3: Graph showing the change in light transmission with time
Download your free copy of Hello World issue 7 today from the Hello World website, where you’ll also find all previous issues. And if you’re an educator in the UK, you’ll have the chance sign up to receive free hard copies to your door!
The post Raspberry Pi-monitored chemical reactor 💥 appeared first on Raspberry Pi.