We love hearing from members of the community and sharing the stories of amazing young people, volunteers, and educators who are using their passion for technology to create positive change in the world around them.
In our latest story, we’re heading to Alkmaar, the Netherlands, to meet Arno and Timo, CoderDojo enthusiasts who have transitioned from club members to supportive mentors. Their journey at CoderDojo and their drive to give back and support the next generation of coders in their community has been an inspiration to those around them.
Arno and Timo have been friends since childhood, and embarked on their CoderDojo journey at the age of 12, eager to explore the world of coding. Under the guidance of mentors like Sanneke, Librarian and Chair of CoderDojo Netherlands, they not only honed their technical skills, but also learned about the value of collaboration, curiosity, and perseverance. As they grew older, they in turn were inspired to support young coders, and wanting to remain part of the CoderDojo community, they decided to become mentors to the next generation of club attendees.
Having been helping younger members of the club for years, the transition to official mentors and proud owners of the much-coveted mentor T-shirt was seamless.
Sanneke reflects on the impact young mentors like Timo and Arno have on the young learners at CoderDojo:
“Having young mentors who are just slightly older than our youngest… I think it helps them to see what happens when you grow up and how they can help. They can be examples for how to help others.” – Sanneke, Librarian, CoderDojo mentor, and Chair of CoderDojo Netherlands
Timo echoes this sentiment, highlighting how mentoring provides a fantastic opportunity to help people and make a positive impact in the local community:
“I think volunteering is important, because you’re doing something for the community, in a city or village, supporting them in their journey in learning coding.” – Timo
As they continue their journey, Timo and Arno remain committed to supporting and inspiring the next generation of coders. They also encourage anyone who is thinking of volunteering at a club to give it a go:
“If you want to volunteer at the CoderDojo, just go for it. You don’t really need that much experience. […] The kids can learn it, so can you.” – Arno
The CoderDojo movement in the Netherlands is celebrating a decade of impact, and champions a culture of growth and learning. Arno and Timo’s story serves as an inspiration to us all, shining a light on the power of mentorship and the impact of volunteering in building stronger, more supportive communities.
Arno and Timo’s story showcases the importance of mentorship for both individuals and communities, and the real impact you can have by donating an hour of your time a week. If you’re interested in becoming a CoderDojo volunteer, head to coderdojo.com to find out how to get started.
Help us celebrate Arno and Timo and their inspiring journey by sharing their story on X (formerly Twitter), LinkedIn, and Facebook.
The post Celebrating the community: Arno & Timo appeared first on Raspberry Pi Foundation.
We love hearing from members of the community and sharing the stories of inspiring young people, volunteers, and educators all over the world who have a passion for technology.
With this latest story, we’re taking you to Leeds, UK, to meet Micah, a young space enthusiast whose confidence has soared since he started attending a Code Club at his local library.
Computing skills are essential in today’s world, and Micah’s mum Catherine was keen for him to be introduced to coding from a young age.
While Micah is known to people close to him for his inquisitive nature, cheeky behaviour, and quick-witted sense of humour, he can be a little shy when meeting new people. And he isn’t always keen on his mum’s suggestions about trying new things and attending after-school clubs! However, when Catherine saw there was a Code Club running at their local library, she knew it was the perfect opportunity for Micah to try out computing.
What Catherine didn’t know is that not only would Micah find out he was a talented coder, but Code Club would also set the path for him to become a regular attendee at many of the library’s other clubs.
Based in Leeds, the Compton Centre Code Club is part of the Leeds Libraries network, which runs seven Code Clubs throughout the city. Liam, Senior Librarian for Digital at Leeds Libraries, described the importance of these spaces for the community and for engaging children in tech:
“Libraries are safe spaces that provide free access to exciting and innovative technology to those in our communities who might not get that opportunity. We’re proud that our Code Clubs can support young people to engage with tech, learn some new skills, and meet like-minded peers in a friendly and positive environment.
Our Code Clubs are aimed at 9- to 13-year-olds. We do have some learners that will come that have a younger sister or brother that wants to get involved as well. We never want to turn anyone away. So we’re more than welcoming for that age group to come in and have a play, get used to the equipment, and join in.”
— Liam, Senior Librarian for Digital at Leeds Libraries
Code Club provides a safe and friendly space for Micah to connect with other children, and he has embraced coding with enthusiasm. This is possible thanks to the work, support, and encouragement of Micah’s Code Club mentor Basia (they/them), the librarian at the Compton Centre who runs the club.
“Micah loves coming [to Code Club] and learning all the different things that he can do with coding. And he also loves Basia. They’re brilliant and run the club really well. It’s a super child-friendly place to be and he loves the support that he gets from them.”
– Catherine, Micah’s mum
Support from an inspiring mentor is so often an important part of a young coder’s journey, and Basia’s own journey from a coding beginner to a confident mentor highlights the positive influence Code Club has on both children and mentors.
Basia reflected on how they felt when they first heard they were going to be running Code Club sessions, and how their skills and confidence have grown.
“I was daunted for a bit. But actually one of the first things I did when I started this job was to go through some of [the Raspberry Pi Foundation’s] resources and do a project in Scratch. And it was just so simple and straightforward. You know, all the resources are absolutely great and I don’t really need to think about it. I think my confidence has increased quite significantly.”
— Basia, Librarian and Code Club mentor
Since joining Code Club, Micah has become involved in other extracurricular activities, like Lego club and drama club. These experiences have contributed to Micah’s overall personal growth, showcasing the transformative power of Code Club for children.
Micah has exciting dreams for the future, including becoming an astrophysicist, a marine biologist, and the founder of a company named Save The Planet. Supported by dedicated mentors like Basia, Code Clubs are not just about teaching coding — they are helping shape the leaders of tomorrow.
If you are interested in encouraging your child to explore coding, take a look at the free coding project resources we have available to support you. If you would like to set up a Code Club for young people in your community, head to codeclub.org for information and support.
Help us celebrate Micah and his inspiring journey by sharing his story on X (formerly Twitter), LinkedIn, and Facebook.
The post Celebrating the community: Micah appeared first on Raspberry Pi Foundation.
It’s the last week of Black History Month 2024 in the USA, but by no means is the celebration over. The beautiful thing about history is that it’s not an isolated narrative about the past, but an ongoing dialogue in which we talk about how our collective past informs our present, and what more can be achieved in the future. The fact is this: we make history every single day. That’s why it’s so important for everyone to actively engage with history, and for us to celebrate the achievements of all.
When we talk about the history of STEM and computing, it’s necessary to highlight the achievements of people from groups that are still underrepresented in these fields: communities of colour, female and gender non-conforming people, people with disabilities, and underresourced communities. When we highlight their achievements, everyone can gain a fuller understanding of this history, and more young people from these groups can see they have a place in these fields and in moving them forward.
[When young kids of colour help inform the technology they use,] we end up with technology that is more inclusive to diverse communities […], and we help the kids become creators instead of just consumers.
Qumisha Goss
So to keep the conversation going about Black history in STEM and computing and how people make it every day, today we’re highlighting stories of Black community members. You’ll find out how they got involved in coding and creating with technology, and who their Black role models in tech are — past and present.
Meet Qumisha Goss, a brilliant source of inspiration and a shining light for youth in the ‘Motor City’ of Detroit, Michigan, USA.
Growing up, Qumisha always had an interest in tech, often tinkering and putting projects together, and her interest quickly transformed into a dream of becoming an engineer one day. Fast forward to now, and Qumisha has done exactly that and so much more.
She’s the Interim Executive Director of Peer 2 Peer University, the Digital Literacy Subject Matter Expert for Connect 313, the Creator and Lead Instructor of Code Grow, and a Raspberry Pi Certified Educator. Talk about impact! We asked Qumisha a few questions to explore her incredible story and to learn how she’s giving back to her community today:
Qumisha: “When I was a kid, my grandmas, Gloria and Cassandra, helped my brother and I make a shrinking machine out of a cardboard box, some batteries, and some lights. There was a minimum of science used, but my grandma swapped out our test ear of corn for a baby corn and my curiosity was rewarded with success. In elementary school, my ‘hero’ was Mae Carol Jemison, engineer, doctor, and astronaut. She was the first African American woman to go to space, in 1992 on the Endeavor. I found someone who looked like me who was doing something that I wanted to do, and that was encouraging.”
Qumisha: “It’s important that young kids of colour help inform the technology that they use. The benefits are twofold: we end up with technology that is more inclusive to diverse communities because it is informed by them, and we help the kids become creators instead of just consumers.”
Qumisha: “I eventually went to college to study engineering. I ended up switching majors and studying history and classical languages, but later returned to the tech world when I joined the Python and Raspberry Pi communities. I learned how to code outside of a traditional classroom and have been running physical computing classes and workshops for kids in my hometown of Detroit.”
Qumisha: “Even if kids don’t stick with it, they learn that coding — and lots of things — are not beyond them. The next Bill Gates might be sitting on the library stoop. The difference between them being able to make it or not is: ‘Did they ever get the opportunity to touch the thing that really sparks their genius?’ And for me, I want to help as many kids as possible interact with tech in a fun and engaging way so that they know that they can be technologists too.”
The difference between [kids] being able to make it or not is: ‘Did they ever get the opportunity to touch the thing that really sparks their genius?’
Qumisha Goss
To connect with Qumisha and learn how you can support the incredible, history-making work that she’s doing, follow her on X at @QatalystGoss.
Keep reading to meet more Black history makers across the USA, and to find resources to learn how you can help increase diversity in the technology sector in your community.
Explore our research seminars for educators who want to learn how to make computer science more accessible to all.
Listen to the stories of other Black community members who are making history all over the US. Siblings Sophia and Sebastian, researcher Randi Williams, and aspiring filmmaker Jordan chatted to us about their interest in coding, tech, and getting creative with digital tools.
Try out one of our guided projects for young people to get creative with tech. Check out Coolest Projects, our free online showcase for young tech creators, and how you can get young people involved.
And if you want to share the story of how you got into tech and how you’re inspiring kids to do the same, reach out to us on social media so we can amplify your voice.
Happy Black History Month!
The post Black role models in tech are making history every day appeared first on Raspberry Pi Foundation.
We’re currently trialling the full integration of our Code Editor in some of the projects on our Projects site, with the aim of providing a seamless experience for young learners. Our Projects site provides hundreds of free coding projects with step-by-step instructions for young people to use at school, in Code Clubs and CoderDojo clubs, and at home. When learners make text-based programming projects in our Python and web design project paths, they use our Code Editor to write and run code in a web browser.
Our new integrated learning experience allows young people to follow the project instructions and work in the Code Editor in a single window. By providing a simpler workspace, where learners do not need to switch between windows to read instructions and input code, we aim to reduce cognitive load and make it easier for young people to learn.
In the integrated project workspace, learners can access the project instructions, coding area, and output (where they can see what they have made) all in the same view. We have reorganised the project guides into short, easy-to-follow steps made up of simple instructions, including code snippets and modelled examples, for learners to work through to create their projects. The project guides feature fresh designs for different types of learning content, such as instruction steps, concept steps, code snippets, tips, and debugging help.
We have also optimised this learning experience for young people using mobiles and tablets. On mobile devices, a new ‘Steps’ tab appears alongside the ‘Code’ and ‘Output’ tabs, enabling learners to easily navigate to the project guide and follow the steps to make their projects.
We are testing our new integrated learning experience as a beta version in three projects:
In each of these projects, young people can choose to complete the original version of the project, with the project instructions and Code Editor in separate windows, or click the button on the project page to try out the new integrated learning experience.
We’d love to hear how your young learners get on with this new integrated experience. Try it out in the three projects above and share your feedback with us here.
Code Editor developments have been made possible with generous support from the Cisco Foundation.
The post An integrated learning experience for young people appeared first on Raspberry Pi Foundation.
In our series of community stories, we celebrate some of the wonderful things young people and educators around the world are achieving through the power of technology.
In our latest story, we’re heading to Vivek High School in Mohali, India, to meet Sahibjot, a 14-year-old coding enthusiast who has taken his hobby to the next level thanks to mentorship, Code Club, and the exciting opportunity to take part in the Coolest Projects 2023 global online showcase.
When he was younger, Sahibjot loved playing video games. His interest in gaming led him to discover the world of game development, and he was inspired to find out more and try it out himself. He began to learn to code in his spare time, using tutorials to help him develop his skills.
Keen to share the joy he had experienced from gaming, Sahibjot set himself the challenge of creating a game for his cousin. This project cemented his enthusiasm for coding and developing games of his own.
“I always felt that I have played so many games in my life, why not make one and others will enjoy the same experience that I had as a child.
For my cousin, I made a personal game for him, and he played it and he liked it very much, so once he played it, I felt that, yes, this is what I want to do with my life.” – Sahibjot
While continuing to hone his computing skills at home, Sahibjot heard that his school had started a Code Club. After initially feeling nervous about joining, his enthusiasm was bolstered by the club mentor, Rajan, talking about artificial intelligence and other interesting topics during the session, and he soon settled in.
At Code Club, with support and encouragement from Rajan, Sahibjot continued to develop and grow his coding skills. Alongside his technical skills, he also learned about teamwork and working collaboratively. He embraced the opportunity to help his peers, sharing his knowledge with others and becoming a mentor for younger club members.
“Last year, we joined this coding club together and we became friends. He’s a very friendly person. Whenever we need him, he just quickly helps us. He helps us to troubleshoot, find any bugs, or even fix our codes.” – Akshat, fellow Code Club member
The next step for Sahibjot came when Rajan introduced him and his fellow Code Club members to Coolest Projects. Coolest Projects is a celebration of young digital creators and the amazing things they make with technology. It offers participants the opportunity to share their tech creations in a global, online showcase, and local in-person events celebrating young creators are also held in several countries.
Sahibjot was eager to take part and showcase what he had made. He submitted a Python project, a ping-pong game, to the online showcase, and was very excited to then see his creation receive a special shout-out during the Coolest Projects global livestream event. He was delighted to share this achievement with his friends and family, and he felt proud to be representing his school and his country on a global stage.
“I told everyone around me that there was going to be a livestream and I possibly might be featured in that, so that was really exciting. I learned a lot about just not representing my school and myself as an individual, I learned about representing my whole nation.” — Sahibjot
Sahibjot’s passion for computing has helped shape his aspirations and ambitions. Looking to the future, he hopes to use his technology skills to benefit others and make an impact.
“Using code and technology and all of the things like that, I aspire to make effort to do something with the world, like help out people with technology.” — Sahibjot
To find out how you and young creators you know can get involved in Coolest Projects, visit coolestprojects.org. If the young people in your community are just starting out on their computing journey, visit our projects site for free, fun beginner coding projects.
For more information to help you set up a Code Club in your school, visit codeclub.org.
Join us in celebrating Sahibjot’s inspiring journey by sharing his story on X (formerly Twitter), LinkedIn, and Facebook.
The post Celebrating the community: Sahibjot appeared first on Raspberry Pi Foundation.
In our series of community stories, we celebrate some of the amazing young people and educators who are using their passion for technology to create positive change in the world around them.
In our latest story, we’re sharing the inspiring journey of St Joseph’s Secondary School in Rush, Ireland. Over the past few years, the school community has come together to encourage coding and digital skills, harnessing the European Astro Pi Challenge as an opportunity to kindle students’ enthusiasm for tech and teamwork.
We caught up with some of the educators and students at St Joseph’s, fresh off the success of their participation in another round of Astro Pi, to delve a little deeper into the school’s focus on making opportunities to engage with computing technologies accessible to all.
St Joseph’s Secondary School is in the heart of Rush, a rural town steeped in agricultural heritage. The school houses a diverse student population coming from the local multigenerational farming families as well as families who’ve been drawn to Rush more recently by its beautiful countryside and employment opportunities. St Joseph’s leadership team has responded to the changing demographics and increase of its student population by adapting and growing the school’s curriculum to meet the evolving needs of the young people and help them build a strong community.
One of the school’s most popular initiatives has been teaching coding from first year (ages 12–13). This proactive approach has resonated with many students, including Kamaya, a member of the school’s 2022/23 Astro Pi cohort, who first discovered her passion for space science and computing through the movie Interstellar.
I remember the first time I was like, ‘OK, space is cool’ is when I watched a movie. It was called Interstellar. I [realised] I might want to do something like that in my future. So, when I came to [St Joseph’s] secondary school, I saw coding as a subject and I was like, ‘Mum, I’ve got to do coding.’
Kamaya, student at St Joseph’s
A key person encouraging St Joseph’s students to give coding a try has been Mr Murray, or Danny as he is fondly referred to by students and staff alike. Danny was introduced to the importance of engaging with computing technologies while teaching science at a school in England: he attended a Code Club where he saw kids building projects with Raspberry Pis, and he couldn’t wait to get involved. Growing his knowledge from there, Danny changed subject focus when he moved back to Ireland. He took on the challenge of helping St Joseph’s expand their computer science offering, along with leading on all IT-related issues.
When the school introduced mandatory coding taster sessions for all first-year students, Danny was blown away by the students’ eagerness and wanted to provide further opportunities for them to see what they could achieve with digital technologies.
This is where Astro Pi came in. After hearing about this exciting coding challenge through an acquaintance, Danny introduced it to his computer science class, as well as extending an open invitation to all St Joseph’s students. The uptake was vast, especially once he shared that the young people could become the recipients of some very exciting photos.
You get to see photos of Earth that nobody has ever seen. Imagine just talking to somebody and saying, ‘Oh, there’s a picture of the Amazon. I took that picture when I was 14. From space.’
Danny Murray, computing teacher at St Joseph’s
Danny’s mission is to instil in his students the belief that they can achieve anything. Collaborating on Astro Pi projects has enabled young people at St Joseph’s to team up and uncover their strengths, and has helped foster a strong community.
The students’ sense of community has transcended Danny’s classroom, creating a culture of enthusiasm for digital skills at St Joseph’s. Today, a dedicated team of students is in charge of solving tech-related challenges within the school, as Deputy Principal Darren Byrne explains:
Our own students actually go class to class, repairing tech issues. So, every day there are four or five students going around checking PCs in classrooms. They […] give classes to our first-year students on app usage.
Darren Byrne, Deputy Principal at St Joseph’s
It’s invested in the whole school [now], the idea that students can look after this kind of technology themselves. We’re the ones reaching out for help from the students!
To find out how you can get involved in Astro Pi, visit astro-pi.org for further information, deadlines, and more. If you would like to learn more about the other free resources we have available to help you inspire a coding community in your school, head to www.raspberrypi.org/teach.
Help us celebrate St Joseph’s Secondary School by sharing their story on X (formerly Twitter), LinkedIn, and Facebook.
The post Celebrating the community: St Joseph’s Secondary School appeared first on Raspberry Pi Foundation.
Earlier this year, we launched our Code Editor, a free online tool to help make learning text-based programming simple and accessible for kids age 9 and up. We focus on supporting the needs of young people who are learning programming at school, in Code Clubs and CoderDojos, and at home.
Today, we have two exciting updates to share: support for web page projects with HTML/CSS, and an improved mobile and tablet experience.
Learners can use the Code Editor to write and run code in a web browser without installing any additional software. The Editor is currently available as a beta version, and we’ve already received really positive comments:
“The Editor looks really nice! I have tried the Python part, and it is intuitive and concise. My little program worked no problem, and I am sure the Editor will be easy, intuitive, and quick to learn for the young [learners].”
— Volunteer in the CoderDojo community
The Code Editor now supports the HTML and CSS web development languages, giving young people the ability to create and preview their own websites directly in the Editor interface. Learners can have their code and the preview panel side by side, and they can also preview their websites in a separate, larger tab.
We have embedded the Editor in our ‘Introduction to web‘ path on the Projects site. The path contains six HTML and CSS projects for beginners and helps them create fun websites like the ones shown here.
We want the Code Editor to be safe, age-appropriate, and suitable for use in classrooms or coding clubs. With this in mind, we have excluded certain functions, like being able to add links to external websites in the code. Rather than enabling image uploads, we provide a library of images when projects in our free learning paths contain images, in order to support multimedia projects safely.
Whether users are coding in Python or HTML/CSS, the Editor offers accessibility options so you can easily switch settings between light and dark mode, and between small, medium, and large text size. The text size feature is useful for people with visual impairments, as well as for educators who want to demonstrate something to a group of learners.
Our Code Editor now offers a new and improved experience for users of mobile and tablet devices. This improves access for learners in classrooms where tablets are used, and in low- and middle-income countries, where mobile phones are commonly used for digital learning.
The Editor now includes:
We’re continuing to develop the Code Editor and have more improvements planned. If you would like to try it out and provide us with your feedback, we’d love to hear what you think of our latest updates.
Code Editor developments have been made possible with generous support from Endless and the Cisco Foundation.
The post Code Editor update: Support for HTML and mobile devices appeared first on Raspberry Pi Foundation.
The mission of the Raspberry Pi Foundation is to enable young people to realise their full potential through the power of computing and digital technologies. That’s what we say in our 2025 strategy. But how can we be sure we’re succeeding?
In our strategy we also identify one of our values as being ‘focussed on impact’. This means that we are committed to learning from the best available evidence, and to being rigorous and transparent about the difference we’re making.
Like all our values, our focus on impact infuses all of our work, and it is led by a dedicated impact team. This blog outlines four ways in which we put this value into practice in pursuit of our mission.
It doesn’t matter how fast you run, if you’re heading in the wrong direction, you’ll never get to your destination. We use data to prioritise our resources where we can make the biggest difference for young people.
For example, we use national statistics from the UK to assess how many of the Code Clubs and CoderDojos we support in the UK run in places where they can reach young people facing educational disadvantage, so that we can adopt an evidence-based approach to better serving these young people.
And we know many of the young people who face the greatest barriers to accessing computing education and developing new skills and confidence live in countries with low- and middle-income economies. That’s why we are building new partnerships in India, Kenya, and South Africa and adapting our resources and programmes for the contexts of educators and learners living there.
We’re really excited that we’ll soon be publishing an updated Theory of Change, which captures how we make an impact. This will be the foundation for Monitoring and Evaluation (M&E) plans for all of our initiatives, where we specify their goals and set down what kinds of data we will collect to make sure we have the measure of whether the initiatives are succeeding.
Strong M&E is equally important for our established programmes and our new pilot initiatives. Code Club, the worldwide network of free, after-school coding clubs for 9- to 13-year-olds we support, has been growing for more than 10 years. Durham University’s Evidence Centre for Education is currently conducting an independent evaluation of UK-based Code Clubs to help us understand how to better support Code Club volunteers and learners around the world. We ourselves recently evaluated the pilot of a new programme we designed in partnership with Amala Education to deliver a vocational skills course for displaced learners aged 16 to 25 in Kakuma refugee camp in Kenya.
Data is only useful if it’s translated into insights that are acted upon. We use the findings from evaluations to inform the design and continual improvement of all our initiatives.
For example, the evaluation of our pilot vocational skills training in Kakuma refugee camp provided insights that have helped us adapt the programme for a second cohort of young people. The same was true of the M&E insights we gained from our partnership with Mo Schools in Odisha, India, where we have provided training and support to 1075 teachers to establish Code Clubs. Informed by survey data and informal feedback each step of the way, we are now gradually scaling up our support towards launching a more intensive computing and coding programme in 2000 schools in Odisha this year.
Side by side with our M&E results, we also rely on the latest computing education research, conducted at the Foundation, in the Raspberry Pi Computing Education Research Centre at the University of Cambridge, and by academic researchers around the world. Our groundbreaking research programme on gender balance in computing, and our ongoing research on culturally relevant pedagogy, are shaping the way we work to enable all young people to achieve their full potential in computing.
We are proud of the difference we are making. We want everyone to hear about it and feel inspired to get involved in our vital mission for young people. Our annual reviews are packed full of statistics and overviews of the difference we’re making, and we’re creating a growing video series of unique stories from people in the community we support. Watch this space for news about our updated Theory of Change, our next annual review, and more blogs about our impact.
By doing these four things well, we can be confident that we are enabling young people to achieve their potential through the power of computing and digital technologies.
If you share our passion for impact and think our mission is important, why not get involved today? You can:
The post The four elements of our focus on impact appeared first on Raspberry Pi Foundation.
A couple of months ago we announced that you can test the online text-based Code Editor we’re building to help young people aged 7 and older learn to write code. Now we’ve made the code for the Editor open source so people can repurpose and contribute to it.
You and your learners can try out the Code Editor in our Python project paths. We’ve included a feedback form for you to let us know what you think about the Editor.
Since the Editor lets learners save their code using their Raspberry Pi Foundation account, it’s easy for them to build on projects they’ve started in the classroom or at home, or bring a project they’ve started at home to their coding club.
Python is the first programming language our Code Editor supports because it’s popular in schools, CoderDojos, and Code Clubs, as well as in industry. We’ll soon be adding support for web development languages (HTML/CSS).
We know that starting out with new programming tools can be tricky and add to the cognitive load of learning new subject matter itself. That’s why our Editor has a simple and accessible user interface and design:
We’ll expand the Editor’s functionalities as we go. For example, at the moment we’re looking at how to improve the Editor’s user interface (UI) for better mobile support.
If there’s a feature you think would help the Editor become more accessible and more suitable for young learners, or make it better for your classroom or club, please let us know via the feedback form.
Our vision is that every young person develops the knowledge, skills, and confidence to use digital technologies effectively, and to be able to critically evaluate these technologies and confidently engage with technological change. We’re part of a global community that shares that vision, so we’ve made the Editor available as an open-source project. That means other projects and organisations focussed on helping people learn about coding and digital technologies can benefit from the work.
To support the widest possible range of learners, we’ve designed the Code Editor application to work well on constrained devices and low-bandwidth connections. Safeguarding, accessibility, and data privacy are also key considerations when we build digital products at the Foundation. That’s why we decided to design the front end of the Editor to work in a standalone capacity, with Python executed through Skulpt, an entirely in-browser implementation of Python, and code changes persisted in local storage by default. Learners have the option of using a Raspberry Pi Foundation account to save their work, with changes then persisted via calls to a back end application programming interface (API).
As safeguarding is always at the core of what we do, we only make features available that comply with our safeguarding policies as well as the ICO’s age-appropriate design code. We considered supporting functionality such as image uploads and code sharing, but at the time of writing have decided to not add these features given that, without proper moderation, they present risks to safeguarding.
There’s an amazing community developing a wealth of open-source libraries. We chose to build our text-editor interface using CodeMirror, which has out-of-the-box mobile and tablet support and includes various useful features such as syntax highlighting and keyboard shortcuts. This has enabled us to focus on building the best experience for learners, rather than reinventing the wheel.
Diving a bit more into the technical details:
You can find out more about our Editor’s code for both the UI front end and API back end in our GitHub readme and contributions documentation. These kick-starter docs will help you get up and running faster:
The Editor’s front end is licensed as permissively as possible under the Apache Licence 2.0, and we’ve chosen to license the back end under the copyleft AGPL V3 licence. Copyleft licences mean derived works must be licensed under the same terms, including making any derived projects also available to the community.
We’d greatly appreciate your support with developing the Editor further, which you can give by:
Our work to develop and publish the Code Editor as an open-source project has been funded by Endless. We thank them for their generous support.
If you are interested in partnering with us to fund this key work, or you are part of an organisation that would like to make use of the Code Editor, please reach out to us via email.
The post Our Code Editor is open source appeared first on Raspberry Pi Foundation.
We love hearing from members of the community and how they use their passion for computing and digital making to inspire others. Our community stories series takes you on a tour of the globe to meet educators and young tech creators from the USA, Iraq, Romania, and more.
For our latest story, we are in the UK with Spencer, a Computer Science teacher at King Edward VI Sheldon Heath Academy (KESH), Birmingham. After 24 years as a science teacher, Spencer decided to turn his personal passion for digital making into a career and transitioned to teaching Computer Science.
From the moment he printed his name on the screen of an Acorn Electron computer at age ten, Spencer was hooked on digital making. He’s remained a member of the digital making community throughout his life, continuing to push himself with his creations and learn new skills whenever possible. Wanting to spread his knowledge and make sure the students at his school had access to computer science, he began running a weekly Code Club in his science lab:
“Code Club was a really nice vehicle for me to get students into programming and digital making, before computer science was an option at the school. So Code Club originally ran in my science lab around the Bunsen burners and all the science equipment, and we do some programming on a Friday afternoon making LEDs flash and a little bit of Minecraft. And from that, the students really got an exciting sense of what programming and digital making could be.”
– Spencer
While running his Code Club, Spencer really embedded himself in the Raspberry Pi community, attending Raspberry Jams, engaging with like-minded people on Twitter, and continuing to rely on our free training to upskill.
When leadership at KESH began to explore introducing Computer Science to the curriculum, Spencer knew he was the right person for the job, and just where to look to make sure he had the right support:
“So when I decided to change from being a science teacher to a computer science teacher, there were loads of course options you could find online, and a lot of them required some really specific prior knowledge and skills. The Foundation’s resources take you from a complete novice, complete beginner — my very first LED flashing on and off — to being able to teach computational thinking and algorithms. So it was a really clear progression from using the Foundation resources that helped take me from a Physics teacher, who could use electricity to light an LED, to a programmer who could teach how to use this in our digital making for our students.”
– Spencer
Thanks to the support from KESH and Spencer’s compelling can-do attitude, he was soon heading up a brand-new Computer Science department. This was met with great enthusiasm from the learners at KESH, with a willing cohort eagerly signing up for the new subject.
“It’s really exciting to see how students have embraced Computer Science as a brand-new subject at school. The take-up for our first year at GCSE was fantastic with 25 students, and this year I’ve really got students asking about, ‘Is there an option for next year, and how can I get on to it?’ Students are almost blown away by the resources now.”
– Spencer
Spencer has a mission to make sure all of KESH’s learners can learn about computing, and making his lessons accessible to all means he’s become a firm favourite amongst the students for his collaborative teaching approach.
“Mr Organ teaches you, and then he just puts you in. If you do need help, you can ask people around you, or him, but he lets you make your own mistakes and learn from there. He will then give you help so you don’t make those mistakes the next time.”
– Muntaha, 16, GCSE Computer Science student, KESH
Spencer’s work is shaped by his awareness that many of the learners at KESH come from under-resourced areas of Birmingham and backgrounds that are underrepresented in computing. He knows that many of them have previously had limited opportunities to use digital tools. This is something he is driven to change.
“I want my young students here, regardless of their background, regardless of their area they’ve been brought up in, to have the same experiences as all other students in the country. And the work I do with Raspberry Pi, and the work I do with Code Club, is a way of opening those doors for our young people.”
– Spencer
As a passionate member of the Raspberry Pi Foundation community, Spencer has been counted on as a friendly face for many years, sharing his enthusiasm on training courses, at Foundation events, and as a part of discussions on Twitter. With the goal to introduce Computer Science at A level shortly, and an ever-growing collection of digital makes housed in his makerspace, Spencer shows no signs of slowing down.
If you are interested in changing your teaching path to focus on Computer Science, take a look at the free resources we have available to support you on your journey.
Help us celebrate Spencer and his dedication to opening doors for his learners by sharing his story on Twitter, LinkedIn, and Facebook.
The post Celebrating the community: Spencer appeared first on Raspberry Pi Foundation.
Broadening participation and finding new entry points for young people to engage with computing is part of how we pursue our mission here at the Raspberry Pi Foundation. It was also the focus of our March online seminar, led by our own Dr Bobby Whyte. In this third seminar of our series on computing education for primary-aged children, Bobby presented his work on ‘designing multimodal composition activities for integrated K-5 programming and storytelling’. In this research he explored the integration of computing and literacy education, and the implications and limitations for classroom practice.
Motivated by challenges Bobby experienced first-hand as a primary school teacher, his two studies on the topic contribute to the body of research aiming to make computing less narrow and difficult. In this work, Bobby integrated programming and storytelling as a way of making the computing curriculum more applicable, relevant, and contextualised.
Critically for computing educators and researchers in the area, Bobby explored how theories related to ‘programming as writing’ translate into practice, and what the implications of designing and delivering integrated lessons in classrooms are. While the two studies described here took place in the context of UK schooling, we can learn universal lessons from this work.
In the seminar Bobby made a distinction between applying computing to literacy (or vice versa) and true integration of programming and storytelling. To achieve true integration in the two studies he conducted, Bobby used the idea of ‘multimodal composition’ (MMC). A multimodal composition is defined as “a composition that employs a variety of modes, including sound, writing, image, and gesture/movement [… with] a communicative function”.
Storytelling comes together with programming in a multimodal composition as learners create a program to tell a story where they:
To investigate the use of MMC in the classroom, Bobby started by designing a curriculum unit of lessons. He mapped the unit’s MMC activities to specific storytelling and programming learning objectives. The MMC activities were designed using design-based research, an approach in which something is designed and tested iteratively in real-world contexts. In practice that means Bobby collaborated with teachers and students to analyse, evaluate, and adapt the unit’s activities.
The first of two studies to explore the design and implementation of MMC activities was conducted with 10 K-5 students (age 9 to 11) and showed promising results. All students approached the composition task multimodally, using multiple representations for specific purposes. In other words, they conveyed different parts of their stories using either text, sound, or images.
Bobby found that broadcast messages and loops were the least used blocks among the group. As a consequence, he modified the curriculum unit to include additional scaffolding and instructional support on how and why the students might embed these elements.
In the second study, the MMC activities were evaluated in a classroom of 28 K-5 students led by one teacher over two weeks. Findings indicated that students appreciated the longer multi-session project. The teacher reported being satisfied with the project work the learners completed and the skills they practised. The teacher also further integrated and adapted the unit into their classroom practice after the research project had been completed.
Factors that impacted the integration of storytelling and programming included the teacher’s confidence to teach programming as well as the teacher’s ability to differentiate between students and what kind of support they needed depending on their previous programming experience.
In addition, there are considerations regarding the curriculum. The school where the second study took place considered the activities in the unit to be literacy-light, as the English literacy curriculum is ‘text-heavy’ and the addition of multimodal elements ‘wastes’ opportunities to produce stories that are more text-based.
Bobby’s research indicates that MMC provides useful opportunities for learners to simultaneously pursue storytelling and programming goals, and the curriculum unit designed in the research proved adaptable for the teacher to integrate into their classroom practice. However, Bobby cautioned that there’s a need to carefully consider both the benefits and trade-offs when designing cross-curricular integration projects in order to ensure a fair representation of both subjects.
Can you see an opportunity for integrating programming and storytelling in your classroom? Let us know your thoughts or questions in the comments below.
You can watch Bobby’s full presentation:
And you can read his research paper Designing for Integrated K-5 Computing and Literacy through Story-making Activities (open access version).
You may also be interested in our pilot study on using storytelling to teach computing in primary school, which we conducted as part of our Gender Balance in Computing programme.
At our next seminar, we welcome Kate Farrell and Professor Judy Robertson (University of Edinburgh). This session will introduce you to how data literacy can be taught in primary and early-years education across different curricular areas. It will take place online on Tuesday 9 May at 17.00 UK time, don’t miss out and sign up now.
Yo find out more about connecting research to practice for primary computing education, you can find other our upcoming monthly seminars on primary (K–5) teaching and learning and watch the recordings of previous seminars in this series.
The post Integrating primary computing and literacy through multimodal storytelling appeared first on Raspberry Pi Foundation.
We are building a new online text-based Code Editor to help young people aged 7 and older learn to write code. It’s free and designed for young people who attend Code Clubs and CoderDojos, students in schools, and learners at home.
At this stage of development, the Code Editor enables learners to:
We’ve chosen Python as the first programming language our Code Editor supports because it is popular in schools, CoderDojos, and Code Clubs. Many educators and young people like Python because they see it as similar to the English language. It is often the text-based language young people learn when they take their first steps away from a block-based programming environment, such as Scratch.
Python is also widely used by professional programmers and usually tops at least one of the industry-standard indexes that ranks programming languages.
We will be adding support for web development languages (HTML/CSS/JavaScript) to the Editor in the near future.
We’re also planning to add features such as project sharing and collaboration, which we know young people will love. We want the Editor to be safe, accessible, and age-appropriate. As safeguarding is always at the core of what we do, we’ll only make new features available once we’ve ensured they comply with the ICO’s age-appropriate design code and our safeguarding policies.
We are inviting you to test the Code Editor as part of what we call the beta phase of development. As the Editor is still in development, some things might not look or work as well as we’d like — and this is why we need your help.
We’d love you to try the Editor out and let us know what worked well for you, what didn’t work well, and what you’d like to see next.
You can now try out the Code Editor in the first two projects of our ‘Intro to Python’ path. We’ve included a feedback form for you to let us know which project you tried, and what you think of the Editor. We’d love to hear from you.
Your feedback helps us decide what to do next. Based on what learners, educators, volunteers, teachers, and parents tell us, we will make the improvements to the Editor that matter most to the young people we aim to support.
One of our long-term goals is to engage millions of young people in learning about computing and how to create with digital technologies. We’re developing the Code Editor with three main aims in mind.
We aim to build the Code Editor so it:
Our work on the Code Editor will:
We want to offer a Code Editor that:
We’re also planning on making the Editor available as an open source project so that other projects and organisations focussed on helping people learn to code can benefit. More on this soon.
Our work on the Code Editor has been generously funded by the Algorand Foundation and Endless, and we thank them for their generous support. If you are interested in partnering with us to fund this key work, please reach out to us via email.
The post Test our new Code Editor for young people appeared first on Raspberry Pi Foundation.
We meet many young people with an astounding passion for tech, and we also meet the incredible volunteers and educators who help them find their feet in the digital world. Our series of community stories is one way we share their journeys with you.
Today we’re introducing you to Nadia from Maysan, Iraq. Nadia’s achievements speak for themselves, and we encourage you to watch her video to see some of the remarkable things she has accomplished.
Nadia’s journey with the Raspberry Pi Foundation started when she moved to England to pursue a PhD at Brunel University. As an international student, she wanted to find a way to be part of the local community and make the most of her time abroad. Through her university’s volunteer department, she was introduced to Code Club and began supporting club sessions for children in her local library. The opportunity to share her personal passion for all things computer science and coding with young people felt like the perfect fit.
“[Code Club] added to my skills. And at the same time, I was able to share my expertise with the young children and to learn from them as well.”
Nadia Al-Aboody
Soon, Nadia saw that the skills young people learned at her Code Club weren’t just technical, but included team building and communication as well. That’s when she realised she needed to take Code Club with her when she moved back home to Iraq.
With personal awareness of just how important it is to encourage girls to engage with computing and digital technologies, Nadia set about training the Code Club network’s first female-only training team. Her group of 15 trainers now runs nine clubs — and counting— throughout Iraq, with their goal being to open a club in every single school in the country.
Reaching new areas can be a challenge, one that Nadia is addressing by using Code Club resources offline:
“Not every child has a smartphone or a device, and that was one of the biggest challenges. The [Raspberry Pi] Foundation also introduced the unplugged activities, which was amazing. It was very important to us because we can teach computer science without the need for a computer or a smart device.”
Nadia Al-Aboody
Nadia also works with a team of other volunteers to translate our free resources related to Code Club and other initiatives for young people into Arabic, making them accessible to many more young people around the world.
Tamasin Greenough Graham, Head of Code Club here at the Foundation, shares just how important volunteers like Nadia are in actively pushing our shared mission forwards.
“Volunteers like Nadia really show us why we do the work we do. Our Code Club team exists to support volunteers who are out there on the ground, making a real difference to young people. Nadia is a true champion for Code Club, and goes out of her way to help give more children access to learning about computing. By translating resources, alongside overseeing a growing network of clubs, she helps to support more volunteers and, in turn, reach more young people. Having Nadia as a member of the community is really valuable.”
Tamasin Greenough Graham, Head of Code Club
If you are interested in becoming a Code Club volunteer, visit codeclub.org for all the information you need to get started.
Help us celebrate Nadia and her commendable commitment to growing the Code Club community in Iraq by sharing her story on Twitter, LinkedIn, and Facebook.
The post Celebrating the community: Nadia appeared first on Raspberry Pi Foundation.
When we think about a celebration, we also think about how important it is to be intentional about sound. And with this month of February being a celebration of Black history in the USA, we want to help you make some noise to amplify the voices, experiences, and achievements of the Black community.
From the past and present, to those still to come in the future, countless remarkable achievements have been made by Black individuals who have chosen to move to the beat of their own drum. Music and sound can be tools to tell stories, to express ourselves, to promote change, to celebrate, and so much more. So take some time this month to make your own music with your young coders and start dancing.
Of course, choosing to dance is not the same as choosing to devote your life to the equality and freedom of all people. But it reminds us that you can incite change by choosing to do what is right, even when you feel like you’re the only one moving to the music. It won’t be long before you see change and meet people you resonate with, and a new sound will develop in which everyone can find their rhythm.
So join us this month as we explore the power of code and music to celebrate Black History Month.
We’ve selected three of our favourite music-related projects to help you bring a joyful atmosphere to your coding sessions this month. All of the projects are in Scratch, a programming language that uses blocks to help young people develop their confidence in computer programming while they experiment with colours and sounds to make their own projects.
Find your rhythm with this clicker game where you earn points by playing the drums in different venues. The project is one of our Explore projects and it includes step-by-step instructions to help young creators develop their skills, confidence, and interest in programming. This makes it a great option for beginners who want to get started with Scratch and programming.
Code to the beat of your own drum — or any instrument you like. Use this project to create your own virtual musical instrument and celebrate a Black musician you admire. For young people who have some experience with Scratch, they may enjoy expressing themselves with this Design project. Our Design projects give young people support to build on their experience to gain more independence coding their own ideas.
Can you keep up with the beat? Prove it in this game where you play the notes of a song while they scroll down the screen. You could choose to include a song associated with a moment in Black history that is meaningful to you. This project is a great opportunity for young people to expand their programming knowledge to create lists, while they also test their reaction skills with a fun game.
For young creators who want to create projects that don’t involve music or sound, check out these projects which can help you to:
Let us know how you’re celebrating Black History Month in your community on Twitter, LinkedIn, Facebook, or Instagram all month long!
Learn about our partnership with Team4Tech and Kenya Connect, with whom we are empowering educators and students in rural Kenya to use the power of coding and computing to benefit their communities.
Meet Salome, a computer science student from the UK who shares her experiences and advice for young people interested in finding out where computer science can lead them. Salome was one of the first people we interviewed for our ‘I belong’ campaign to celebrate young role models in computer science.
We believe that creating inclusive and equitable learning environments is essential to supporting all young people to see computer science as an opportunity for them. To help engage young people, especially those who are underrepresented in computer science classrooms, we are carrying out research with teachers to make computing culturally relevant. Our work promoting culturally relevant pedagogy in educational settings in England has been impacted by projects of many US researchers who have already contributed heavily to this area. You can learn about two of these projects in this blog post.
Educators who want to find out how they can use culturally relevant pedagogy with their learners can download our free guidelines today.
We would also like to invite you to our monthly research seminar on 7 February 2023, when we will be joined by Dr Jean Salac who will be sharing their research on Moving from equity to justice in computing instruction for youth. Dr Salac’s session is part of our current series of seminars that centres on primary school (K–5) teaching and learning of computing. The seminars are free and open to everyone interested in computing education. We hope to see you there!
The post Code to the beat of your own drum during Black History Month 2023 appeared first on Raspberry Pi Foundation.
In our work, we get to meet so many super inspiring young people who make things with technology. Our series of community stories is one way we share their journeys and enthusiasm for digital making with you.
Today we’re introducing you to Adarsh from California, USA.
We first met Adarsh at the Coolest Projects USA showcase in 2019, when he was 15 years old. Adarsh was chosen as the Coolest Projects judges’ favourite in the showcase’s Hardware category for making a Smart Sprinkler System, which can serve an entire community. He was inspired to create this project by the need he saw in California to manage water during a drought. Using a Raspberry Pi computer, he built a moisture sensor–based sprinkler system that integrates real-time weather forecast data and Twitter feeds to dispense only optimum amounts of water, in compliance with city water regulations. Adarsh says:
“The world around us right now has a lot of different problems that need to be solved and so the way that I get inspired is by looking outwards.”
In 2020, Coolest Projects Global went online with young people across the world sharing their tech projects, and Adarsh created a project for the showcase to solve another real-life problem he had witnessed. When Adarsh had been in middle school, his mother had to be rushed to hospital with a sudden heart problem. The experience of seeing her hooked up to lots of vital sign monitors, with the wires hindering her movement, stayed in his memory. It led Adarsh to create another tech project: the Contactless Vital Signs Monitor. This low-cost device can be used to monitor a person’s skin temperature, heart rate, respiratory rate, blood pressure, and oxygen saturation without needing to be in direct contact with them. Adarsh’s contactless monitor lets patients rest more comfortably and also keeps healthcare staff safer from infections.
Adarsh entered his Contactless Vital Signs Monitor in the Davidson Fellows Scholarship programme, which recognises students who have completed significant projects that have the potential to benefit society.
Adarsh has this message for other young people who think they might like to try creating things with tech:
“None of these projects, to get to the stage where they are today, were without frustration or difficulties. That’s part of the process. You should expect that. Because of all the struggles I had, the fact that I was able to build all of this is so much more rewarding to me.”
A big part of coding and digital making is problem-solving and collaboration. Adarsh told us that he had a really great mentor, Johan, who introduced him to coding and Raspberry Pi hardware, and showed him where Adarsh could ask for help online.
“[The Raspberry Pi community] is such a large and inclusive community. It welcomes young students — even older adults who are first starting to develop their interest in computer science — and we all are developing our own skills, our own projects, and our own passions together, and while doing so, we’re helping each other out.”
Now a freshman at Stanford University, Adarsh is currently doing an epidemiology-related research project about the relationship between COVID-19 mutations and environmental, health, and demographic statistics. He wants to focus either on biomedical engineering or environmental engineering in his studies.
“Really [what I’m studying at university] is going to involve engineering or computer science largely due to the Raspberry Pi and the early influence it has had on my life.”
Thanks for inspiring us, Adarsh, and for letting us share your story with the community!
Help us celebrate Adarsh and inspire other young people to discover coding and digital making as a passion, by sharing his story on Twitter, LinkedIn, Facebook, or Instagram.
The post Celebrating the community: Adarsh appeared first on Raspberry Pi.
It’s wonderful hearing from people in the community about what learning and teaching digital making means to them and how it impacts their lives. So far, our community stories series has involved young creators, teachers, and mentors from the UK and US, India, Romania, and Ireland, who are all dedicated to making positive change in their corner of the world through getting creative with technology.
For our next story, we travel to a tiny school in North Yorkshire in the UK to meet teacher Sophie Hudson, who’s been running a Code Club since February 2021.
A teacher for 10 years, Sophie is always looking for new opportunities and ideas to inspire and encourage her learners. The school where she teaches, Linton-on-Ouse Primary School & Nursery in rural Yorkshire, is very small. With only five teachers supporting the children, any new activity has to be meticulously planned and scheduled. Sophie was also slightly nervous about setting up a Code Club because she doesn’t have a computer science background, sharing that “there’s always one subject that you feel less confident in.”
Sophie started the Code Club off small, with only a few learners. But then she grew it quickly, and now half of the learners in Key Stage 2 attend, and the club sessions have become a regular fixture in the school week.
“Once I did have a look at it [Code Club], it really wasn’t as scary as I thought. […] It has had a really positive influence on our school.”
Sophie Hudson, primary school teacher
Thanks to our free Code Club project guides and coding challenges like Astro Pi Mission Zero, Sophie’s Code Club has plenty of activities and resources for the children to learn to code with confidence — while having fun too. Sophie says: “I like the idea that the children can be imaginative: it’s play, but it’s learning at the same time. They might not even realise it.”
Visiting the Code Club at Linton-on-Ouse Primary School was a joyful experience. The children listened intently as Sophie kicked off the lunchtime club session. As they started to code, there were giggles and gasps throughout, and the classroom filled with sounds and intermittent squeaks from the ‘Stress ball’ project. It was clear how much enjoyment the learners felt, and how engaged everyone was with their coding projects. Learner Erin told us she likes Code Club because she can “have a little fun with it”. Learners Maise and Millie enjoy it because “it makes you worry less about getting stuff wrong, because you always know there’s a back-up plan.”
“It’s amazing. Anything is possible.”
Millie (10), learner at Sophie’s Code Club
Attending Code Club had a profound impact on a 9-year-old learner called Archie, who shares that his confidence has improved since taking part in the sessions: “I would never, ever think of doing things that I do now in Code Club,” he says. His mum Jenni has also seen a difference in Archie since he joined Code Club, with his confidence improving generally at school.
The positive impact that Sophie has on Linton-on-Ouse Primary School & Nursery is undeniable, not only by running Code Club as an extracurricular activity but also by joint-leading science and leading PE, computing, and metacognition. Head teacher Davinia Pearson says, “How could you not be influenced by someone who’s just out there looking for the best for their class and children, and making a difference?”
Help us celebrate Sophie and her Code Club at Linton-on-Ouse Primary School & Nursery by sharing their story on Twitter, LinkedIn, and Facebook.
The post Celebrating the community: Sophie appeared first on Raspberry Pi.
Last summer, the Raspberry Pi Foundation and the University of Cambridge Department of Computer Science and Technology created a new research centre focusing on computing education research for young people in both formal and non-formal education. The Raspberry Pi Computing Education Research Centre is an exciting venture through which we aim to deliver a step-change for the field.
Computing education research that focuses specifically on young people is relatively new, particularly in contrast to established research disciplines such as those focused on mathematics or science education. However, computing is now a mandatory part of the curriculum in several countries, and being taken up in education globally, so we need to rigorously investigate the learning and teaching of this subject, and do so in conjunction with schools and teachers.
To celebrate the official launch of the Raspberry Pi Computing Education Research Centre, we will be holding an in-person event in Cambridge, UK on Weds 20 July from 15.00. This event is free and open to all: if you are interested in computing education research, we invite you to register for a ticket to attend. By coming together in person, we want to help strengthen a collaborative community of researchers, teachers, and other education practitioners.
The launch event is your opportunity to meet and mingle with members of the Centre’s research team and listen to a series of short talks. We are delighted that Prof. Mark Guzdial (University of Michigan), who many readers will be familiar with, will be travelling from the US to join us in cutting the ribbon. Mark has worked in computer science education for decades and won many awards for his research, so I can’t think of anybody better to be our guest speaker. Our other speakers are Prof. Alastair Beresford from the Department of Computer Science and Technology, and Carrie Anne Philbin MBE, our Director of Educator Support at the Foundation.
The event will take place at the Department of Computer Science and Technology in Cambridge. It will start at 15.00 with a reception where you’ll have the chance to talk to researchers and see the work we’ve been doing. We will then hear from our speakers, before wrapping up at 17.30. You can find more details about the event location on the ticket registration page.
The aim of the Raspberry Pi Computing Education Research Centre is to increase our understanding of teaching and learning computing, computer science, and associated subjects, with a particular focus on young people who are from backgrounds that are traditionally under-represented in the field of computing or who experience educational disadvantage.
We have been establishing the Centre over the last nine months. In October, I was appointed Director, and in December, we were awarded funding by Google for a one-year research project on culturally relevant computing teaching, following on from a project at the Raspberry Pi Foundation. The Centre’s research team is uniquely positioned, straddling both the University and the Foundation. Our two organisations complement each other very well: the University is one of the highest-ranking universities in the world and renowned for its leading-edge academic research, and the Raspberry Pi Foundation works with schools, educators, and learners globally to pursue its mission to put the power of computing into the hands of young people.
In our research at the Centre, we will make sure that:
We are excited to work with a large community of teachers and researchers, and we look forward to meeting you at the launch event.
At the end of June, we’ll be launching a new website for the Centre at computingeducationresearch.org. This will be the place for you to find out more about our projects and events, and to sign up to our newsletter. For announcements on social media, follow the Raspberry Pi Foundation on Twitter or Linkedin.
The post Join us at the launch event of the Raspberry Pi Computing Education Research Centre appeared first on Raspberry Pi.
We love being able to share how young people across the world are getting creative with technology and solving problems that matter to them. That’s why we put together a series of films that celebrate the personal stories of young tech creators.
For our next story, we met up with young digital maker Jay in Preston, UK, who wants to share what coding and robotics mean to him.
Watch Jay’s video to see how Jay created a homemade ventilator, Oxy-Pi, and how he’s making sure people in his local community also have the opportunity to create with technology.
Jay (11) wants everyone to learn about programming. At a young age, Jay started to experiment with code to make his own games. He attended free coding groups in his area, such as CoderDojo, and was introduced to the block-based programming language Scratch. Soon Jay was combining his interests in programming with robotics to make his own inventions.
“My mission is to spread the word of computing and programming, because not many people know about these subjects.”
Jay
When he found out about Coolest Projects, our global tech showcase where young creators share their projects, Jay decided to channel his creativity into making something to exhibit there. He brought along a security alarm he had built, and he left Coolest Projects having made lots of new friends who were young tech creators just like himself.
“With robotics and coding, what Jay has learned is to think outside of the box and without any limits.”
Biren, Jay’s dad
While Jay has made many different tech projects, all of his ideas involve materials that are easily accessible and low-cost. Lots of his creations start out made with cardboard, and repurposed household items often feature in his final projects. Jay says, “I don’t want to spend much money, because it’s not necessary when you actually have an alternative that works perfectly fine.”
One of Jay’s recent projects, which he made from repurposed materials, is called Oxy-Pi. It’s a portable ventilator for use at home. Jay was inspired to make Oxy-Pi during the COVID-19 pandemic, and this project is especially important to him as his dad was hospitalised during this time. With his digital making approach, Jay is an example to everyone that you can use anything you have to hand to create something important to you.
Digital making has helped Jay express himself creatively, test his skills, and make new friends, which is why he is motivated to help others learn about digital making too. In his local community, Jay has been teaching children, teenagers, and adults about coding and robotics for the last few years. He says that he and the people around him get a lot from the experience.
“When I go out and teach, I love it so much because it’s really accessible. It helps me build my confidence, it helps them to discover, to learn, to create. And it’s really fun.”
Jay
Using tech to create things and solve problems, and helping others to learn to do the same, is incredibly important to Jay, and he wants it to be important to you too!
Help us celebrate Jay and inspire other young people to discover coding and digital making as a passion, by sharing his story on Twitter, LinkedIn, and Facebook.
The post Celebrating the community: Jay appeared first on Raspberry Pi.
For those of us living in the USA, February is Black History Month, our month-long celebration of Black history. This is an occasion to highlight the amazing accomplishments of Black Americans through time. Simply put, the possibilities are endless! Black history touches every area of our lives, and it is so important that we seize the opportunity to honor Black freedom fighters who fought for the equality and freedom of ALL people.
That’s why we encourage you to join us in celebrating Black History Month with the help of free, specially chosen coding and computing education resources. We’ve got something for everyone: whether you’re a learner, an educator, a volunteer, or any lover of tech, everyone can participate.
This month, we want to empower young people to think about how they can use code as a tool to celebrate Black history with innovation and creativity. We’ve designed a project card listing the perfect projects to jumpstart young learners’ imagination:
There are projects for beginner coders, as well as intermediate and advanced coders, in Scratch, Python, HTML/CSS, and Ruby plus Raspberry Pi.
We’re working on research to better understand how to support the Black community and other underrepresented communities to engage with computer science.
Take some time this month to explore the following resources to make sure we’re growing into a more diverse and inclusive community:
Uplifting Black voices is one of the best things we can all do this February in observance of Black History Month. We’ve had the privilege of hearing from members in our community about their experiences in tech, and their stories are incredibly insightful and inspiring.
Happy Black History Month! Share with us on Twitter, LinkedIn, Facebook, or Instagram how you’re celebrating in your community.
The post Celebrate Black history this month with code! appeared first on Raspberry Pi.
Since last year, we have been investigating culturally relevant pedagogy and culturally responsive teaching in computing education. This is an important part of our research to understand how to make computing accessible to all young people. We are now continuing our work in this area with a new project called Roots, bridging our research team here at the Foundation and the team at the Raspberry Pi Computing Education Research Centre, which we jointly created with the University of Cambridge in its Department of Computer Science and Technology.
Across both organisations, we’ve got great ambitions for the Centre, and I’m delighted to have been appointed as its Director. It’s a great privilege to lead this work.
Culturally relevant pedagogy is a framework for teaching that emphasises the importance of incorporating and valuing all learners’ knowledge, ways of learning, and heritage. It promotes the development of learners’ critical consciousness of the world and encourages them to ask questions about ethics, power, privilege, and social justice. Culturally relevant pedagogy emphasises opportunities to address issues that are important to learners and their communities.
Culturally responsive teaching builds on the framework above to identify a range of teaching practices that can be implemented in the classroom. These include:
The overall objective of our work in this area is to further our understanding of ways to engage underrepresented groups in computing. In 2021, funded by a Special Projects Grant from ACM’s Special Interest Group in Computer Science Education (SIGCSE), we established a working group of teachers and academics who met up over the course of three months to explore and discuss culturally relevant pedagogy. The result was a collaboratively written set of practical guidelines about culturally relevant and responsive teaching for classroom educators.
The video below is an introduction for teachers who may not be familiar with the topic, showing the perspectives of three members of the working group and their students. You can also find other resources that resulted from this first phase of the work, and read our Special Projects Report.
We’re really excited that, having developed the guidelines, we can now focus on how culturally responsive computing teaching can be implemented in English schools through the Roots project, a new, related project supported by funding from Google. This funding continues Google’s commitment to grow the impact of computer science education in schools, which included a £1 million donation to support us and other organisations to develop online courses for teachers.
In our new Roots project, we want to learn from practitioners how culturally responsive computing teaching can be implemented in classrooms in England, by supporting teachers to plan activities, and listening carefully to their experiences in school. Our approach is similar to the Research-Practice-Partnership (RPP) approach used extensively in the USA to develop research in computing education; this approach hasn’t yet been used in the UK. In this way, we hope to further develop and improve the guidelines with exemplars and case studies, and to increase our understanding of teachers’ motivations and beliefs with respect to culturally responsive computing teaching.
The pilot phase of the Roots project starts this month and will run until December 2022. During this phase, we will work with a small group of schools around London, Essex, and Cambridgeshire. Longer-term, we aim to scale up this work across the UK.
The project will be centred around two workshops held in participating teachers’ schools during the first half of the year. In the first workshop, teachers will work together with facilitators from the Foundation and the Raspberry Pi Computing Education Research Centre to discuss culturally responsive computing teaching and how to make use of the guidelines in adapting existing lessons and programmes of study. The second workshop will take place after the teachers have implemented the guidelines in their classroom, and it will be structured around a discussion of the teachers’ experiences and suggestions for iteration of the guidelines. We will also be using a visual research methodology to create a number of videos representing the new knowledge gleaned from all participants’ experiences of the project. We’re looking forward to sharing the results of the project later on in the year.
We’re delighted that Dr Polly Card will be leading the work on this project at the Raspberry Pi Computing Education Research Centre, University of Cambridge, together with Saman Rizvi in the Foundation’s research team and Katie Vanderpere-Brown, Assistant Headteacher, Saffron Walden County High School, Essex and Computing Lead of the NCCE London, Hertfordshire and Essex Computing Hub.
We hold monthly research seminars here at the Foundation, and in the first half of 2021, we invited speakers who focus on a range of topics relating to equity, diversity, and inclusion in computing education.
As well as holding seminars and building a community of interested people around them, we share the insights from speakers and attendees through video recordings of the sessions, blog posts, and the speakers’ presentation slides. We also publish a series of seminar proceedings with referenced chapters written by the speakers.
You can download your copy of the proceedings of the equity, diversity, and inclusion series now.
The post The Roots project: Implementing culturally responsive computing teaching in schools in England appeared first on Raspberry Pi.
Today we bring you the sixth film in our series of inspirational community stories. It’s wonderful to share how people all across the world are getting creative with tech and solving problems that matter to them.
Our next community story comes from Drogheda, Ireland, where a group of programmers set up one of the country’s very, very first CoderDojo coding clubs for young people. One of that Dojo’s attendees was Cian Martin Bohan, whose story we’re sharing today.
“I can’t create anything I want in real life, but I can create anything I want on a computer.”
Cian Martin Bohan
Watch Cian’s video to find out how this keen programmer went from his first experience with coding at his local CoderDojo as an 11-year-old, to landing a Software Engineering apprenticeship at Google.
Cian (20) vividly remembers the first time he heard about CoderDojo as a shy 11-year-old: he initially told his dad he felt too nervous to attend. What Cian couldn’t have known back then was that attending CoderDojo would set him on an exciting journey of creative digital making and finding life-long friends.
Right from the beginning, the CoderDojo gave Cian space to make friends and develop his coding skills and his curiosity about creating things with technology. He started to attend the Dojo regularly, and before long he had created his own website about the planets in our solar system with basic CSS and HTML.
“I made a website that talked about the planets, and I thought that was the coolest thing ever. In fact, I actually still have that website.”
Cian Martin Bohan
In over 6 years of being part of his CoderDojo community, Cian was able to share his passion for programming with others and grow his confidence.
From meeting like-minded peers and developing apps and websites, to serving as a youth member on the Digital Youth Council, Cian embraced the many experiences that CoderDojo opened up for him. They were all of great benefit when he decided to apply for an apprenticeship at Google.
As someone who didn’t follow the university route of education, Cian’s time at CoderDojo and the mentors he met there had a profound impact on his life and his career path. His CoderDojo mentors always encouraged Cian to learn new skills and follow his interests, and in this way they not only helped him reach his current position at Google, but also instilled in him a steady desire to always keep learning.
The future is limitless for Cian, and we cannot wait to hear what he does next.
Help us celebrate Cian, and inspire other young people to discover coding and digital making as a passion, by liking and sharing his story on Twitter, LinkedIn, and Facebook.
The post Celebrating the community: Cian appeared first on Raspberry Pi.
On the occasion of Black History Month UK, we speak to Joe Arday, Computer Science teacher at Woodbridge High School in Essex, UK, about his experiences in computing education, his thoughts about underrepresentation of Black students in the subject, and his ideas about what needs to be done to engage more Black students.
For me personally it’s an opportunity to celebrate our culture, but my view is it shouldn’t be a month — it should be celebrated every day. I am of Ghanaian descent, so Black History Month is an opportunity to share my culture in my school and my community. Black History Month is also an opportunity to educate yourself about what happened to the generations before you. For example, my parents lived through the Brixton riots. I was born in 1984, and I got to secondary school before I heard about the Brixton riots from a teacher. But my mother made sure that, during Black History Month, we went to a lot of extracurricular activities to learn about our culture.
For me it’s about embracing the culture I come from, being proud to be Black, and sharing that culture with the next generation, including my two kids, who are of mixed heritage. They need to know where they come from, and know their two cultures.
So I was a tech professional in the finance sector, and I was made redundant when the 2008 recession hit. I did a couple of consulting jobs, but I thought to myself, “I love tech, but in five years from now, do I really want to be going from job to job? There must be something else I can do.”
At that time there was a huge drive to recruit more teachers to teach what was called ICT back then and is now Computing. As a result, I started my career as a teacher in 2010. As a former software consultant, I had useful skills for teaching ICT. When Computing was introduced instead, I was fortunate to be at a school that could bring in external CPD (continued professional development) providers to teach us about programming and build our understanding and skills to deliver the new curriculum. I also did a lot of self-study and spoke to lots of teachers at other schools about how to teach the subject.
Not really — I had to seek them out. In my environment, there are very few Black teachers, and I was often the only Black Computer Science teacher. A parent once said to me, “I hope you’re not planning to leave, because my son needs a role model in Computer Science.” And I understood exactly what she meant by that, but I’m not even a role model, I’m just someone who’s contributing to society the best way I can. I just want to pave the way for the next generation, including my children.
My current school is supporting me to lead all the STEM engagement for students, and in that role, some of the things I do are running a STEM club that focuses a lot on computing, and running new programmes to encourage girls into tech roles. I’ve also become a CAS Master Teacher and been part of a careers panel at Queen Mary University London about the tech sector, for hundreds of school students from across London. And I was selected by the National Centre for Computing Education as one of their facilitators in the Computer Science Accelerator CPD programme.
But there’s been a lack of leadership opportunities for me in schools. I’ve applied for middle-leadership roles and have been told my face doesn’t fit in an interview in a previous school. And I’m just as skilled and experienced as other candidates: I’ve been acting Head of Department, acting Head of Year — what more do I need to do? But I’ve not had access to middle-leadership roles. I’ve been told I’m an average teacher, but then I’ve been put onto dealing with “difficult” students if they’re Black, because a few of my previous schools have told me that I was “good at dealing with behaviour”. So that tells you about the role I was pigeonholed into.
It is very important for Black students to have role models, and to have a curriculum that reflects them.
Joe Arday
I’ve never worked for a Black Headteacher, and the proportion of Black teachers in senior leadership positions is very low, only 1%. So I am considering moving into a different area of computing education, such as edtech or academia, because in schools I don’t have the opportunities to progress because of my ethnicity.
I think it is, that’s why the number of Black teachers is so low. And as a Black student of Computer Science considering a teaching role, I would look around my school and think, if I go into teaching, where are the opportunities going to come from?
There’s a lack of role models across the board: in schools, but also in tech leadership roles, CEOs and company directors. And the interest of Black students isn’t fostered early on, in Year 8, Year 9 (ages 12–14). If they don’t have a teacher who is able to take them to career fairs or to tech companies, they’re not going to get exposure, they’re not going to think, “Oh, I can see myself doing that.” So unless they have a lot of interest already, they’re not going to pick Computer Science when it comes to choosing their GCSEs, because it doesn’t look like it’s for them.
But we need diverse people in computing and STEM, especially girls. As the father of a boy and a girl of mixed heritage, that’s very important to me. Some schools I’ve worked in, they pushed computer science into the background, and it’s such a shame. They don’t have the money or the time for their teachers to do the CPD to teach it properly. And if attitudes at the top are negative, that’s going to filter down. But even if students don’t go into the tech industry, they still need digital skills to go into any number of sectors. Every young person needs them.
It is very important for Black students to have role models, and to have a curriculum that reflects them. Students need to see themselves in their lessons and not feel ignored by what is being taught. I was very fortunate to be selected for the working group for the Raspberry Pi Foundation’s culturally relevant teaching guidelines, and I’m currently running some CPD for teachers around this. I bet in the future Ofsted will look at how diverse the curriculum of schools is.
I think tech organisations need to work with schools and offer work experience placements. When I was a student, 20 years ago, I went on a placement, and that set me on the right path. Nowadays, many students don’t do work experience, they are school leavers before they do an internship. So why do so many schools and organisations not help 14- or 15-year-olds spend a week or two doing a placement and learning some real-life skills?
And I think it’s very important for teachers to be able to keep up to date with the latest technologies so they can support their students with what they need to know when they start their own careers, and can be convincing doing it. I encourage my GCSE Computer Science students to learn about things like cloud computing and cybersecurity, about the newest types of technologies that are being used in the tech sector now. That way they’re preparing themselves. And if I was a Headteacher, I would help my students gain professional certifications that they can use when they apply for jobs.
Teachers could run a STEM or computing club with a Black History Month theme to get Black students interested — and it doesn’t have to stop at Black History Month. And you can make computing cross-curricular, so there could be a project with all teachers, where each one runs a lesson that involves a bit of coding, so that all students can see that computing really is for everyone.
Because of my role working for the NCCE, I always encourage teachers to join the NCCE’s Computer Science Accelerator programme and to retrain to teach Computer Science. It’s a beautiful subject, all you need to do is give it a chance.
Thank you, Joe, for sharing your thoughts with us!
Joe was part of the group of teachers we worked with to create our practical guide on culturally relevant teaching in the computing classroom. You can download it as a free PDF now to help you think about how to reflect all your students in your lessons.
The post Engaging Black students in computing at UK schools — interview with Joe Arday appeared first on Raspberry Pi.
On the occasion of Black History Month UK, we speak to Lynda Chinaka, Senior Lecturer in Computing in Education at the University of Roehampton, about her experiences in computing education, her thoughts about underrepresentation of Black students in the subject, and her ideas about what needs to be done to engage more Black students.
Black history is a really important topic, obviously, and I think that, when Black History Month was first introduced, it was very powerful — and it continues to be in certain places. But I think that, for where we are as a society, it’s time to move past talking about Black history for only one month of the year, albeit an important, focused celebration. And certainly that would include integrating Black history and Black figures across subjects in school. That would be a very useful way to celebrate the contributions that Black people have made, and continue to make, to society. Children need to be taught a history in which they are included and valued. Good history is always a matter of different perspectives. Too often in schools, children experience a single perspective.
In terms of my journey, I’ve always been passionate about Computing — formerly ICT. I’ve been a Computing subject lead in schools, moving on into senior management. Beyond my career in schools, I have worked as an ICT consultant and as a Teacher Leader for a London authority. During that time, my interest in Computing/ICT led me to undertake an MA in Computing in Education at King’s College London. This led me to become a teacher trainer in my current role. In some sense, I’m carrying on the work I did with the local authorities, but in a university setting. At the University of Roehampton, I teach computing to BA Primary Education and PGCE students. Training teachers is something that I’m very much interested in. It’s about engaging student teachers, supporting them in developing their understanding of Computing in the primary phases. Students learn about the principles of computing, related learning theories, and how children think and learn. Perhaps more importantly, I am keen to instil a love of the subject and broaden their notions about computing.
In terms of the support I’ve received, I’ve worked in certain schools where Computing was really valued by the Headteacher, which enabled me to promote my vision for the subject. Supportive colleagues made a difference in their willingness take on new initiatives that I presented. I have been fortunate to work in local authorities that have been forward-thinking; one school became a test bed for Computing. So in that sense, schools have supported me. But as a Black person, a Black woman in particular, I would say that I faced barriers throughout my career. And those barriers have been there since childhood. In the Black community, people experience all sorts of things, and prejudice and barriers have been at play in my career.
Prejudice sometimes is very overt. An example I think I can share because it prevented me from getting a job: I went for an interview in a school. It was a very good interview, the Headteacher told me, “It was fantastic, you’re amazing, you’re excellent,” the problem was that there weren’t “enough Black pupils”, so she “didn’t see the need…”. And this is a discussion that was shared with me. Now in 2021 a Headteacher wouldn’t say that, but let’s just wind the clock back 15 years. These are the kinds of experiences that you go through as a Black teacher.
So what happens is, you tend to build up a certain resilience. People’s perceptions and low expectations of me have been a hindrance. This can be debilitating. You get tired of having to go through the same thing, of having to overcome negativity. Yes, I would say this has limited my progress. Obviously, I am speaking about my particular experiences as a Black woman, but I would say that these experiences are shared by many people like me.
But it’s my determination and the investment I’ve made that has resulted in me staying in the field. And a source of support for me is always Black colleagues, they understand the issues that are inherent within the profession.
There need to be more Black teachers, because children need to see themselves represented in schools. As a Black teacher, I know that I have made a difference to Black children in my class who had a Black role model in front of them. When we talk about the poor performance of Black pupils, we need to be careful not to blame them for the failures of the education system. Policy makers, Headteachers, teachers, and practitioners need to be a lot more self-aware and examine the impact of racism in education. People need to examine their own policies and practice, especially people in positions of power.
A lot of collective work needs to be done.
Lynda Chinaka
Some local authorities do better than others, and some Headteachers I’ve worked with have been keen to build a diverse staff team. Black people are not well-represented at all in education. Headteachers need to be more proactive about their staff teams and recruitment. And they need to encourage Black teachers to go for jobs in senior management.
In all settings I taught in, no matter how many students of colour there were, these students would experience something in my classroom that their white counterparts had experienced all their lives: they would leave their home and come to school and be taught by someone who looks like them and perhaps speaks the same language as them. It’s enormously affirming for children to have that experience. And it’s important for all children actually, white children as well. Seeing a Black person teaching in the classroom, in a position of power or influence — it changes their mindset, and that ultimately changes perspectives.
So in terms of that route into Computing, Black students need to see themselves represented.
It’s absolutely vital to teach children about Computing. As adults, they are going to participate in a future that we know very little about, so I think it’s important that they’re taught computer science approaches, problem solving and computational thinking. So children need to be taught to be creators and not simply passive users of technology.
One of the things some of my university students say is, “Oh my goodness, I can’t teach Computing, all the children know much more than me.”, but actually, that’s a little bit of a myth, I think. Children are better at using technologies than solving computing problems. They need to learn a range of computational approaches for solving problems. Computing is a life skill; it is the future. We saw during the pandemic the effects of digital inequity on pupils.
In education, we need to look at the curriculum and how to decolonise it to really engage young people. This also includes looking out for bias and prejudice in the things that are taught. Even when you’re thinking about specific computer science topics. So for example, the traditional example for algorithm design is making a cup of tea. But tea is a universal drink, it originates in China, and as a result of colonialism made its way to India and Kenya. So we drink tea universally, but the method (algorithm) for making tea doesn’t necessarily always include a china tea pot or a tea bag. There are lots of ways to introduce it, thinking about how it’s prepared in different cultures, say Kenya or the Punjab, and using that as a basis for developing children’s algorithmic thinking. This is culturally relevant. It’s about bringing the interests and experiences children have into the classroom.
For children to be engaged in Computing, there needs to be a payoff for them. For example, I’ve seen young people developing their own African emojis. They need to see a point to it! They don’t necessarily have to become computer scientists or software engineers, but Computing should be an avenue that opens for them because they can see it as something to further their own aims, their own causes. Young people are very socially and politically aware. For example, Black communities are very aware of the way that climate change affects the Global South and could use data science to highlight this. Many will have extended family living in these regions that are affected now.
So you don’t compromise on the quality of your teaching, and it require teachers to be more reflective. There is no quick fix. For example, you can’t just insert African masks into a lesson without exploring their meaning in real depth within the culture they originate from.
So in your Computing or Computer Science lessons, you need to include topics young people are interested in: climate change, discrimination, algorithms and algorithmic bias in software, surveillance and facial recognition. Social justice topics are close to their hearts. You can get them interested in AI and data science by talking about the off-the-shelf datasets that Big Tech uses, and about what impact these have in terms of surveillance and on minority communities specifically.
‘Culturally relevant’ is easier to sit with. ‘Decolonising the curriculum’ provokes a reaction, but it’s really about teaching children about histories and perspectives on curricula that affect us all. We need to move towards a curriculum that is fit for purpose where children are taught different perspectives and truth that they recognise. Even if you’re in a school without any Black children at all, the curriculum still needs to be decolonised so that children can actually understand and benefit from the many ways that topics, events, subjects may be taught.
When we think about learning in terms of being culturally relevant and responsive, this is about harnessing children’s heritage, experiences, and viewpoints to engage learners such that the curriculum is meaningful and includes them. The goal here is to promote long-term and consistent engagement with Computing.
Diversity initiatives are a good step, but we need to give it time.
The selection process for subjects at GCSE can sometimes affect the uptake of computing. Then there are individual attitudes and experiences of pupils. It has been documented that Black and Asian students have often been in the minority and experience marginalisation, particularly noted in the case of female students in GCSE Computer Science.
ITE (Initial Teacher Education) providers need to consider their partnerships with schools and support schools to be more inclusive. We need more Black teachers, as I said. We also need to democratise pathways for young people getting into computing and STEM careers. Applying to university is one way — there should be others.
Schools could also develop partnerships with organisations that have their roots in the Black community. Research has also highlighted discriminatory practices in careers advice, and in the application and interview processes of Russell Group universities. These need to be addressed.
There are too few Black academics at universities. This can have an impact on student choice and decisions about whether to attend an institution or not. Institutions may seem unwelcoming or unsympathetic. Higher education institutions need to eliminate bias through feedback and measuring course take-up.
Outside the field of education, tech companies could offer summer schemes, short programmes to stimulate interest amongst young Black people. Really, the people in leadership positions, all the people with the power, need to be proactive.
A lot of collective work needs to be done. It’s a whole pipeline, and everybody needs to play a part.
You can present children with Black pioneers in computing and tech. They can show Black children how to achieve their goals in life through computing. For example, create podcasts or make lists with various organisations that use data science to further specific causes.
It’s not a one-off, one teacher thing, it’s a project for the whole school.
Lynda Chinaka
Also, it’s not a one-off, one teacher thing, it’s project for the whole school. You need to build it into a whole curriculum map, do all the things you do to build a new curriculum map: get every teacher to contribute, so they take it on, own it, research it, make those links to the national curriculum so it’s relevant. Looking at it in isolation it’s a problem, but it’s a whole school approach that starts as a working group. And it’s senior management that sets the tone, and they really need to be proactive, but you can start by starting a working group. It won’t be implemented overnight. A bit like introducing a school uniform. Do it slowly, have a pilot year group. Get parents in, have a coffee evening, get school governors on board. It’s a whole staff team effort.
People need to recognise the size of the problem and not be discouraged by the fact that things haven’t happened overnight. But people who are in a position of influence need to start by having those conversations, because that’s the only way that change can happen, quite frankly.
Lynda, thank you for sharing your insights with us!
Lynda was one of the advisors in the group we worked with to create our recently published, practical guide on culturally relevant teaching. You can download it as a free PDF now. We hope it will help you kickstart conversations in your setting.
The post Engaging Black students in computing at UK schools — interview with Lynda Chinaka appeared first on Raspberry Pi.
Baltic is a handsome 1962 vintage tugboat that was built in Norway, where she operated until the 1980s. She’s now in English waters, having been registered in Southampton once renovations were complete. After some initial hull restoration work in France she sailed to the western Ligurian coast in Italy, where it took about five years to complete the work. The boat’s original exterior was restored, while the inside was fully refurbished to the standard of a luxury yacht.
Ulderico Arcidiaco, who coordinated the digital side of Baltic’s makeover, is the CEO of Sfera Labs, so naturally he turned to Raspberry Pi Compute Module 3+ in the guise of Sfera’s Strato Pi CM Duo for the new digital captain of the vessel.
Strato Pi CM Duo is an industrial server comprising a Raspberry Pi Compute Module 3+ inside a DIN-rail case with a slew of additional features. The MagPi magazine took a good look at them when they launched.
The Strato Pi units are the four with red front panels in the cabinet pictured below. There are four other Raspberry Pi Compute Modules elsewhere onboard. Two are identical to the Strato Pi CM Duos in this photo; another is inside an Iono Pi Max; and there’s a Compute Module 4 inside an Exo Sense Pi down in the galley.
Baltic now has fully integrated control of all core and supplementary functions, from power distribution to tanks and pump control, navigation, alarms, fire, lighting, stabilisers, chargers, inverters, battery banks, and video. All powered by Raspberry Pi.
Ulderico says:
“When it was built sixty years ago, not even the wildest science fiction visionary could have imagined she would one day be fully computer controlled, and not by expensive dedicated computer hardware, but by a tiny and inexpensive device that any kid can easily buy and play with to have fun learning.
And, if there is some old-fashioned patriotism in things, the Raspberry Pi on board will surely like the idea of being back under their home British Flag.”
The post Raspberry Pi helped restore this boat to former glory appeared first on Raspberry Pi.
So far in our series of community stories, we’ve collaborated with young people from the UK, India, and Romania who are getting creative with technology to change the world around them.
Our next community story comes from a highly regarded community member who has been connecting young people with opportunities to learn and create with technology throughout her career. A US-based educator with over twenty years of experience, Yolanda Payne shares our mission to put computing and digital making into the hands of people all over the world.
“The biggest reason I’m so invested in technology is because people invested in me.”
Yolanda Payne
Yolanda Payne is an educator you might recognise from our online courses. Based in Atlanta, Georgia in the USA, she’s passionate about making technology accessible to all and helping young people become technology creators.
Yolanda says, “The biggest reason I’m so invested in technology is because people invested in me. They saw something that I was good at, showed me opportunities, and so in turn, that was my philosophy in teaching.”
Yolanda got her first computer at a young age and was hooked instantly: it opened up many new opportunities and led her to choosing a career in education. She says, “The computer gives me the tools to be an artist, it gives me the tools to create things, and if it does that for me, then just imagine what it will do for kids!”
“If you give a teacher a Raspberry Pi and show them these resources, they’re going to be hooked.”
Yolanda Payne
Yolanda has spent her entire professional life dedicated to education. She gained a bachelor’s degree in Elementary Education from Mississippi University for Women; a master’s degree in Instructional Technology from Mississippi State University; and Educational Specialist degrees from the University of Florida and the University of Georgia in Curriculum and Instruction, and in Language and Literacy.
Throughout her twenty-one years as a classroom teacher and her time running Code Clubs, Yolanda found joy in supporting students who have multiple challenges or complex needs, and in seeing them thrive in the subject of computer science. Yolanda points out, “I worked with both students that were considered to be in special education and students that were gifted. And one of the biggest things that I saw that I don’t think people realise, especially about students in special education: they are used to solving problems. […] You’d be very surprised at how real-life problem-solving skills flow very easily into computer science.”
Yolanda now works as a Research Associate at the Georgia Institute of Technology. We are tremendously thankful for her contributions as an educator and an advocate for technology and young people.
Please join us in celebrating her story by sharing it on Twitter, LinkedIn, and Facebook!
The post Celebrating the community: Yolanda appeared first on Raspberry Pi.
Today we bring you the fourth film in our series of inspirational community stories! Incredible young people from the community have collaborated with us to create these videos, where they tell their tech stories in their own words.
Watch the new film to meet a “mischievous” tech creator who is helping other young people in his community to use technology to bring their ideas to life.
Toshan’s story takes place in his hometown of Bangalore, India, where his love for electronics and computing sent him on a journey of tech discovery!
Toshan (16) first encountered coding aged 12, thanks to his computing teacher Miss Sonya. Describing his teacher, he says: “The unique thing is, she just doesn’t stop where the syllabus ends.” The world of digital making and Raspberry Pi computers that Miss Sonya introduced him to offered Toshan “limitless opportunities”, and he felt inspired to throw himself into learning.
“If we help people with their ideas, they might bring something new into the world.”
Toshan
Having found help in his local community and the online Raspberry Pi Foundation community that enabled him to start his tech journey, Toshan decided to pass on his skills: he set up a CoderDojo for other young people in Bangalore when he was 14. Toshan says, “I wanted to give something back.” Mentoring others as they learn coding and digital making helped his confidence grow. Toshan loves supporting the learners at his Dojo with problem-solving because “if we help people with their ideas, they might bring something new into the world.”
Supported by his mum and dad, Toshan’s commitment to helping others create with technology is leading him to extend his community beyond the city he calls home. Through his YouTube channel, he reaches people outside of Bangalore, and he has connected with a worldwide community of like-minded young tech creators by taking part in Coolest Projects online 2020 with an automated hand sanitiser he built.
Toshan’s enthusiasm and love for tech are already motivating him to empower others, and he has only just begun! We are delighted to be a part of his journey and can’t wait to see what he does next.
Help us celebrate Toshan by liking and sharing his story on Twitter, Linkedin, or Facebook!
The post Celebrating the community: Toshan appeared first on Raspberry Pi.
A whole lot of super free hands-on activities are happening at the Raspberry Pi Store this summer.
We have teamed up with the Centre for Computing History to create an interactive learning space that’s accessible to all ages and abilities. Best of all, everything is free. It’s all happening in a big space new space we’ve borrowed a few doors down from the Raspberry Pi Store in the Grand Arcade in Cambridge, UK.
Everyone aged seven to 107 can get hands-on and creative with our free beginner-friendly workshops. You can make games with Scratch on Raspberry Pi, learn simple electronics for beginners, or get hands-on with the Raspberry Pi camera and Python programming.
If you don’t know anything about coding, don’t worry: there are friendly people on hand to help you learn.
The workshops take place every Monday, Wednesday and Friday until 3 September. Pre-booking is highly advisable. If the one you want is fully booked, it’s well worth dropping by if you’re in the neighbourhood, because spaces often become available at the last minute. And if you book and find you can no longer come along, please do make sure you cancel, because there will be lots of people who would love to take your space!
Book your place at one of our workshops.
Come and celebrate thirty years of the World Wide Web and see how things have changed over the last three decades.
This interactive exhibition celebrates the years since Tim Berners-Lee changed the world forever by publishing the very first website at CERN in 1991. You can trace the footsteps of the early web, and have a go on some original hardware.
Here are some of the things you can do:
While we would love to have a Raspberry Pi store in every town in every country all over the world (cackles maniacally), we are sticking with just the one in our hometown for now. But we make lots of cool stuff you can access online to relieve the FOMO.
The Raspberry Pi Foundation’s livestreamed Digital Making at Home videos are all still available for young people to watch and learn along with. You can chat, code together, hear from cool people, and see amazing digital making projects from kids who love making with technology.
There are also more than thirty Raspberry Pi courses available for free on FutureLearn. There’s something for every type of user and level of learner, from coders looking to move from Scratch to Python programming, to people looking to start up their own CoderDojo. Plus tons of materials for teachers sharing practical resources for the classroom.
If you like to tinker away in your own time, there are loads of books for all abilities available from the Raspberry Pi Press online store. The Official Raspberry Pi Beginner’s Guide comes in five languages. Game designers can Code the Classics. And fashion-forward makers can create Wearable Tech Projects.
The post Summer at the Raspberry Pi Store with The Centre for Computing History appeared first on Raspberry Pi.
A whole lot of super free hands-on activities are happening at the Raspberry Pi Store this summer.
We have teamed up with the Centre for Computing History to create an interactive learning space that’s accessible to all ages and abilities. Best of all, everything is free. It’s all happening in a big space new space we’ve borrowed a few doors down from the Raspberry Pi Store in the Grand Arcade in Cambridge, UK.
Everyone aged seven to 107 can get hands-on and creative with our free beginner-friendly workshops. You can make games with Scratch on Raspberry Pi, learn simple electronics for beginners, or get hands-on with the Raspberry Pi camera and Python programming.
If you don’t know anything about coding, don’t worry: there are friendly people on hand to help you learn.
The workshops take place every Monday, Wednesday and Friday until 3 September. Pre-booking is highly advisable. If the one you want is fully booked, it’s well worth dropping by if you’re in the neighbourhood, because spaces often become available at the last minute. And if you book and find you can no longer come along, please do make sure you cancel, because there will be lots of people who would love to take your space!
Book your place at one of our workshops.
Come and celebrate thirty years of the World Wide Web and see how things have changed over the last three decades.
This interactive exhibition celebrates the years since Tim Berners-Lee changed the world forever by publishing the very first website at CERN in 1991. You can trace the footsteps of the early web, and have a go on some original hardware.
Here are some of the things you can do:
While we would love to have a Raspberry Pi store in every town in every country all over the world (cackles maniacally), we are sticking with just the one in our hometown for now. But we make lots of cool stuff you can access online to relieve the FOMO.
The Raspberry Pi Foundation’s livestreamed Digital Making at Home videos are all still available for young people to watch and learn along with. You can chat, code together, hear from cool people, and see amazing digital making projects from kids who love making with technology.
There are also more than thirty Raspberry Pi courses available for free on FutureLearn. There’s something for every type of user and level of learner, from coders looking to move from Scratch to Python programming, to people looking to start up their own CoderDojo. Plus tons of materials for teachers sharing practical resources for the classroom.
If you like to tinker away in your own time, there are loads of books for all abilities available from the Raspberry Pi Press online store. The Official Raspberry Pi Beginner’s Guide comes in five languages. Game designers can Code the Classics. And fashion-forward makers can create Wearable Tech Projects.
The post Summer at the Raspberry Pi Store appeared first on Raspberry Pi.
We love seeing all the wonderful things people are doing in the community — that’s why we’re sharing our new series of short films documenting some of the incredible journeys of community members in all corners of the globe!
Today we bring you the third wonderful film in this series of community stories. For the series, we’ve been super lucky to collaborate with digital makers all over the world, and today’s story exemplifies how truly global the community is.
Watch our video to find out how this ambitious young digital maker’s passion for creating with technology has propelled her around the world!
Laura’s journey began in her hometown of Timișoara, Romania. In Laura’s words: “I joined my local CoderDojo, and it changed my life.”
Laura (17) started attending her CoderDojo coding club four years ago because she loves problem-solving and wanted to learn more about how digital technology works. Her biggest discovery at CoderDojo, however, was the other young people there, who were just as passionate about technology as she was. Laura says, “I had the opportunity to meet people with the same interests. Everybody was working, exchanging ideas, having fun!”
Laura and the new friends she made worked together to solve problems in their local community: they built an autonomous waste-collecting robot and a drone-mounted air pollution monitor.
“I want to bring a change to the world.”
Laura
But Laura’s tech journey did not stop there. In 2017, she travelled to Dublin to present her latest project — a Raspberry Pi-powered, mind-controlled robot! — at Coolest Projects International, which introduced her to a global community of digital makers. And since then she’s even taken part in a robotics competition at MIT!
Working alongside like-minded peers and connecting with a global community of young tech creators has had a profound impact on Laura. She says, “I never imagined that I would have so many opportunities to travel, expand my horizons, and meet so many people. It’s thanks to CoderDojo and Coolest Projects that I’ve been able to build an amazing network of friends, and together we’re ready to take on the world.”
We are so excited to see what Laura will do next. Help us celebrate Laura by liking and sharing her story on Twitter, Linkedin, or Facebook!
The post Celebrating the community: Laura appeared first on Raspberry Pi.
I am delighted to announce the creation of the Raspberry Pi Computing Education Research Centre at the University of Cambridge.
With computers and digital technologies increasingly shaping all of our lives, it’s more important than ever that every young person, whatever their background or circumstances, has meaningful opportunities to learn about how computers work and how to create with them. That’s our mission at the Raspberry Pi Foundation.
Compared to subjects like mathematics, computing is a relatively new field and, while there are enduring principles and concepts, it’s a subject that’s changing all the time as the pace of innovation accelerates. If we’re honest, we just don’t know enough about what works in computing education, and there isn’t nearly enough investment in high-quality research.
That’s why research and evidence has always been a priority for the Raspberry Pi Foundation, from rigorously evaluating our own programmes and running structured experiments to test what works in areas like gender balance in computing, to providing a platform for the world’s best computing education researchers to share their findings through our seminar series.
Through our research activities we hope to make a contribution to the field of computing education and, as an operating foundation working with tens of thousands of educators and millions of learners every year, we’re uniquely well-placed to translate that research into practice. You can read more about our research work here.
The new Research Centre is a joint initiative between the University of Cambridge and the Raspberry Pi Foundation, and builds on our longstanding partnership with the Department of Computer Science and Technology. That partnership goes all the way back to 2008, to the creation of the Raspberry Pi Foundation and the invention of the Raspberry Pi computer. More recently, we have collaborated on Isaac Computer Science, an online platform that is already being used by more than 2500 teachers and 36,000 students of A level Computer Science in England, and that we will shortly expand to cover GCSE content.
Through the Raspberry Pi Computing Education Research Centre, we want to increase understanding of what works in teaching and learning computing, with a particular focus on young people who come from backgrounds that are traditionally underrepresented in the field of computing or who experience educational disadvantage.
The Research Centre will combine expertise from both institutions, undertaking rigorous original research and working directly with teachers and other educators to translate that research into practice and effect positive change in young peoples’ lives.
The scope will be computing education — the teaching and learning of computing, computer science, digital making, and wider digital skills — for school-aged young people in primary and secondary education, colleges, and non-formal settings.
We’re starting with three broad themes:
While we’re based in the UK and expect to run a number of research projects here, we are eager to establish collaborations with universities and researchers in other countries, including the USA and India.
We’re really excited about this next chapter in our research work, and doubly excited to be working with the brilliant team at the Department of Computer Science and Technology.
If you’d like to find out more or get involved in supporting the new Computing Education Research Centre, please subscribe to our research newsletter or email research@raspberrypi.org.
You can also join our free monthly research seminars.
The post Introducing the Raspberry Pi Computing Education Research Centre appeared first on Raspberry Pi.
We’re excited to share another incredible story from the community — the second in our new series of inspirational short films that celebrate young tech creators across the world.
These stories showcase some of the wonderful things that young people are empowered to do when they learn how to create with technology. We hope that they will inspire many more young people to get creative with technology too!
This time, you will meet an accomplished, young community member who is on a quest to encourage more girls to join her and get into digital making.
For as long as she can remember, Avye (13) has enjoyed creating things. It was at her local CoderDojo that seven-year-old Avye was introduced to the world of robotics. Avye’s second-ever robot, the Raspberry Pi–powered Voice O’Tronik Bot, went on to win the Hardware category at our Coolest Projects UK event in 2018.
Coding and digital making have become an integral part of Avye’s life, and she wants to help other girls discover these skills too. She says, “I believe that it’s important for girls and women to see and be aware of ordinary girls and women doing cool things in the STEM world.” Avye started running her own workshops for girls in their community and in 2018 founded Girls Into Coding. She has now teamed up with her mum Helene, who is committed to helping to drive the Girls Into Coding mission forwards.
I want to get other girls like me interested in tech.
Avye
Avye has received multiple awards to celebrate her achievements, including the Princess Diana Award and Legacy Award in 2019. Most recently, in 2020, Avye won the TechWomen100 Award, the Women in Tech’s Aspiring Teen Award, and the FDM Everywoman in Tech Award!
We cannot wait to see what the future has in store for her. Help us celebrate Avye and inspire others by liking and sharing her story on Twitter, Linkedin, or Facebook!
The post Celebrating the community: Avye appeared first on Raspberry Pi.
Today we are launching an exciting series of impact stories from the community, to shine a spotlight on some of the young people who are learning and creating with technology through our educational initiatives.
These stories get to the heart of our mission: to put the power of computing and digital making into the hands of people all over the world.
Designed in close collaboration with families across the world, our new series of short inspirational films showcases some of the wonderful things that young people are empowered to do when they learn to use technology to address the issues that matter to them.
We are incredibly proud to be a part of these young people’s journeys — and to see the positive impact of engaging with our free programmes, coding clubs, and resources. We can’t wait to share their unique experiences and achievements with you as we roll out the series over the next few months.
And we invite you to celebrate these young people by liking and sharing their stories on social media!
The first story takes you to a place not far from our home: London, UK.
Zaahra (12) and Eesa (8) are a sister and brother coding team and live in East London. For the last four years they’ve been learning about computing and digital making by attending regular sessions at their local Code Club. Zaahra and Eesa love working as a team and using technology to solve problems around them. When they found it difficult to communicate with their grandparents in their first language, Sylheti, the siblings decided to code a language learning app called ‘Easy Sylheti’. Eesa says, “We wanted to create something that was helpful to us, but also to our family and the community.”
When Zaahra and Eesa decided to take part in the Coolest Projects online tech showcase with their app, they never expected that it would be picked as a favourite by Coolest Projects special judge Eben Upton, CEO and co-inventor of Raspberry Pi!
“I’ve discovered that I’m capable of a lot more than I thought.”
Zaahra
Describing the effect of learning to create with technology and seeing the success of their app, Zaahra declares, “I’ve discovered that I’m capable of a lot more than I thought.” And she’s using her new-found confidence to continue helping her community: Zaahra has recently taken up a role as youth member on the Newham Youth Empowerment Fund Panel.
Help us celebrate Zaahra and Eesa by liking and sharing their story on Twitter, Linkedin, or Facebook!
The post Celebrating the community: Zaahra and Eesa appeared first on Raspberry Pi.
In the latest issue of The MagPi Magazine, out today, Rob Zwetsloot talks to teacher Chris Regini about the incredible project his students are working on.
When we think of garden automation, we often think of basic measures like checking soil moisture and temperature. The Kay-Berlin Food Computer, named after student creators Noah Kay and Noah Berlin, does a lot more than that. A lot more.
“It is a fully automated growth chamber that can monitor over a dozen atmospheric and root zone variables and post them to an online dashboard for remote viewing,” Chris Regini tells us. He’s supervising both Noahs in this project. “In addition to collecting data, it is capable of adjusting fan speeds based on air temperature and humidity, dosing hydroponic reservoirs with pH adjustment and nutrient solutions via peristaltic pumps, dosing soil with water based on moisture sensor readings, adjusting light spectra and photoperiods, and capturing real-time and time-lapsed footage using a [Raspberry Pi] Camera Module NoIR in both daylight and night-time growth periods.”
Everything can be controlled manually or set to be autonomous. This isn’t just keeping your garden looking nice, this is the future of automated farming.
“The idea originated from the long standing MIT food computer project and lots of open-source collaboration in both the agriculture and Raspberry Pi communities,” Chris explains. “We’ve always had the hopes of creating an automated growing system that could collect long-term data for use in the ISS during space travel or in terrestrial applications where urbanisation or climate concerns required the growth of food indoors.”
With students doing a lot of learning from home in the past year, having such a system accessible online for interaction was important for Chris: “Adding a layer that could keep students engaged in this endeavour during remote learning was the catalyst that truly spurred on our progress.”
This level of control and web accessibility is perfect for Raspberry Pi, which Chris, his students, and his Code Club have been using for years.
“The fact that we had access to the GPIOs for sensors and actuators as well as the ability to capture photo and video was great for our application,” Chris says. “Being able to serve the collected data and images to the web, as well as schedule subroutines via systemd, made it the perfect fit for accessing our project remotely and having it run time-sensitive programs.”
The computer has been in development for a while, but the students working on it have a wide range of skills that have made it possible.
“We have had a dedicated nucleus of students that have spent time learning plant science, electronic circuitry, Python, developing UIs, and creating housings in CAD,” Chris explains. “They all started as complete beginners and have benefited greatly from the amazing tutorials available to them through the Raspberry Pi Foundation website as well as the courses offered on FutureLearn.”
The project is ongoing – although they’re already getting a lot of data that is being used for citizen science.
“The system does a fantastic job collecting data and allowing us to visualise it via our Adafruit IO+ dashboards,” Chris says. “Upgrading our sensors and actuators to more reliable and accurate models has allowed the system to produce research level data that we are currently sharing in a citizen science project called Growing Beyond Earth. It is funded by NASA and is organised through Fairchild Botanical Gardens. We have been guided along the way by industry professionals in the field of hydroponics and have also collaborated with St. Louis-based MARSfarm to upgrade the chamber housing, reflective acrylic panels, and adjustable RGBW LED panel. Linking our project with scientists, engineers, researchers, and entrepreneurs has allowed it to really take off.”
You can grab the brand-new issue right now online from the Raspberry Pi Press store, or via our app on Android or iOS. You can also pick it up from supermarkets and newsagents, but make sure you do so safely while following all your local guidelines. There’s also a free PDF you can download.
The post Kay-Berlin Food Computer | The MagPi #104 appeared first on Raspberry Pi.
Hey everyone, come and see, come and see! Here’s a great new bookazine from the makers of the official Raspberry Pi magazine. We do love the folks at The MagPi. Clever, they are.
If, like us, you’re over 2020 already, dive into the pages of The Official Raspberry Pi Handbook 2021, and pretend it never happened. That will totally work.
To help you get the most of out of your Raspberry Pi computer, this official Handbook features 200 pages of essential information, inspiring projects, practical tutorials, and definitive reviews.
If you’re an absolute beginner, you can learn from the Handbook how to set up your Raspberry Pi and start using it. Then you can move on to the step-by-step tutorials that will teach you how to code and make with your Raspberry Pi.
You’ll also (re)discover the new Raspberry Pi 400 and High Quality Camera, both released this year. And you’ll find out about the top kits and accessories for your projects.
And finally, we’ve also picked out some incredible Raspberry Pi projects made by people in the community to inspire you to get making and coding.
You can buy The Official Raspberry Pi Handbook 2021 now from the Raspberry Pi Press online store, or at the Raspberry Pi store in Cambridge, UK.
Personally, we prefer new book smell and the crackle of physical pages but, if you’re less picky and don’t mind on-screen reading, the lovely folks at The MagPi have a PDF version you can download for free.
The post New book: The Official Raspberry Pi Handbook 2021 appeared first on Raspberry Pi.
A Glitch Storm is an explosive torrent of musical rhythms and sound, all generated from a single line of code. In theory, you can’t do this with a Raspberry Pi running Python – in this month’s new issue, out now, the HackSpace magazine team lovingly acquired a tutorial from The Mag Pi team to throw theory out the window and show you how.
A Glitch Storm is a user-influenceable version of bytebeat music. We love definitions like that here at the Bakery: something you have never heard of is simple a development of something else you have never heard of. Bytebeat music was at the heart of the old Commodore 64 demo scene, a competition to see who could produce the most impressive graphs and music in a very limited number of bytes. This was revived/rediscovered and christened by Viznut, aka Ville-Matias Heikkilä, in 2011. And then JC Ureña of the ‘spherical sound society’ converted the concept into the interactive Glitch Storm.
Most random music generators work on the level of notes; that is, notes are chosen one at a time and then played, like our Fractal Music project in The MagPi #66. However, with bytebeat music, an algorithm generates the actual samples levels that make up the sound. This algorithm performs bitwise operations on a tick variable that increments with each sample. Depending on the algorithm used, this may or may not produce something musically interesting. Often, the samples produced exhibit a fractal structure, which is itself similar on many levels, thus providing both the notes and structure.
With a Glitch Storm, three user-controlled variables – a, b, and c – can be added to this algorithm, allowing the results to be fine-tuned. In the ‘Algorithms’ box, you can see that the bytebeat algorithms simply run; they all repeat after a certain time, but this time can be long, in the order of hours for some. A Glitch Storm algorithm, on the other hand, contains variables that a user can change in real-time while the sample is playing. This exactly what we can do with rotary encoders, without having the algorithm interrupted by checking the state of them all the time.
In order to produce music like this on the Raspberry Pi, we need some extra hardware to generate the sound samples, and also a bunch of rotary encoders to control things. The samples are produced by using a 12-bit A/D converter connected to one of the SPI ports. The schematic of this is shown in Figure 1. The clock rate for the transfer of data to this can be controlled and provides a simple way of controlling, to some extent, the sample rate of the sound. Figure 2 shows the wiring diagram of the five rotary encoders we used.
The hardware comes as two parts: the D/A converter and associated audio components. These are built on a board that hangs off Raspberry Pi’s GPIO pins. Also on this board is a socket that carries the wires to the control box. We used an IDC (insulation displacement connector) to connect between the board and the box, as we wanted the D/A connection wires to be as short as possible because they carry a high frequency signal. We used a pentagonal box just for fun, with a control in each corner, but the box shape is not important here.
The board is built on a 20-row by 24-hole piece of stripboard. Figure 3 and Figure 4 show the physical layout for the front and back of the board. The hole number 5 on row 4 is enlarged to 2.5mm and a new hole is drilled between rows 1 and 2 to accommodate the audio jack socket. A 40-way surface-mount socket connector is soldered to the back of the board, and a 20-way socket is soldered to the front. You could miss this out and wire the 20-way ribbon cable direct to the holes in these positions if you want to economise.
Note: as always, the physical layout diagram shows where the wires go, not necessarily the route they will take. Here, we don’t want wires crossing the 20-way connector, so the upper four wires use 30AWG Kynar wire to pop under the connector and out through a track hole, without soldering, on the other side. When putting the 20-way IDC pin connector on the ribbon cable, make sure the red end connector wire is connected to the pin next to the downward-pointing triangle on the pin connector. Figure 5 shows a photograph of the control box wiring
The live_byte_beat.py listing on GitHub is a minimal program for trying out a bytebeat algorithm. It will play until stopped by pressing CTRL+C. The variable v holds the value of the sample, which is then transferred to the D/A over SPI in two bytes. The format of these two bytes is shown in Figure 6, along with how we have to manipulate v to achieve an 8-bit or 12-bit sample output. Note that all algorithms were designed for an 8-bit sample size, and using 12 bits is a free bonus here: it does sound radically different, and not always in a good way.
The main software for this project is on our GitHub page, and contains 24 Pythonised algorithms. The knobs control the user variables as well as the sample rate and what algorithm to use. You can add extra algorithms, but if you are searching online for them, you will find they are written in C. There are two major differences you need to note when converting from C to Python. The first is the ternary operation which in C is a question mark, and the second is the modulus operator with a percent sign. See the notes that accompany the main code about these.
There are a few reasons why you would not expect this to work on a Raspberry Pi in Python. The most obvious being that of the interruptions made by the operating system, regularly interrupting the flow of output samples. Well, it turns out that this is not as bad as you might fear, and the extra ‘noise’ this causes is at a low level and is masked by the glitchy nature of the sound. As Python is an interpreted language, it is just about fast enough to give an adequate sample rate on a Raspberry Pi 4.
You can now explore the wide range of algorithms for generating a Glitch Storm and interact with the sound. On our GitHub page there’s a list of useful links allowing you to explore what others have done so far. For a sneak preview of the bytebeat type of sound, visit magpi.cc/bytebeatdemo; you can even add your own algorithms here. For interaction, however, there’s no substitute for having your own hardware. The best settings are often found by making small adjustments and listening to the long-term effects – some algorithms surprise you about a minute or two into a sequence by changing dramatically.
HackSpace magazine is out now, available in print from the Raspberry Pi Press online store, your local newsagents, and the Raspberry Pi Store, Cambridge.
You can also download the PDF from the HackSpace magazine website.
Subscribers to HackSpace for 12 months get a free Adafruit Circuit Playground, or can choose from one of our other subscription offers, including this amazing limited-time offer of three issues and a book for only £10!
If you liked this project, it was first featured in The MagPi Magazine. Download the latest issue for free or subscribe here.
The post Rotary encoders: Raise a Glitch Storm | Hackspace 34 appeared first on Raspberry Pi.
We’re pleased to announce that today, the Raspberry Pi Store in Cambridge re-opens its doors. We have taken care to follow government guidelines to ensure a clean and safe environment for our staff and customers.
While we’ve removed all interactive activities, you’ll still be able to experience the versatility of Raspberry Pi via our displays, and our staff will be on hand to talk you through any projects you’d like to know more about.
To make sure everyone can maintain physical distancing, we’re limiting numbers to a maximum of seven customers in the store at a time. We’ve also marked a one-way route around the store to help you shop without squeezing past others.
![]()
![]()
We have trained all our colleagues in the Raspberry Pi Store team in current health and safety measures, and they’ll be working hard to keep all surfaces sanitised while continuing to offer advice and support to our visitors.
Our newly revised opening times align with those of the Grand Arcade shopping centre, and we’re working closely with centre management to continue to follow updated government guidelines.
Everything is in stock. From the new 8GB Raspberry Pi 4 and the 8GB Desktop Kit to the High Quality Camera and its companion book, The Official Raspberry Pi Camera Guide, all our recently released products are in stock and ready to go.
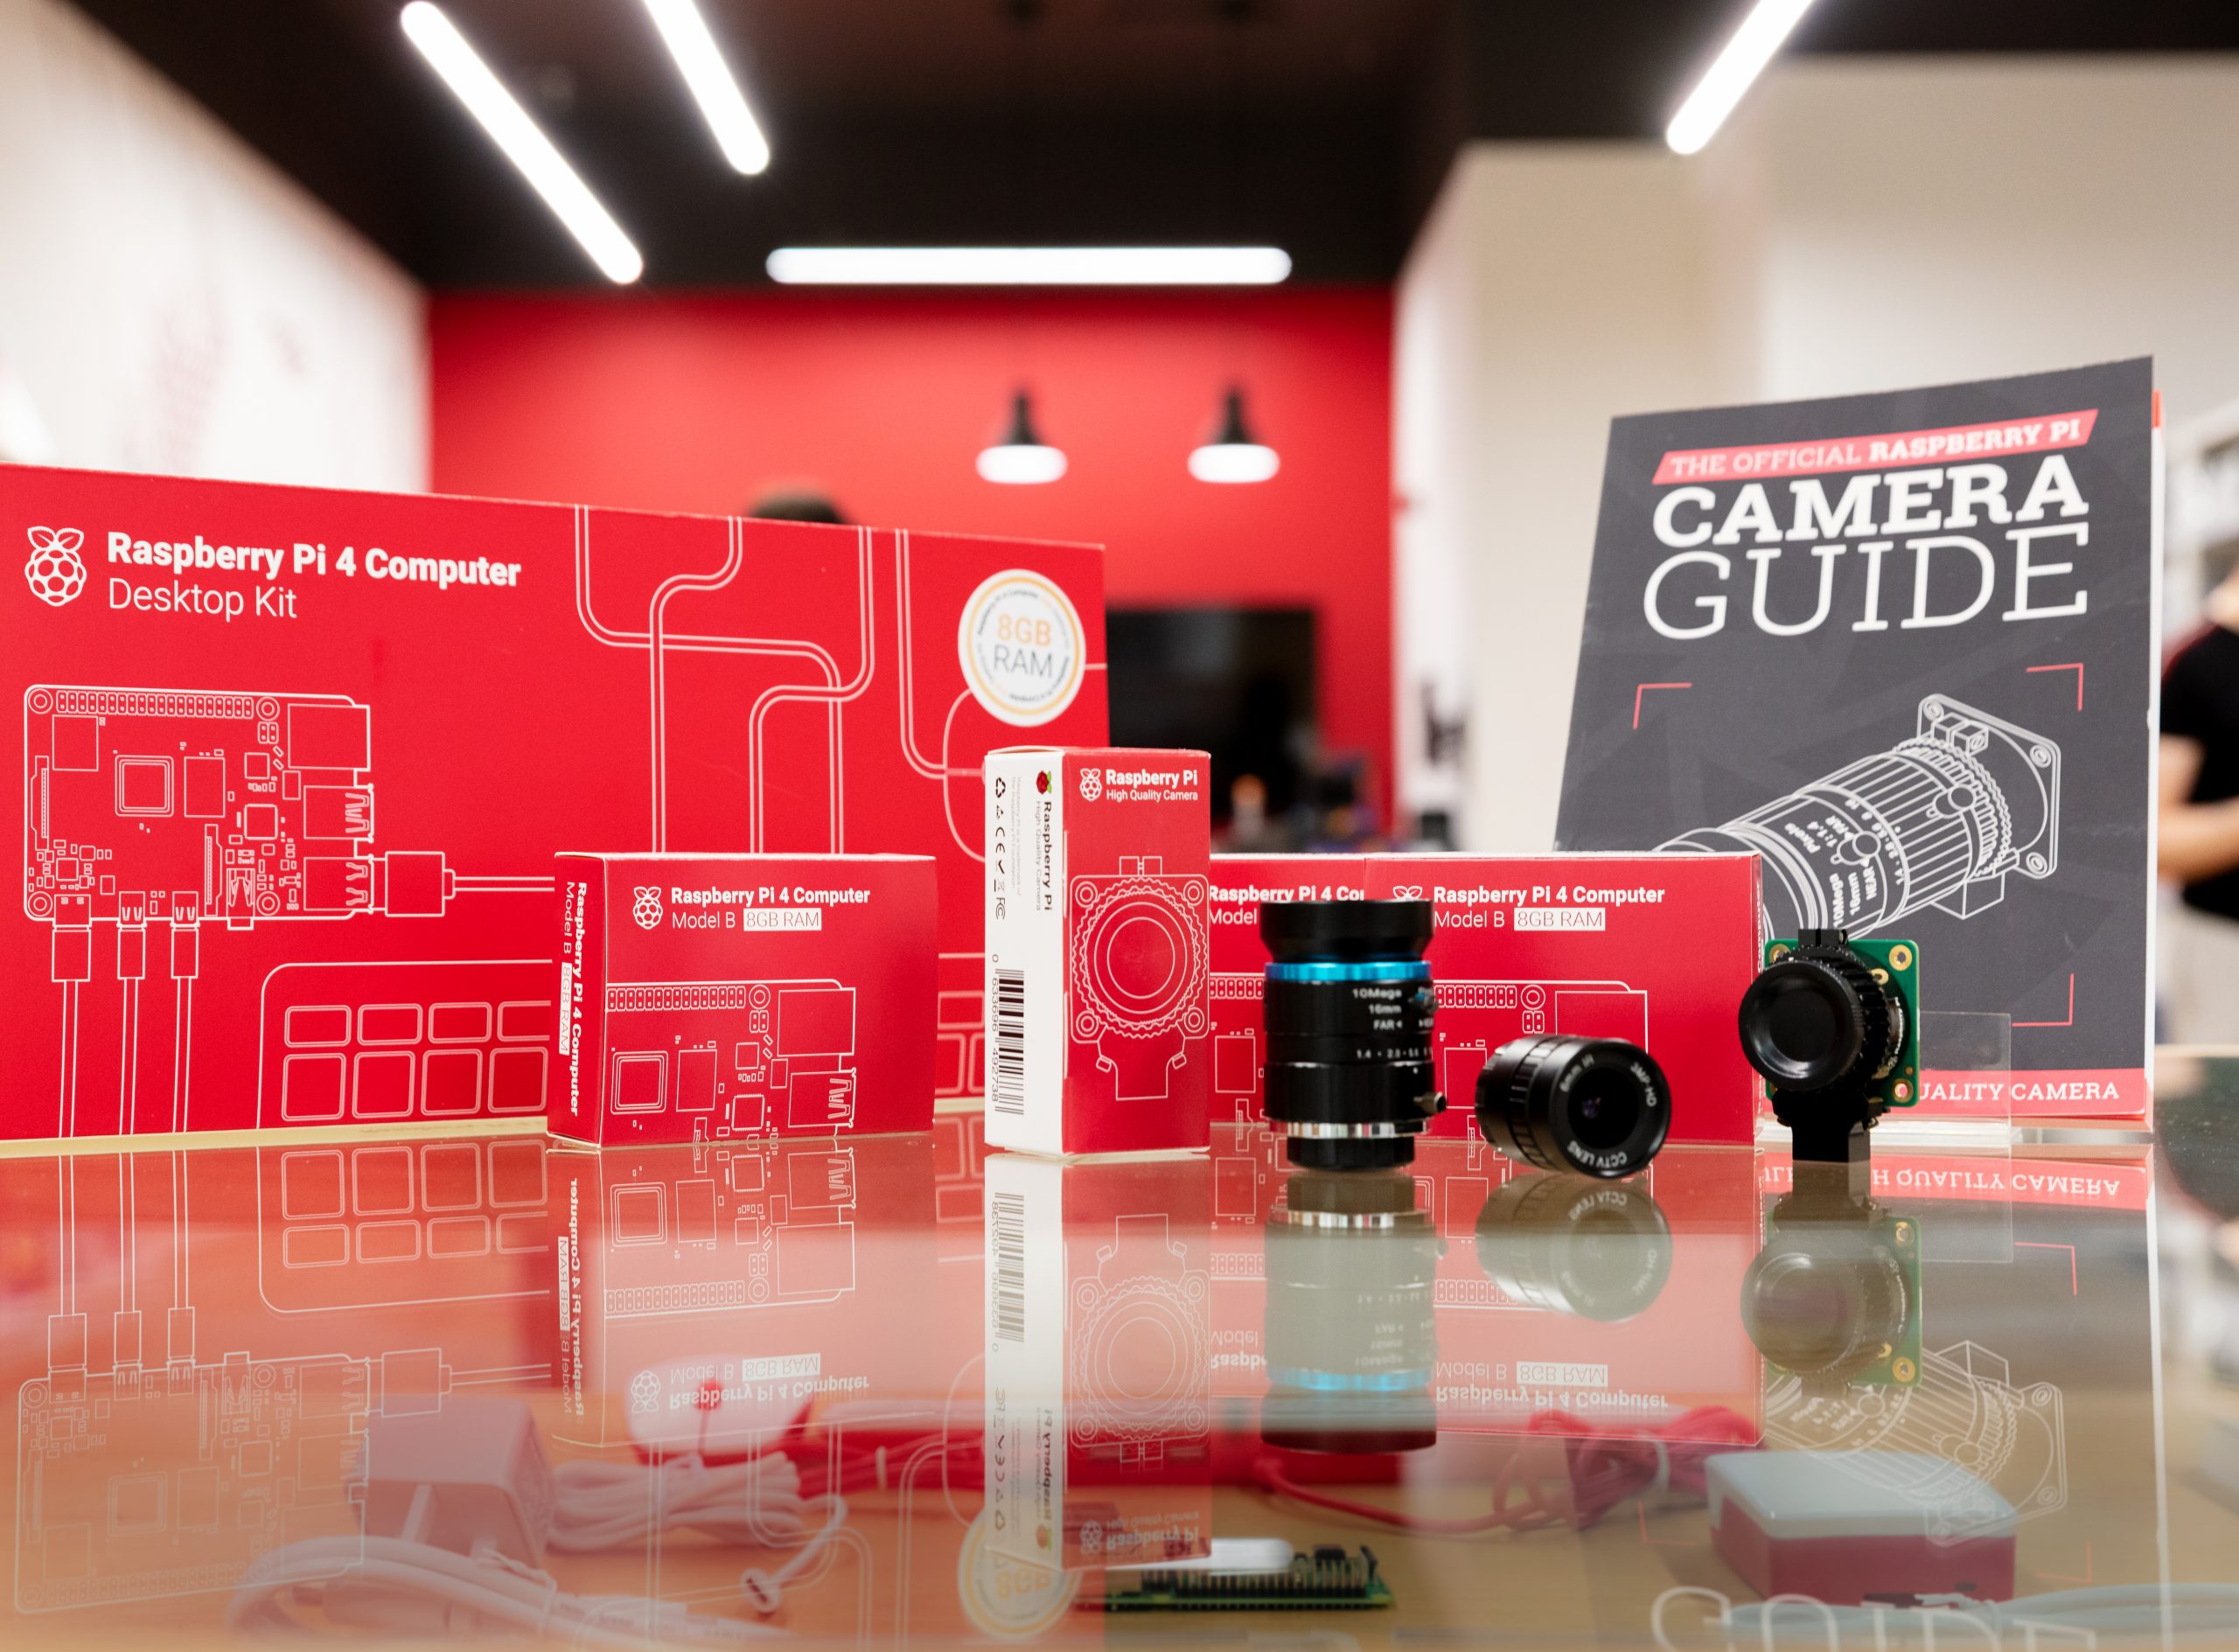
We’re also continuing to stock and sell gift cards, third-party products, and in-store exclusives.
![]()
![]()
If you plan to visit the Raspberry Pi Store, please continue to exercise social distancing by keeping 2m between yourself and others. Please use our free hand sanitiser when you enter the store, and, if you can, wear a face mask to protect both yourself and others.
![]()
![]()
So, if you happen to be in Cambridge, please pop in and say hi… from a distance. And, if you have any further questions, visit the Raspberry Pi Store webpage, where you’ll find our FAQs, directions to the store, and contact details.
The post The Raspberry Pi Store reopens today appeared first on Raspberry Pi.
Enabling two-factor authentication (2FA) to boost security for your important accounts is becoming a lot more common these days. However you might be surprised to learn that you can do the same with your Raspberry Pi. You can enable 2FA on Raspberry Pi, and afterwards you’ll be challenged for a verification code when you access it remotely via Secure Shell (SSH).
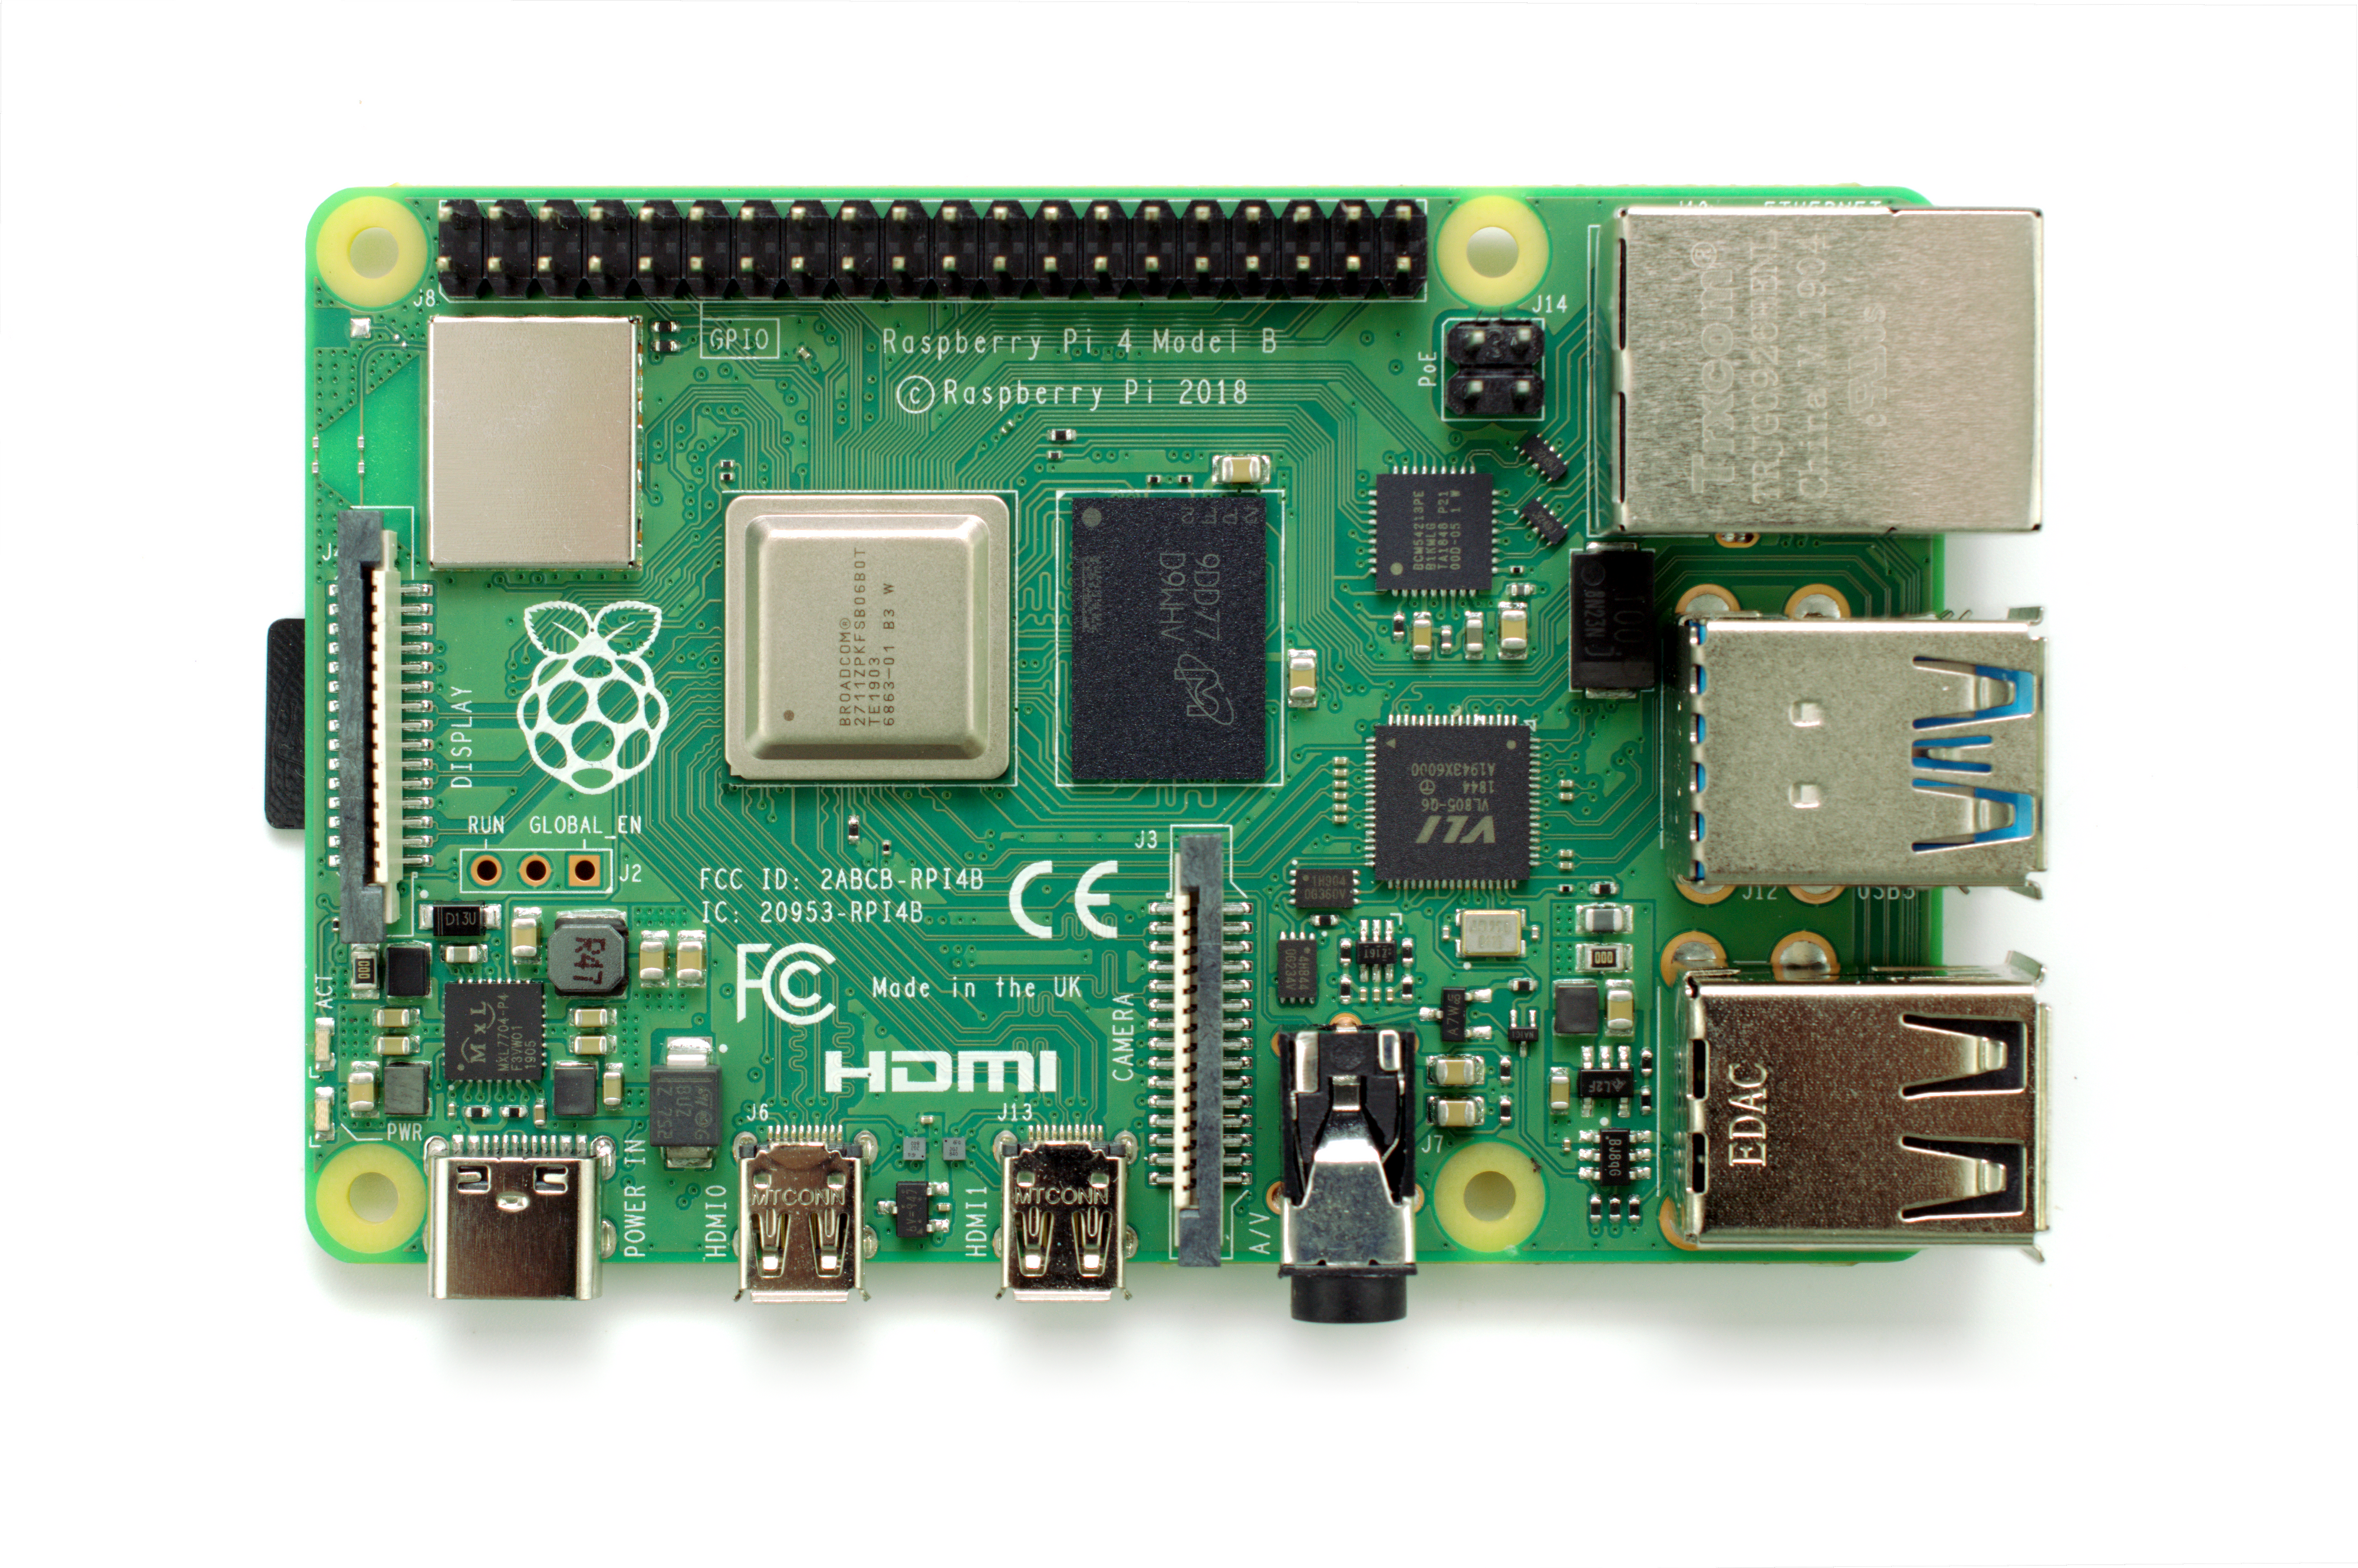
A lot of people use a Raspberry Pi at home as a file, or media, server. This is has become rather common with the launch of Raspberry Pi 4, which has both USB 3 and Gigabit Ethernet. However, when you’re setting up this sort of server you often want to run it “headless”; without a monitor, keyboard, or mouse. This is especially true if you intend tuck your Raspberry Pi away behind your television, or somewhere else out of the way. In any case, it means that you are going to need to enable Secure Shell (SSH) for remote access.
However, it’s also pretty common to set up your server so that you can access your files when you’re away from home, making your Raspberry Pi accessible from the Internet.
Most of us aren’t going to be out of the house much for a while yet, but if you’re taking the time right now to build a file server, you might want to think about adding some extra security. Especially if you intend to make the server accessible from the Internet, you probably want to enable two-factor authentication (2FA) using Time-based One-Time Password (TOTP).
Two-factor authentication is an extra layer of protection. As well as a password, “something you know,” you’ll need another piece of information to log in. This second factor will be based either on “something you have,” like a smart phone, or on “something you are,” like biometric information.
We’re going to go ahead and set up “something you have,” and use your smart phone as the second factor to protect your Raspberry Pi.
The first thing you should do is make sure your Raspberry Pi is up to date with the latest version of Raspbian. If you’re running a relatively recent version of the operating system you can do that from the command line:
$ sudo apt-get update
$ sudo apt-get full-upgrade
If you’re pulling your Raspberry Pi out of a drawer for the first time in a while, though, you might want to go as far as to install a new copy of Raspbian using the new Raspberry Pi Imager, so you know you’re working from a good image.
The Raspbian operating system has the SSH server disabled on boot. However, since we’re intending to run the board without a monitor or keyboard, we need to enable it if we want to be able to SSH into our Raspberry Pi.
The easiest way to enable SSH is from the desktop. Go to the Raspbian menu and select “Preferences > Raspberry Pi Configuration”. Next, select the “Interfaces” tab and click on the radio button to enable SSH, then hit “OK.”
You can also enable it from the command line using systemctl:
$ sudo systemctl enable ssh
$ sudo systemctl start ssh
Alternatively, you can enable SSH using raspi-config, or, if you’re installing the operating system for the first time, you can enable SSH as you burn your SD Card.
Next, we need to tell the SSH daemon to enable “challenge-response” passwords. Go ahead and open the SSH config file:
$ sudo nano /etc/ssh/sshd_config
Enable challenge response by changing ChallengeResponseAuthentication from the default no to yes.
Editing /etc/ssh/ssd_config.
Then restart the SSH daemon:
$ sudo systemctl restart ssh
It’s good idea to open up a terminal on your laptop and make sure you can still SSH into your Raspberry Pi at this point — although you won’t be prompted for a 2FA code quite yet. It’s sensible to check that everything still works at this stage.
The first thing you need to do is download an app to your phone that will generate the TOTP. One of the most commonly used is Google Authenticator. It’s available for Android, iOS, and Blackberry, and there is even an open source version of the app available on GitHub.
Google Authenticator in the App Store.
So go ahead and install Google Authenticator, or another 2FA app like Authy, on your phone. Afterwards, install the Google Authenticator PAM module on your Raspberry Pi:
$ sudo apt install libpam-google-authenticator
Now we have 2FA installed on both our phone, and our Raspberry Pi, we’re ready to get things configured.
You should now run Google Authenticator from the command line — without using sudo — on your Raspberry Pi in order to generate a QR code:
$ google-authenticator
Afterwards you’re probably going to have to resize the Terminal window so that the QR code is rendered correctly. Unfortunately, it’s just slightly wider than the standard 80 characters across.
The QR code generated by google-authenticator. Don’t worry, this isn’t the QR code for my key; I generated one just for this post that I didn’t use.
Don’t move forward quite yet! Before you do anything else you should copy the emergency codes and put them somewhere safe.
These codes will let you access your Raspberry Pi — and turn off 2FA — if you lose your phone. Without them, you won’t be able to SSH into your Raspberry Pi if you lose or break the device you’re using to authenticate.
Next, before we continue with Google Authenticator on the Raspberry Pi, open the Google Authenticator app on your phone and tap the plus sign (+) at the top right, then tap on “Scan barcode.”
Your phone will ask you whether you want to allow the app access to your camera; you should say “Yes.” The camera view will open. Position the barcode squarely in the green box on the screen.
Scanning the QR code with the Google Authenticator app.
As soon as your phone app recognises the QR code it will add your new account, and it will start generating TOTP codes automatically.
The TOTP in Google Authenticator app.
Your phone will generate a new one-time password every thirty seconds. However, this code isn’t going to be all that useful until we finish what we were doing on your Raspberry Pi. Switch back to your terminal window and answer “Y” when asked whether Google Authenticator should update your .google_authenticator file.
Then answer “Y” to disallow multiple uses of the same authentication token, “N” to increasing the time skew window, and “Y” to rate limiting in order to protect against brute-force attacks.
You’re done here. Now all we have to do is enable 2FA.
We’re going to use Linux Pluggable Authentication Modules (PAM), which provides dynamic authentication support for applications and services, to add 2FA to SSH on Raspberry Pi.
Now we need to configure PAM to add 2FA:
$ sudo nano /etc/pam.d/sshd
Add auth required pam_google_authenticator.so to the top of the file. You can do this either above or below the line that says @include common-auth.
Editing /etc/pam.d/sshd.
As I prefer to be prompted for my verification code after entering my password, I’ve added this line after the @include line. If you want to be prompted for the code before entering your password you should add it before the @include line.
Now restart the SSH daemon:
$ sudo systemctl restart ssh
Next, open up a terminal window on your laptop and try and SSH into your Raspberry Pi.
If everything has gone to plan, when you SSH into the Raspberry Pi, you should be prompted for a TOTP after being prompted for your password.
SSH’ing into my Raspberry Pi.
You should go ahead and open Google Authenticator on your phone, and enter the six-digit code when prompted. Then you should be logged into your Raspberry Pi as normal.
You’ll now need your phone, and a TOTP, every time you ssh into, or scp to and from, your Raspberry Pi. But because of that, you’ve just given a huge boost to the security of your device.
Now you have the Google Authenticator app on your phone, you should probably start enabling 2FA for your important services and sites — like Google, Twitter, Amazon, and others — since most bigger sites, and many smaller ones, now support two-factor authentication.
The post Setting up two-factor authentication on your Raspberry Pi appeared first on Raspberry Pi.
On Wednesday, we hosted the first-ever Cambridge Computing Education Research Symposium online. Research in computing education, particularly in school and for young people, is a young field compared to maths and science education, and we do not have much in terms of theoretical foundations. It is not a field that has received a lot of funding, so we cannot yet look to large-scale, longitudinal, empirical studies for evidence. Therefore, further research on how best to teach, learn, and assess computing is desperately needed. We also need to investigate ways of inspiring and motivating all young people in an area which is increasingly important for their future.
![]()
That’s why at the Raspberry Pi Foundationwe have made research a key part of our new strategy, and that’s why we worked with the University of Cambridge to hold this event.
This was to be our first large-scale research event, held jointly with the University of Cambridge Department of Computer Science and Technology. Of course, current circumstances made it necessary for us to turn the symposium from a face-to-face into an online event at short notice.
![]()
An enthusiastic team took on the challenge, and we were delighted with how well the way the day went! You can see what participants shared throughout the day on Twitter.
![]()
Our keynote speaker was Dr Natalie Rusk of MIT and the Scratch Foundation, who shared her passion for digital creativity using Scratch.
![]()
We were excited to see images from early versions of Scratch and how it had developed over the years. Plus, Natalie revealed the cat blocks that were available on 1 April only — I had completely forgotten the day of the symposium was April Fools’ Day! The focus of Natalie’s presentation was on creativity, invention, tinkering, and the development of ideas over time, and she explored case studies of two ‘Scratchers’ who took a very different approach to working in the Scratch community on projects. The talk was well received by all.
![]()
We heard from researchers from a range of institutions on topics under these themes:
Highlights for me were Ethel Tshukudu’s analysis of the way students transfer from one programming language to another, in which she draws on semantic transfer theory; and Paul Curzon’s application of Karl Maton’s semantic wave theory (taken from linguistics) to computing education.
![]()
The symposium’s focus was computing for young people, and much of the research presented was directly grounded in work with teachers and students in learning situations. Lynne Blair shared an interesting study highlighting female participation in A level computer science classes, which found the feeling of a lack of belonging among young women, a finding that echoes existing research around computing education and gender. Fenia Aivaloglou from the University of Leiden, Netherlands, considered the barriers faced by learners and teachers in extra-curricular code clubs, and Alison Twiner and Jo Shillingworth from the University of Cambridge shared a study on engaging young people in work-related computing projects.
![]()
We also heard how tools for supporting learners are developing, for example machine learning techniques to process natural language answers to questions on the free online learning platforms Isaac Computer Science and Isaac Physics.
For the poster sessions, we divided into separate sessions so that the poster presenters could display and discuss their posters with a smaller group of people. This enabled more in-depth discussion about the topic being presented, which participants appreciated at this large online event. The 11 posters covered a wide range of topics from data visualisations in robotics to data-driven dance.
![]()
We showcased some of our own work on progression mapping with learning graphs for the NCCE Resource Repository; the Isaac Computer Science A level content platform; and our research into online learning with our free online courses for teachers.
From having successfully hosted this event online, we learned many lessons that we want to put into practice in future online events being offered by the Raspberry Pi Foundation.
There’s a plethora of tools available, and they all have their pros and cons (we used Google Meet). It’s my view that the tool is less important than the preparation needed for a large-scale online event, which is significant! The organising team hosted technical run-throughs with all presenters in the two days before the event, and instigated a ‘green room’ for all presenters to check their setups again five to ten minutes before their speaking slot. This helped to avoid a whole myriad of potential technical difficulties.
![]()
I’m so grateful to the great team at the Raspberry Pi Foundation, who worked behind the scenes all day to make sure that the participants and presenters got the most out of the event!
If you’re interested in receiving a regular update about these and other research activities of ours, sign up to our newsletter.
We look forward to building a community of researchers and to sharing more of our work with you over the coming years.
The post Cambridge Computing Education Research Symposium – recap of our online event appeared first on Raspberry Pi.
Welcome back to Digital Making at Home from the Raspberry Pi Foundation! If you’re joining us for the first time this week, welcome: you’re now part of a global movement with other young digital makers from all over the world. You’re in great company, friend!
You all CRUSHED making your own games last week, so we’re eager to see how you take on this week’s theme: storytelling!
Welcome to Digital Making at Home: Storytelling with code
Find out more about Digital Making at Home at http://rpf.io/home Find more digital making projects at http://rpf.io/projects Find out more about the #Raspber…
We all have a story to tell, and with the power of coding and digital making, you can share your own story in your very own way with other digital makers around the world! This week, your challenge is to tell us a story using code. Maybe you want to create your own story or retell one of your favourite tales in your own way — the possibilities are endless.
![]()
And when you’ve created your story, share it with others! We’re excited to see it too, so show us what you’ve made by sending it to us to check out..
If you need some inspiration, our Raspberry Pi team is here for you! They’re all back with more code-along videos to help you explore storytelling with code.
Join Mr. C and his sidekick Zac as they create their own story generator in Scratch.
Digital Making at Home – Story generator (beginner)
Go to the project guide: http://rpf.io/dm-storygen What do you think about this content? Tell us your feedback: https://docs.google.com/forms/d/e/1FAIpQLScM4…
Go to the free project guide (available in 19 languages).
Mr C has also recorded some extra videos showing you how to do cool extra things with your Scratch story! Find them in this week’s playlist.
Christina shows you how to tell a story on a web page you build with HTML/CSS and any pictures you like.
Digital Making at Home – Tell a story (intermediate)
Go to the project guide: http://rpf.io/dm-tellastory What do you think about this content? Tell us your feedback: https://docs.google.com/forms/d/e/1FAIpQLSc…
Go to the free project guide (available in 25 languages).
Code along with Marc, who creates his own online version of a classic story using more advanced HTML/CSS code and content that’s in the public domain.
Digital Making at Home – Magazine (advanced)
Go to the project guide: http://rpf.io/dm-magazine What do you think abotut his content? Tell us your feedback: https://docs.google.com/forms/d/e/1FAIpQLScM4…
Go to the free project guide (available in 21 languages).
If you want to try something else, here’s a video from a friend of ours! In it, Nick, one of our Raspberry Pi Certified Educators in the USA, explains how to create interactive fiction stories in Python.
We would love to see the story you’re choosing to tell this week! When you’re ready, enlist an adult to send us your story. Who knows, maybe we will feature it in an upcoming blog for our global community to see?
As you’re coding something new this week, we’ll be playing through your game projects from last week! We were super thrilled to see so many digital makers submit their games from all over the world: Iraq, Canada, United Kingdom, and beyond. We wonder what story you’ll tell us this week…?
Are you ready? Get set…LET’S CODE!
We’d love to know what you think of Digital Making at Home, so that we can make it better for you! Please let us know your thoughts.
PS: All of our resources are available for free forever. This is made possible thanks to the generous donations of individuals and organisations. Learn how you can help too!
The post Digital Making at Home: Storytelling with code appeared first on Raspberry Pi.
Looking to build their own ergonomic mechanical split keyboard, Gosse Adema turned to the Raspberry Pi Zero W for help.
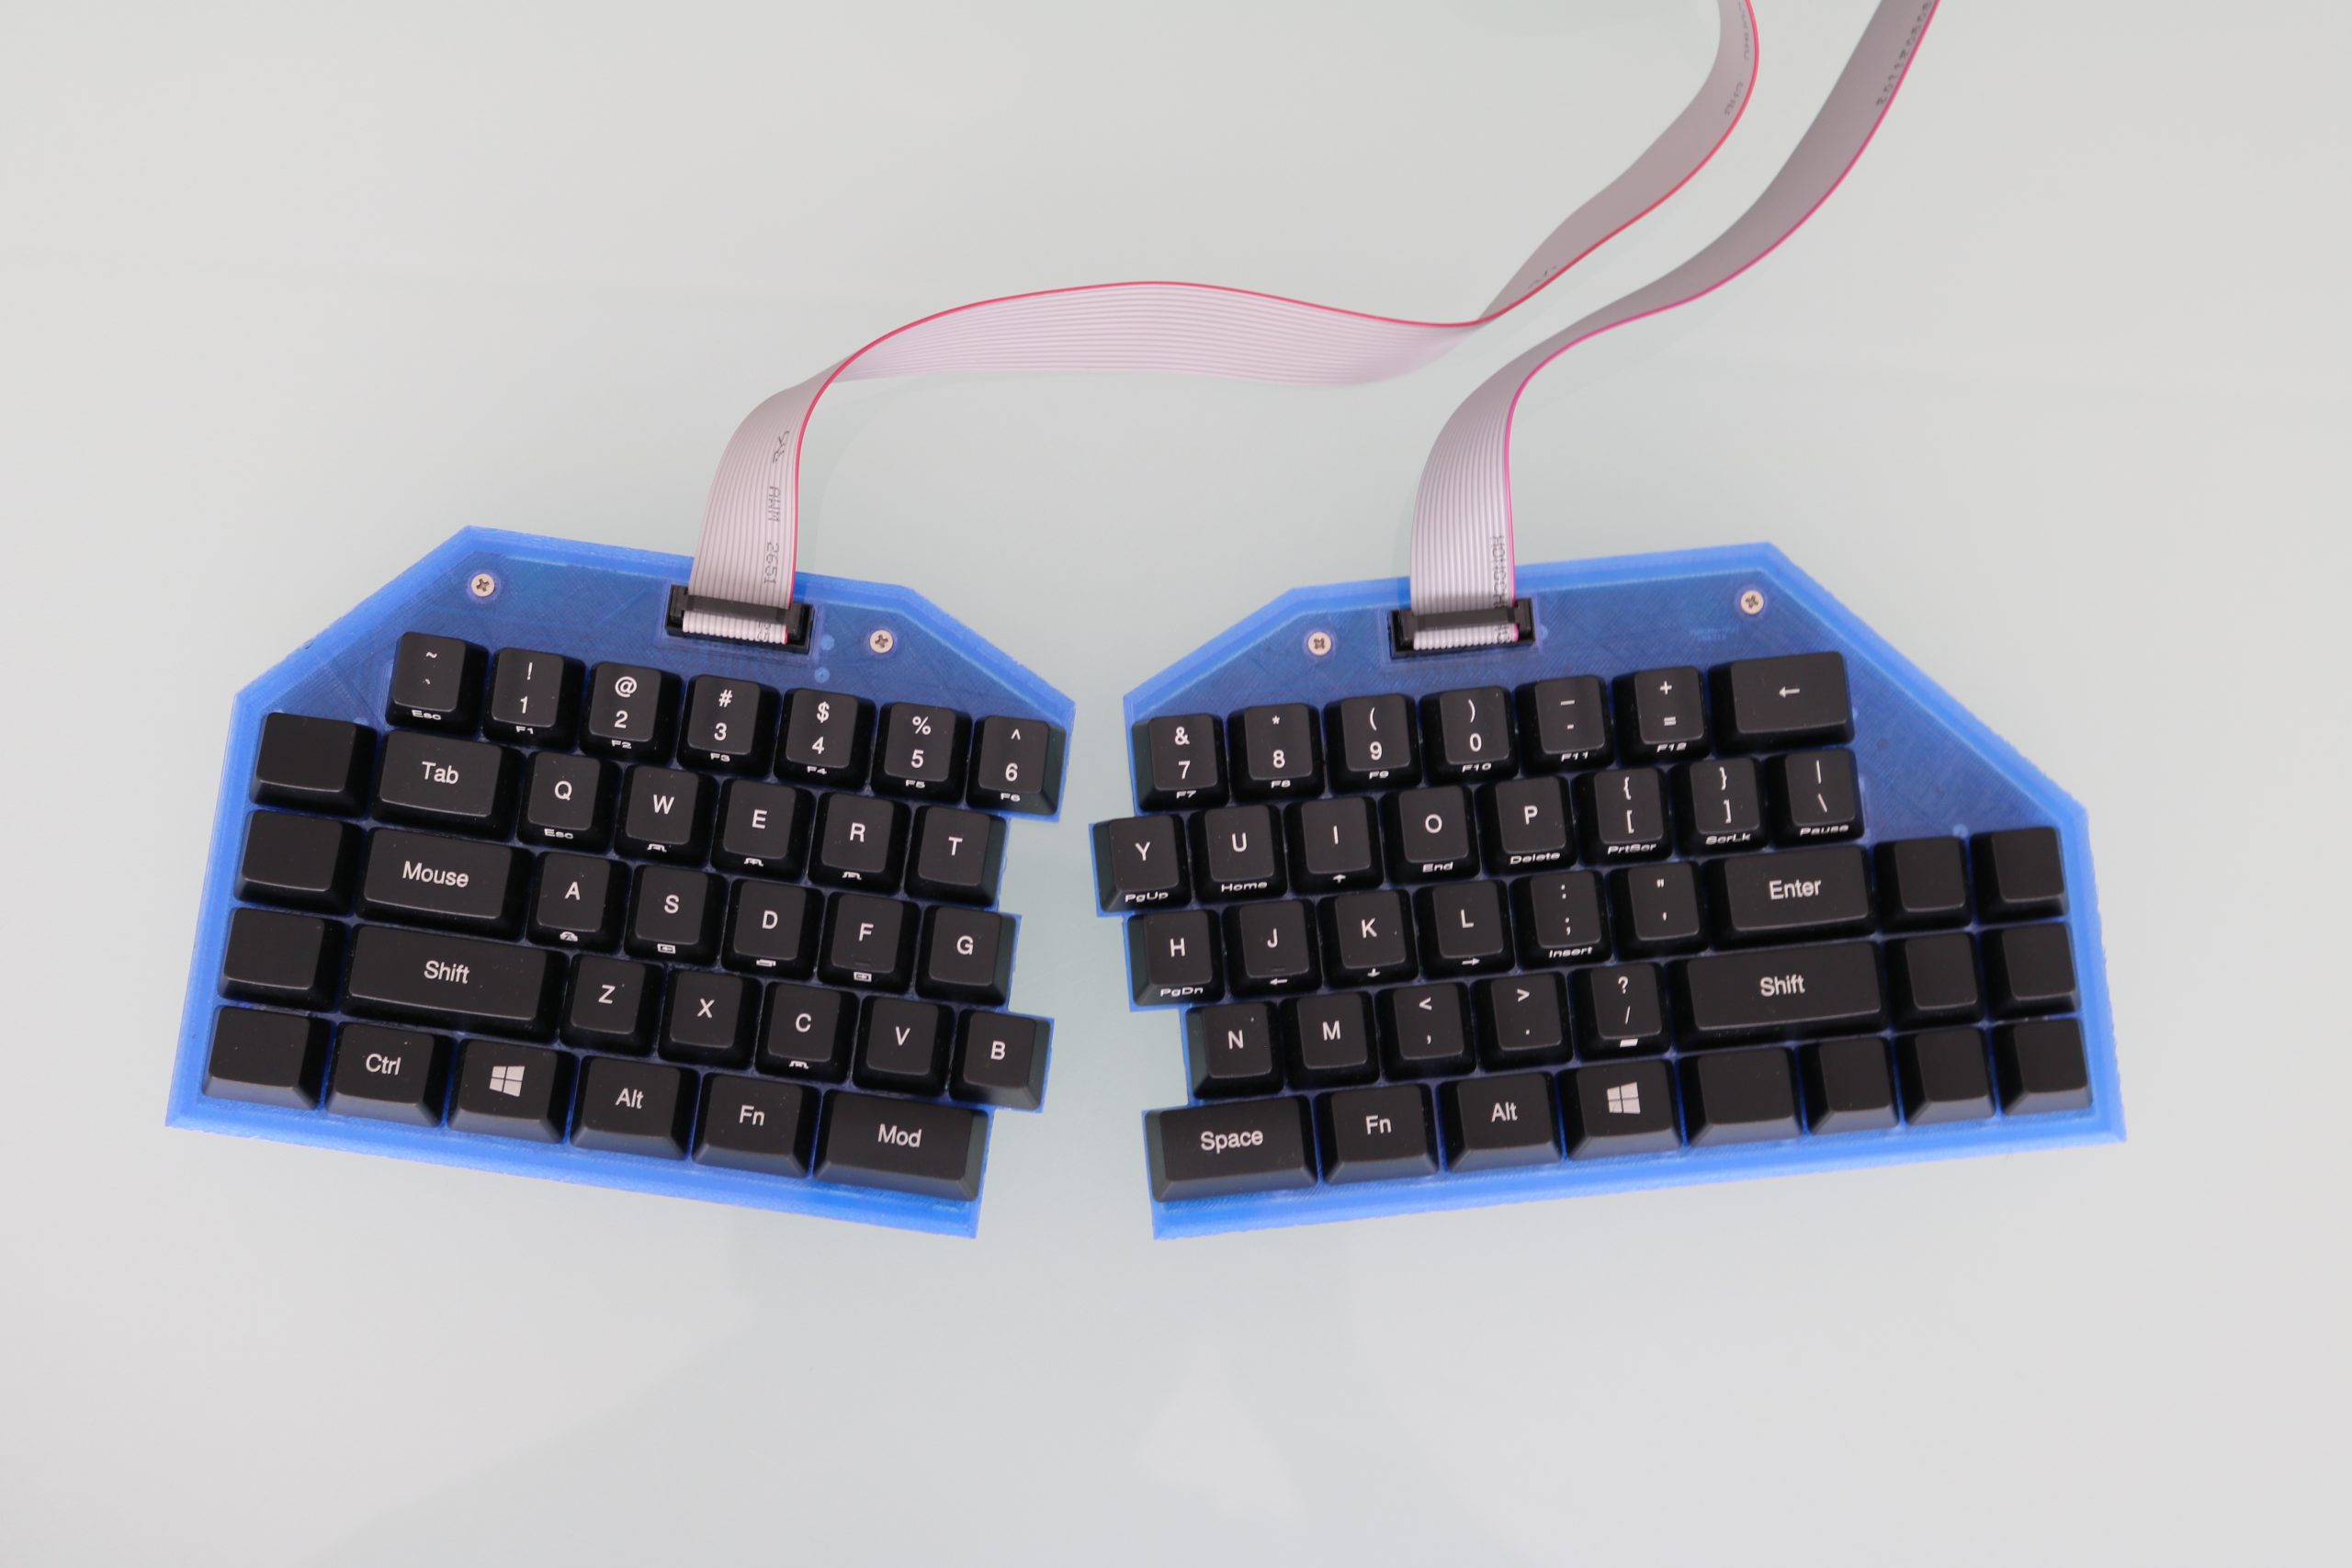
Gosse has been happily using a Microsoft Natural Elite keyboard for years. You know the sort, they look like this:

Twenty years down the line, the keyboard has seen better days and, when looking for a replacement, Gosse decided to make their own.
This is my the first mechanical keyboard project. And this will be for daily usage. Although the possibilities are almost endless, I limit myself to the basic functionality: An ergonomic keyboard with mouse functions.
While searching for new switched, Gosse came across a low-profile Cherry MX that would allow for a thinner keyboard. And what’s the best device to use when trying to keep the profile of your project as thin as possible? Well, hello there, Raspberry Pi Zero W, aren’t you looking rather svelte today.

After deciding to use a Raspberry Pi as the keyboard controller over other common devices, Gosse took inspiration from an Adafruit tutorial on turning Raspberry Pi into a USB gadget, and from “the usbarmory Github page of Chris Kuethe”, which describes how to create a USB gadget with a keyboard.
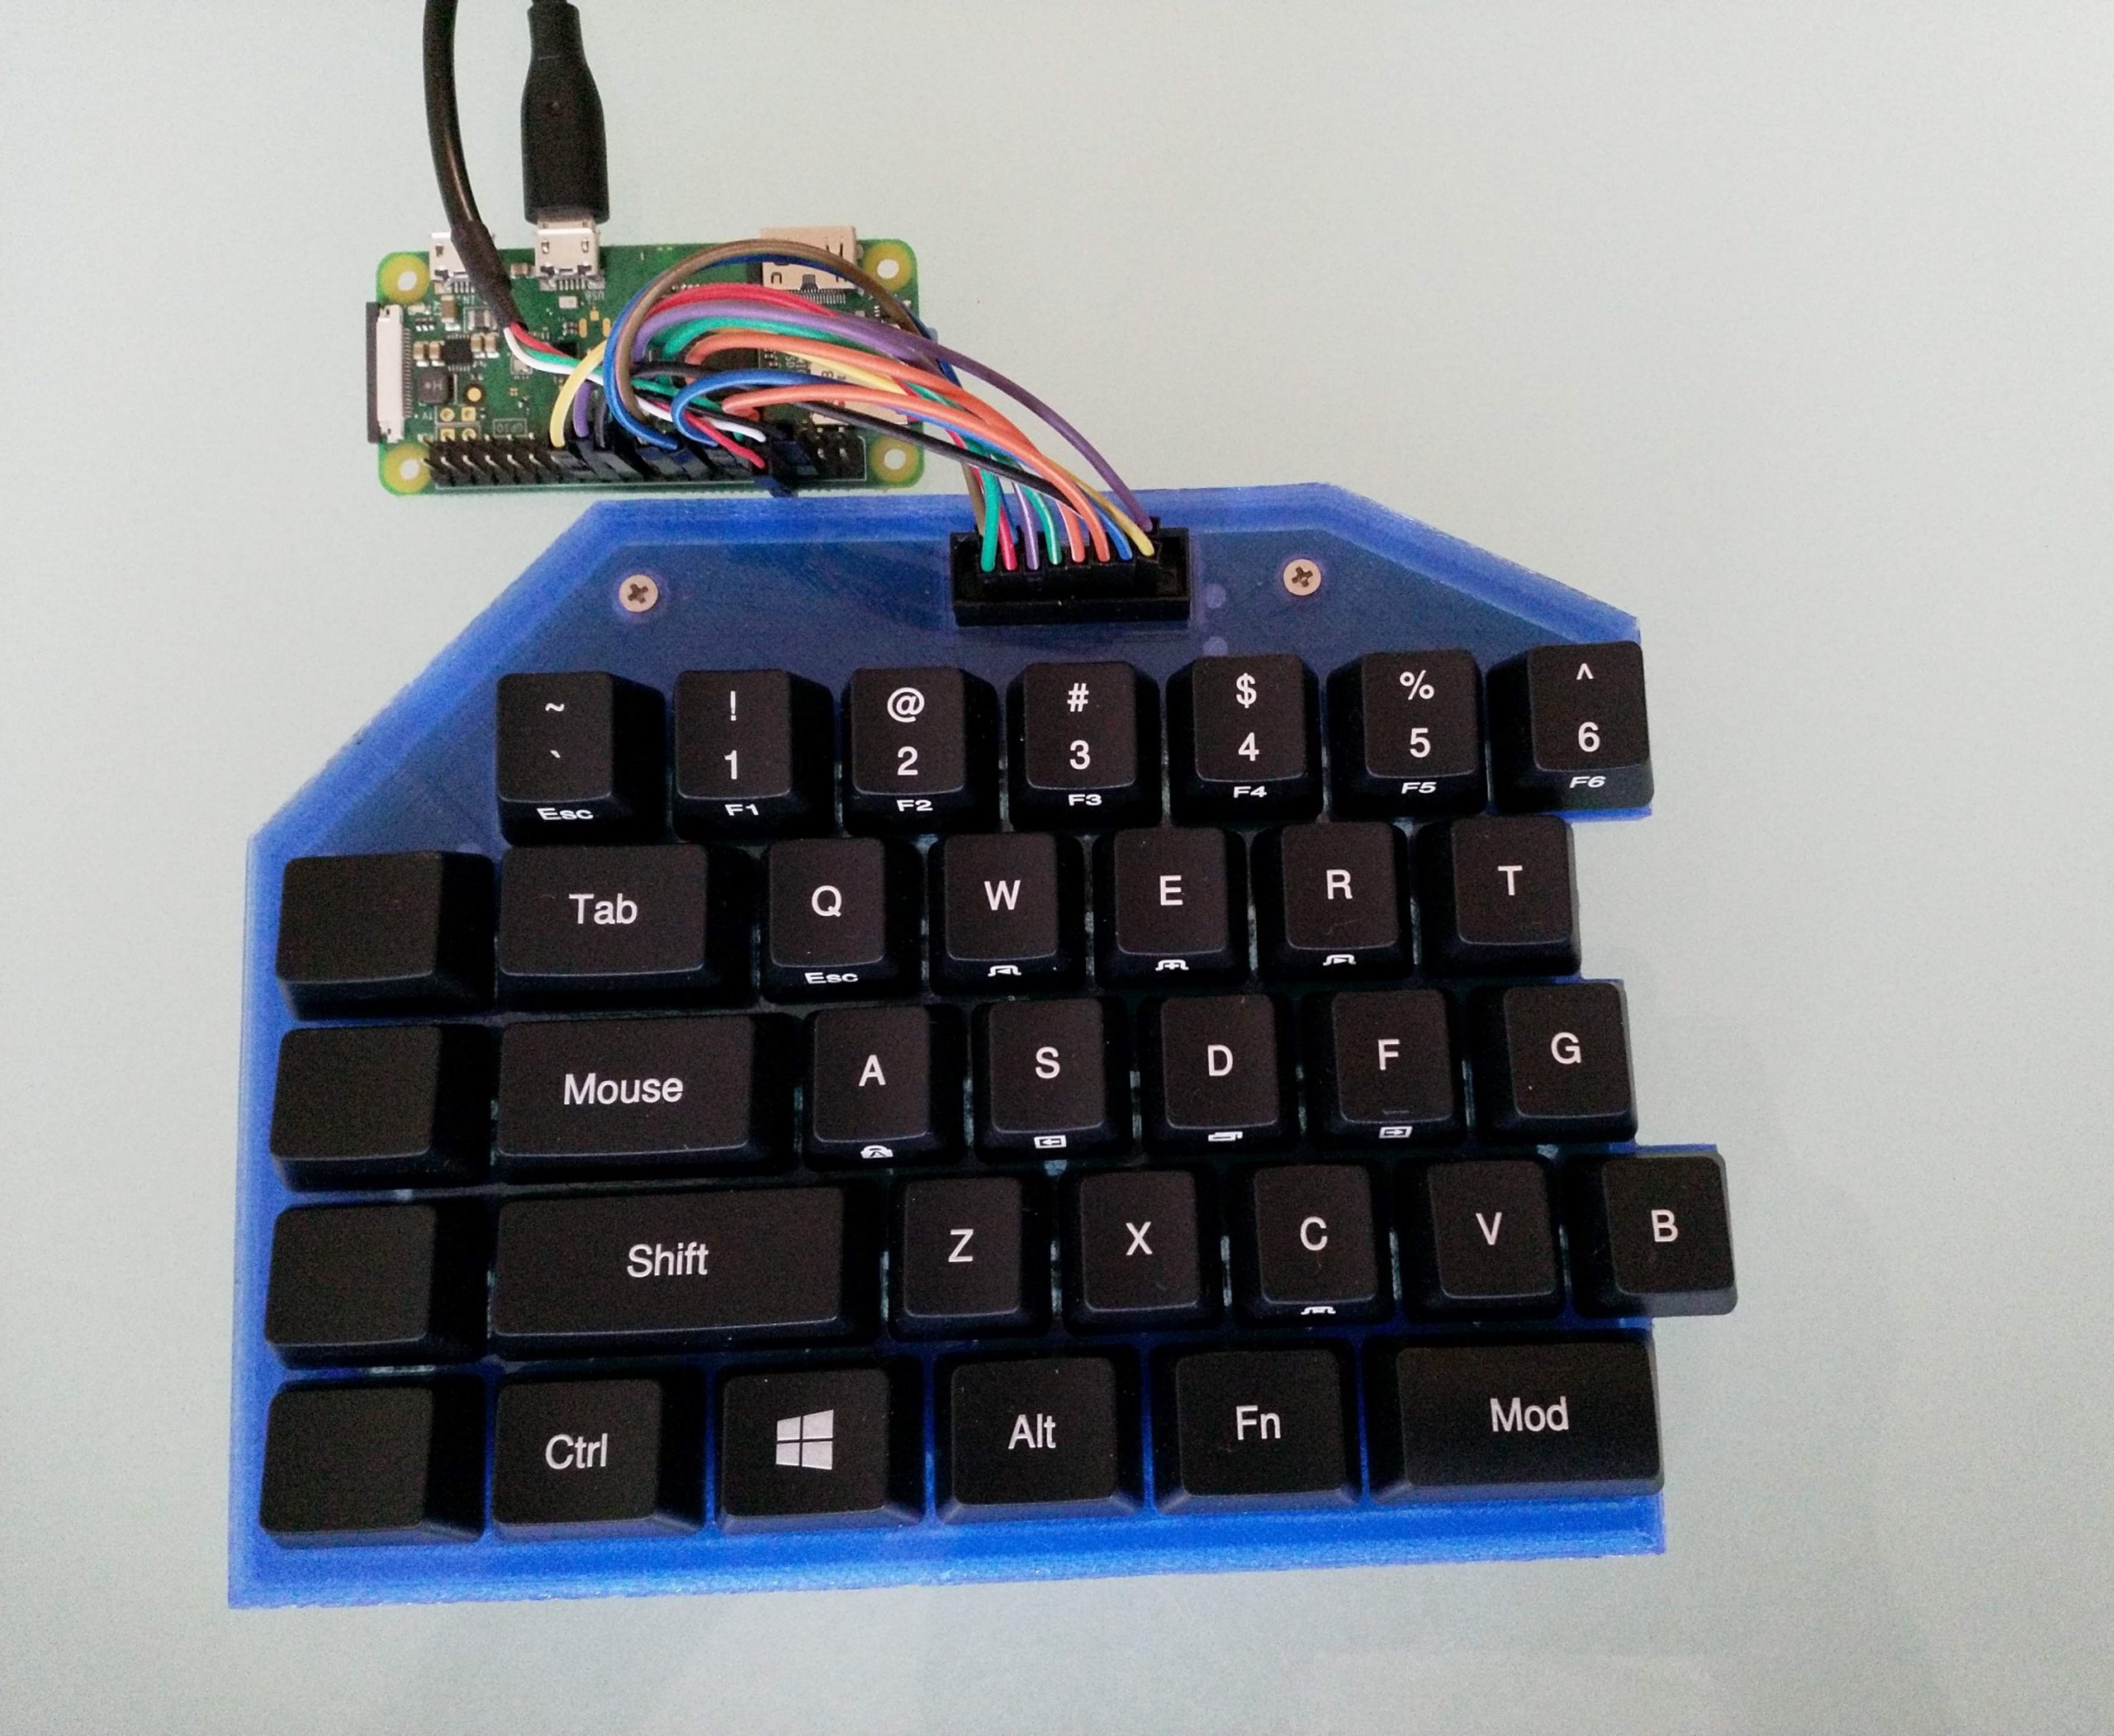
There is a lot *A LOT* of information on how Gosse built the keyboard on Instructables and, if we try to go into any detail here, our word count is going to be in the thousands. So, let’s just say this: the project uses some 3D printing, some Python code, and some ingenuity to create a lovely-looking final keyboard. If you want to make your own, Gosse has provided absolutely all the information you need to do so. So check it out, and be sure to give Gosse some love via the comments section on Instructables.
Also, if you’re unsure of how a mechanical keyboard differs from other keyboards, we made this handy video for you all!
How do mechanical keyboards work?
So, what makes a mechanical keyboard ‘mechanical’? And why are some mechanical keyboards more ‘clicky’ than others? Custom PC’s Edward Chester explains all. …
The post Building a split mechanical keyboard with a Raspberry Pi Zero controller appeared first on Raspberry Pi.
People make marvellous things for their pets with Raspberry Pi. Here’s a splendid hamster feeder tutorial from Christopher Barnatt of Explaining Computers, just perfect if you’re after a small project for this weekend.
Raspberry Pi Zero Hamster Feeder
Raspberry Pi servo-controlled pet feeder, using a Raspberry Pi Zero and two SG90 servo motors. This project builds on the servo control code and setup from m…
All you need to build your hamster feeder is a Raspberry Pi Zero and peripherals, a couple of servos, some plasticard, sellotape and liquid polyadhesive, and some jumper wires. The video takes you very clearly through the entire set-up, from measurements to wiring details to Python code (which is available to download). As Christopher explains, this will allow you to feed your hamster controlled portions of food at suitable intervals, so that it doesn’t eat the lot in one go and, consequently, explode. What’s not to love?
Check out the Explaining Computers YouTube channel for more clear, detailed videos to help you do more with computing. And for more Raspberry Pi projects, head to our own Raspberry Pi projects, with hundreds of ideas for beginners and beyond available in English and many other languages.
The post Make a hamster feeder with Raspberry Pi Zero appeared first on Raspberry Pi.
Day three of our Pong celebration leads us here, to HackSpace magazine’s ultrasonic hack of Eben’s Code the Classics Pong tribute, Boing!
If you haven’t yet bought your copy of Code the Classics, you have until 11:59pm GMT tonight to get £1 off using the discount code PONG. Click here to visit the Raspberry Pi Press online store to secure your copy, and read on to see how you can use ultrasonic sensors to turn this classic game into something a lot more physical.
Over to the HackSpace magazine team…
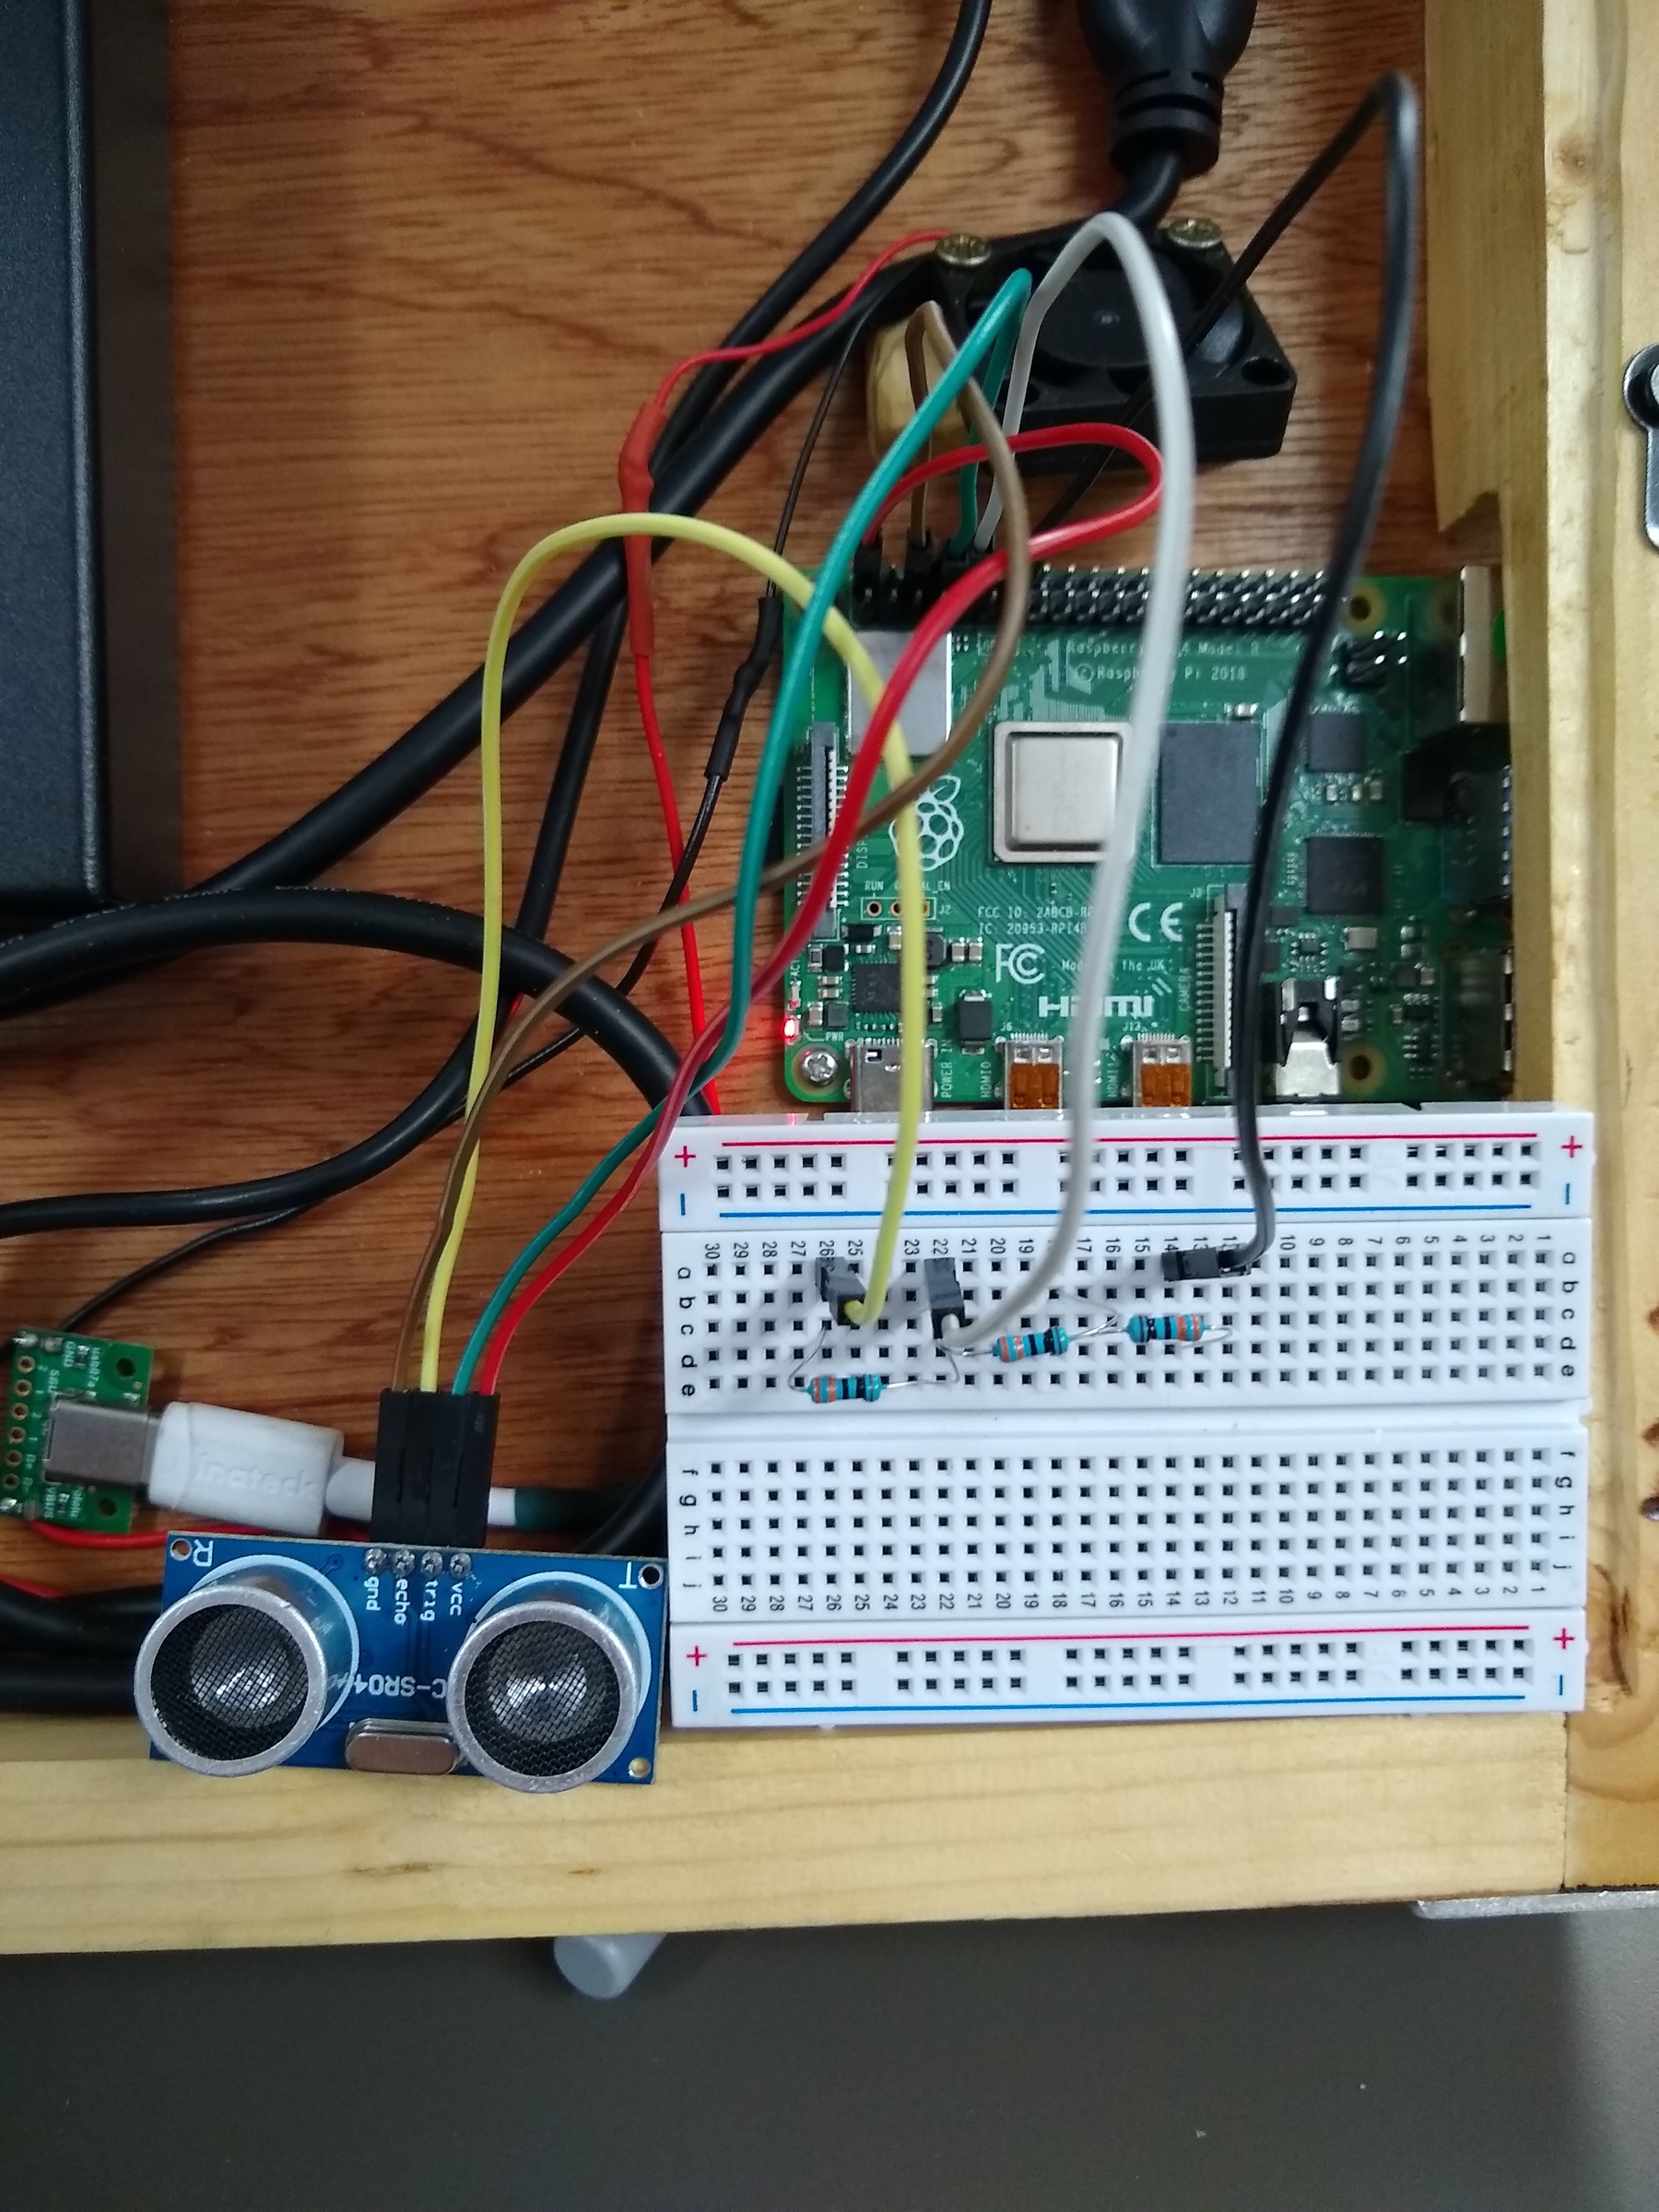
Code the Classics is an entertaining book for a whole bunch of reasons, but one aspect of it that is particularly exciting to us makers is that it means there are some games out there that are really fun to play, but also written to be easy to understand and have high-quality game art to go along with them. Why does this excite us as makers? Because it makes them ideal candidates for testing out novel DIY games controllers!
We’re going to start right at the beginning of the book (and also at the beginning of computer game history) with the game Pong. There’s a great chapter on this seminal game in the book, but we’ll dive straight into the source code of our Boing! tribute game. This code should run on any computer with Python 3 (and a few dependencies) installed, but we’ll use a Raspberry Pi, as this has GPIO pins that we can use to add on our extra controller.
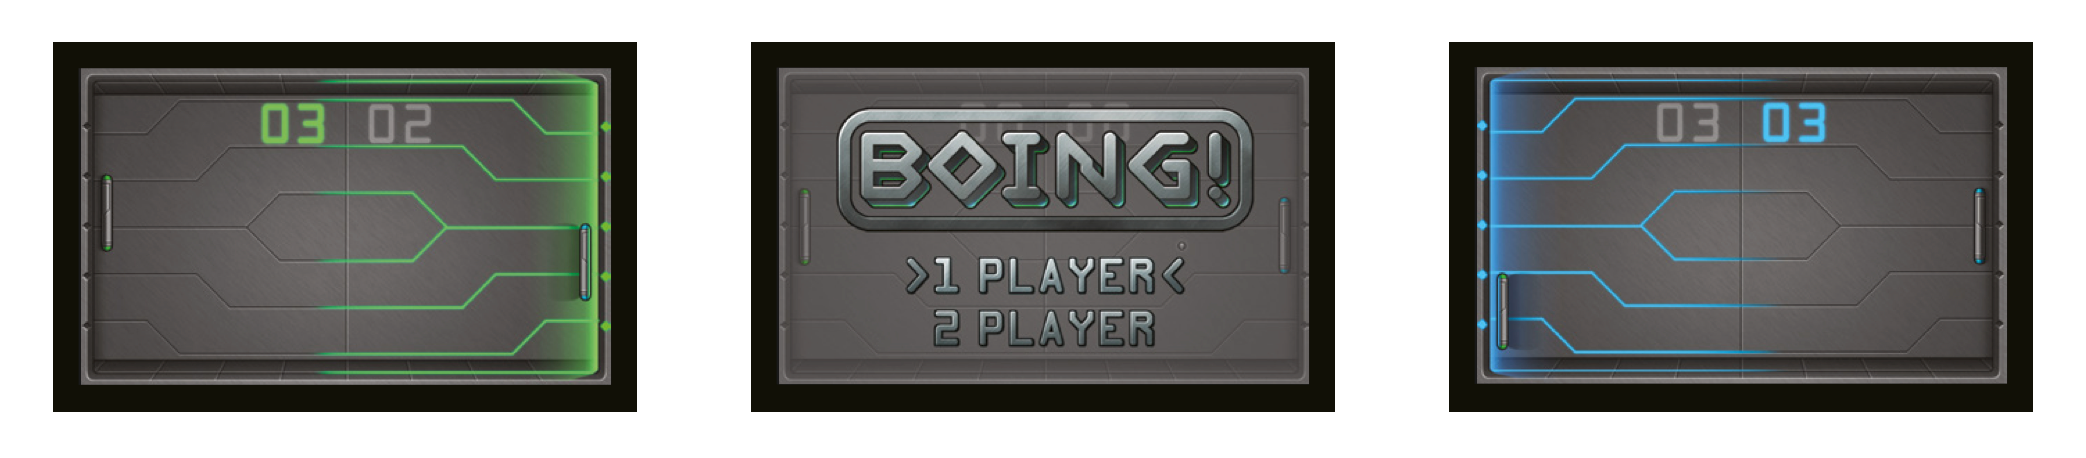
Download the code here by clicking the ‘Clone or download’ button, and then ‘Download ZIP’. Unzip the downloaded file, and you should have a directory called Code‑The‑Classics-master, and inside this, a directory called boing-master.
Open a terminal and navigate to this directory, then run:
python3 boing.py
If everything works well, you’ll get a screen asking you to select one or two players – press SPACE to confirm your selection, and have a play.
So that’s how Eben Upton designed the game to be played. Let’s put our own spin on it. Games controllers are basically just sensors that take input from the real world in some way and translate that into in-game actions. Most commonly, these sensors are buttons that you press, but there’s no need for that to be the case. You can use almost any sensor you can get input from – it sounds trite, but the main limitation really is your imagination!
We were playing with ultrasonic distance sensors in the last issue of HackSpace magazine, and this sprung to mind a Pong controller. After all, distance sensors measure in one dimension and Pong bats travel in one dimension.
Last issue we learned that the main challenge when using the cheap HC-SR04 sensors with 3.3V devices is that they use 5V, so we need to reduce their output to 3.3V. A simple voltage divider does the trick, and we used three 330Ω resistors to achieve this – see Figure 1 for more details.
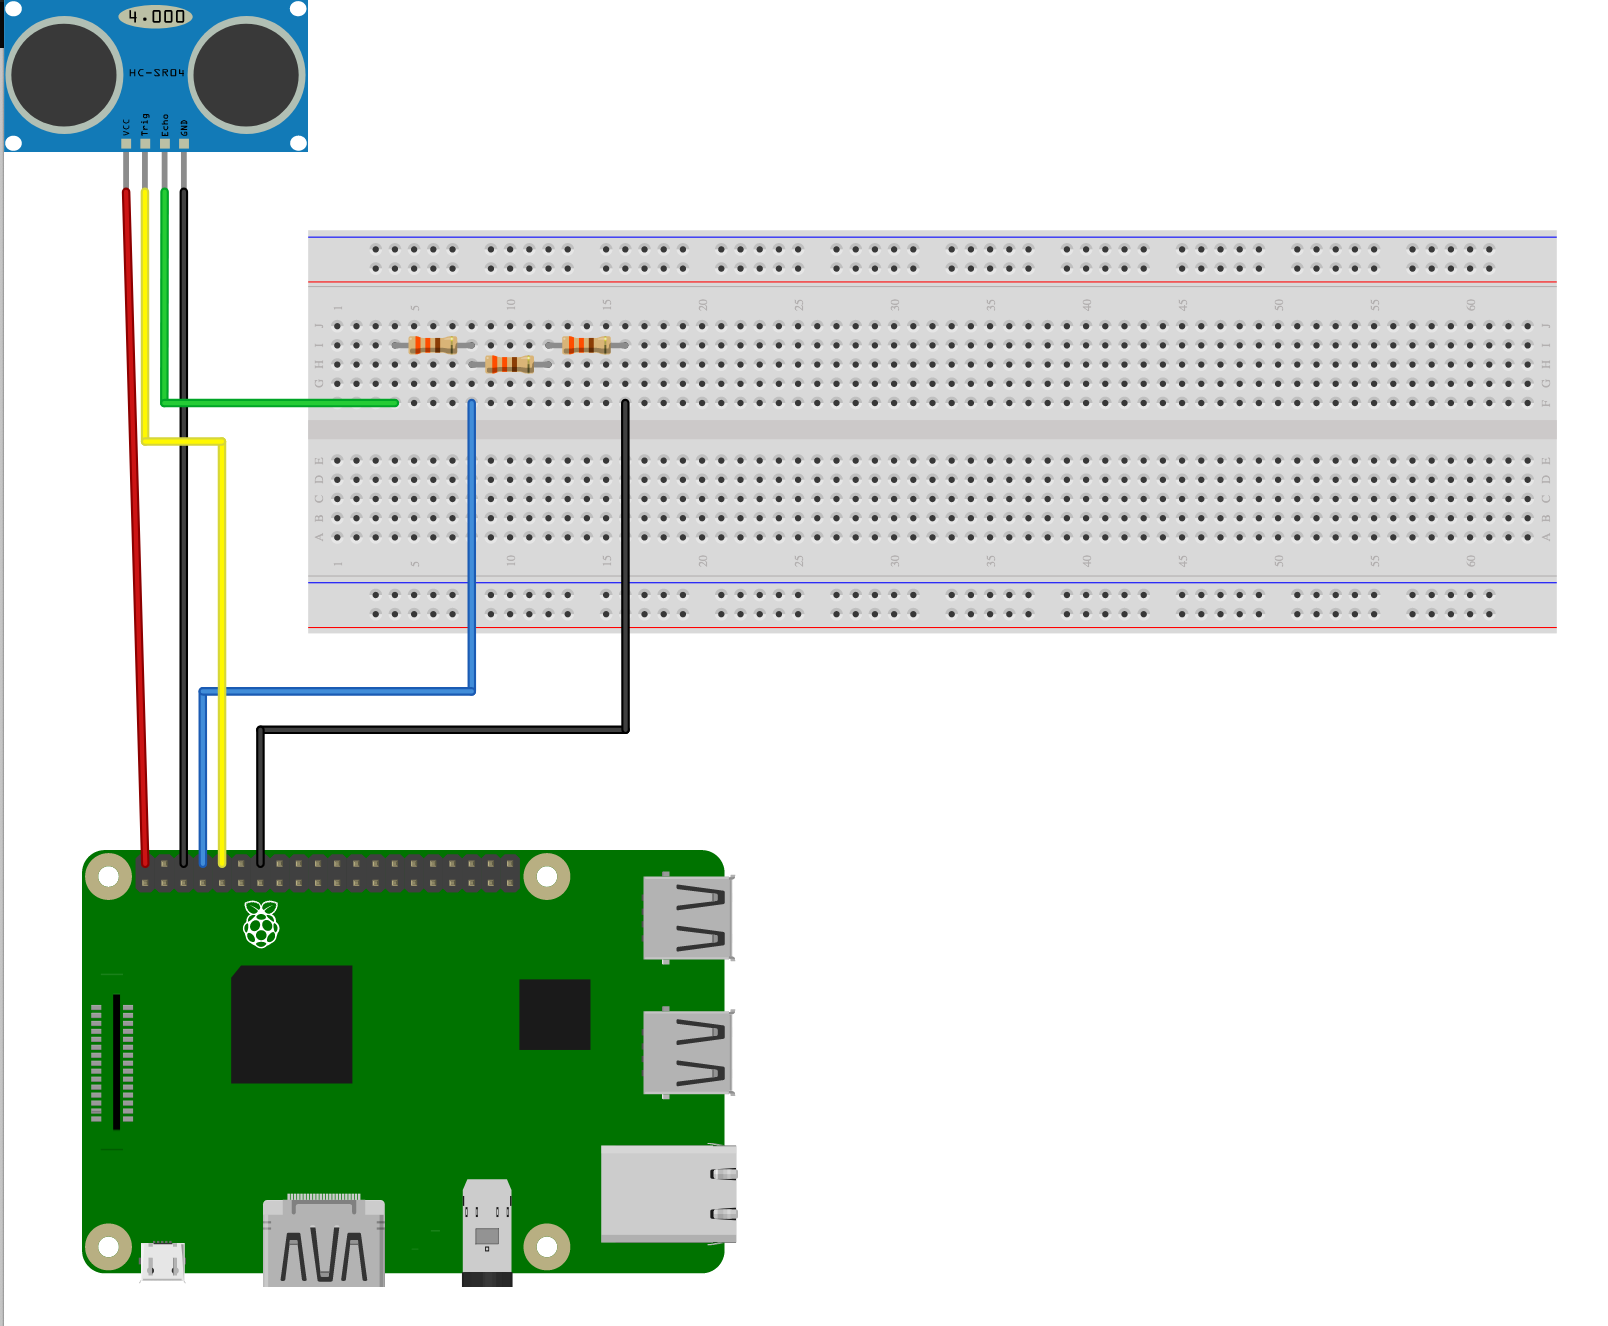
There’s support for these sensors in the GPIO Zero Python library. As a simple test, you can obtain the distance with the following Python code:
import gpiozero
import time
sensor = gpiozero.DistanceSensor(echo=15,trigger=14)

while True:
    print(sensor.distance)

time.sleep(0.1)
That will give you a constant read-out of the distance between the ultrasonic sensor and whatever object is in front of it. If you wave your hand around in front of the sensor, you’ll see the numbers changing from 0 to 1, which is the distance in metres.
So far, so straightforward. We only need to add a few bits to the code of our Boing! game to make it interact with the sensor. You can download an updated version of Boing! here, but the changes are as follows.
Add this line to the import statements at the top:
import gpiozero
Add this line to instantiate the distance sensor object at the end of the file (just before pgzrun.go()):
p1_distance = DistanceSensor(echo=15,trigger=14,queue_len=5)
We added the queue_len parameter to get the distances through a little quicker.
Finally, overwrite the p1_controls function with the following:
def p1_controls():
    move = 0
    distance = p1_distance.distance
    print(distance)
    if distance < 0.1:
        move = PLAYER_SPEED
    elif distance > 0.2:
        move = -PLAYER_SPEED
    return move
This uses the rather arbitrary settings of 10 cm and 20 cm to define whether the paddle moves up or down. You can adjust these as required.
That’s all there is to our ultrasonic Pong. It’s great fun to play, but there are, no doubt, loads of other versions of this classic game you can make by adding different sensors. Why not see what you can come up with?
Today is the last day to get £1 off Code the Classics with the promo code PONG, so visit the Raspberry Pi Press online store to order your discounted copy before 11:59pm GMT tonight.
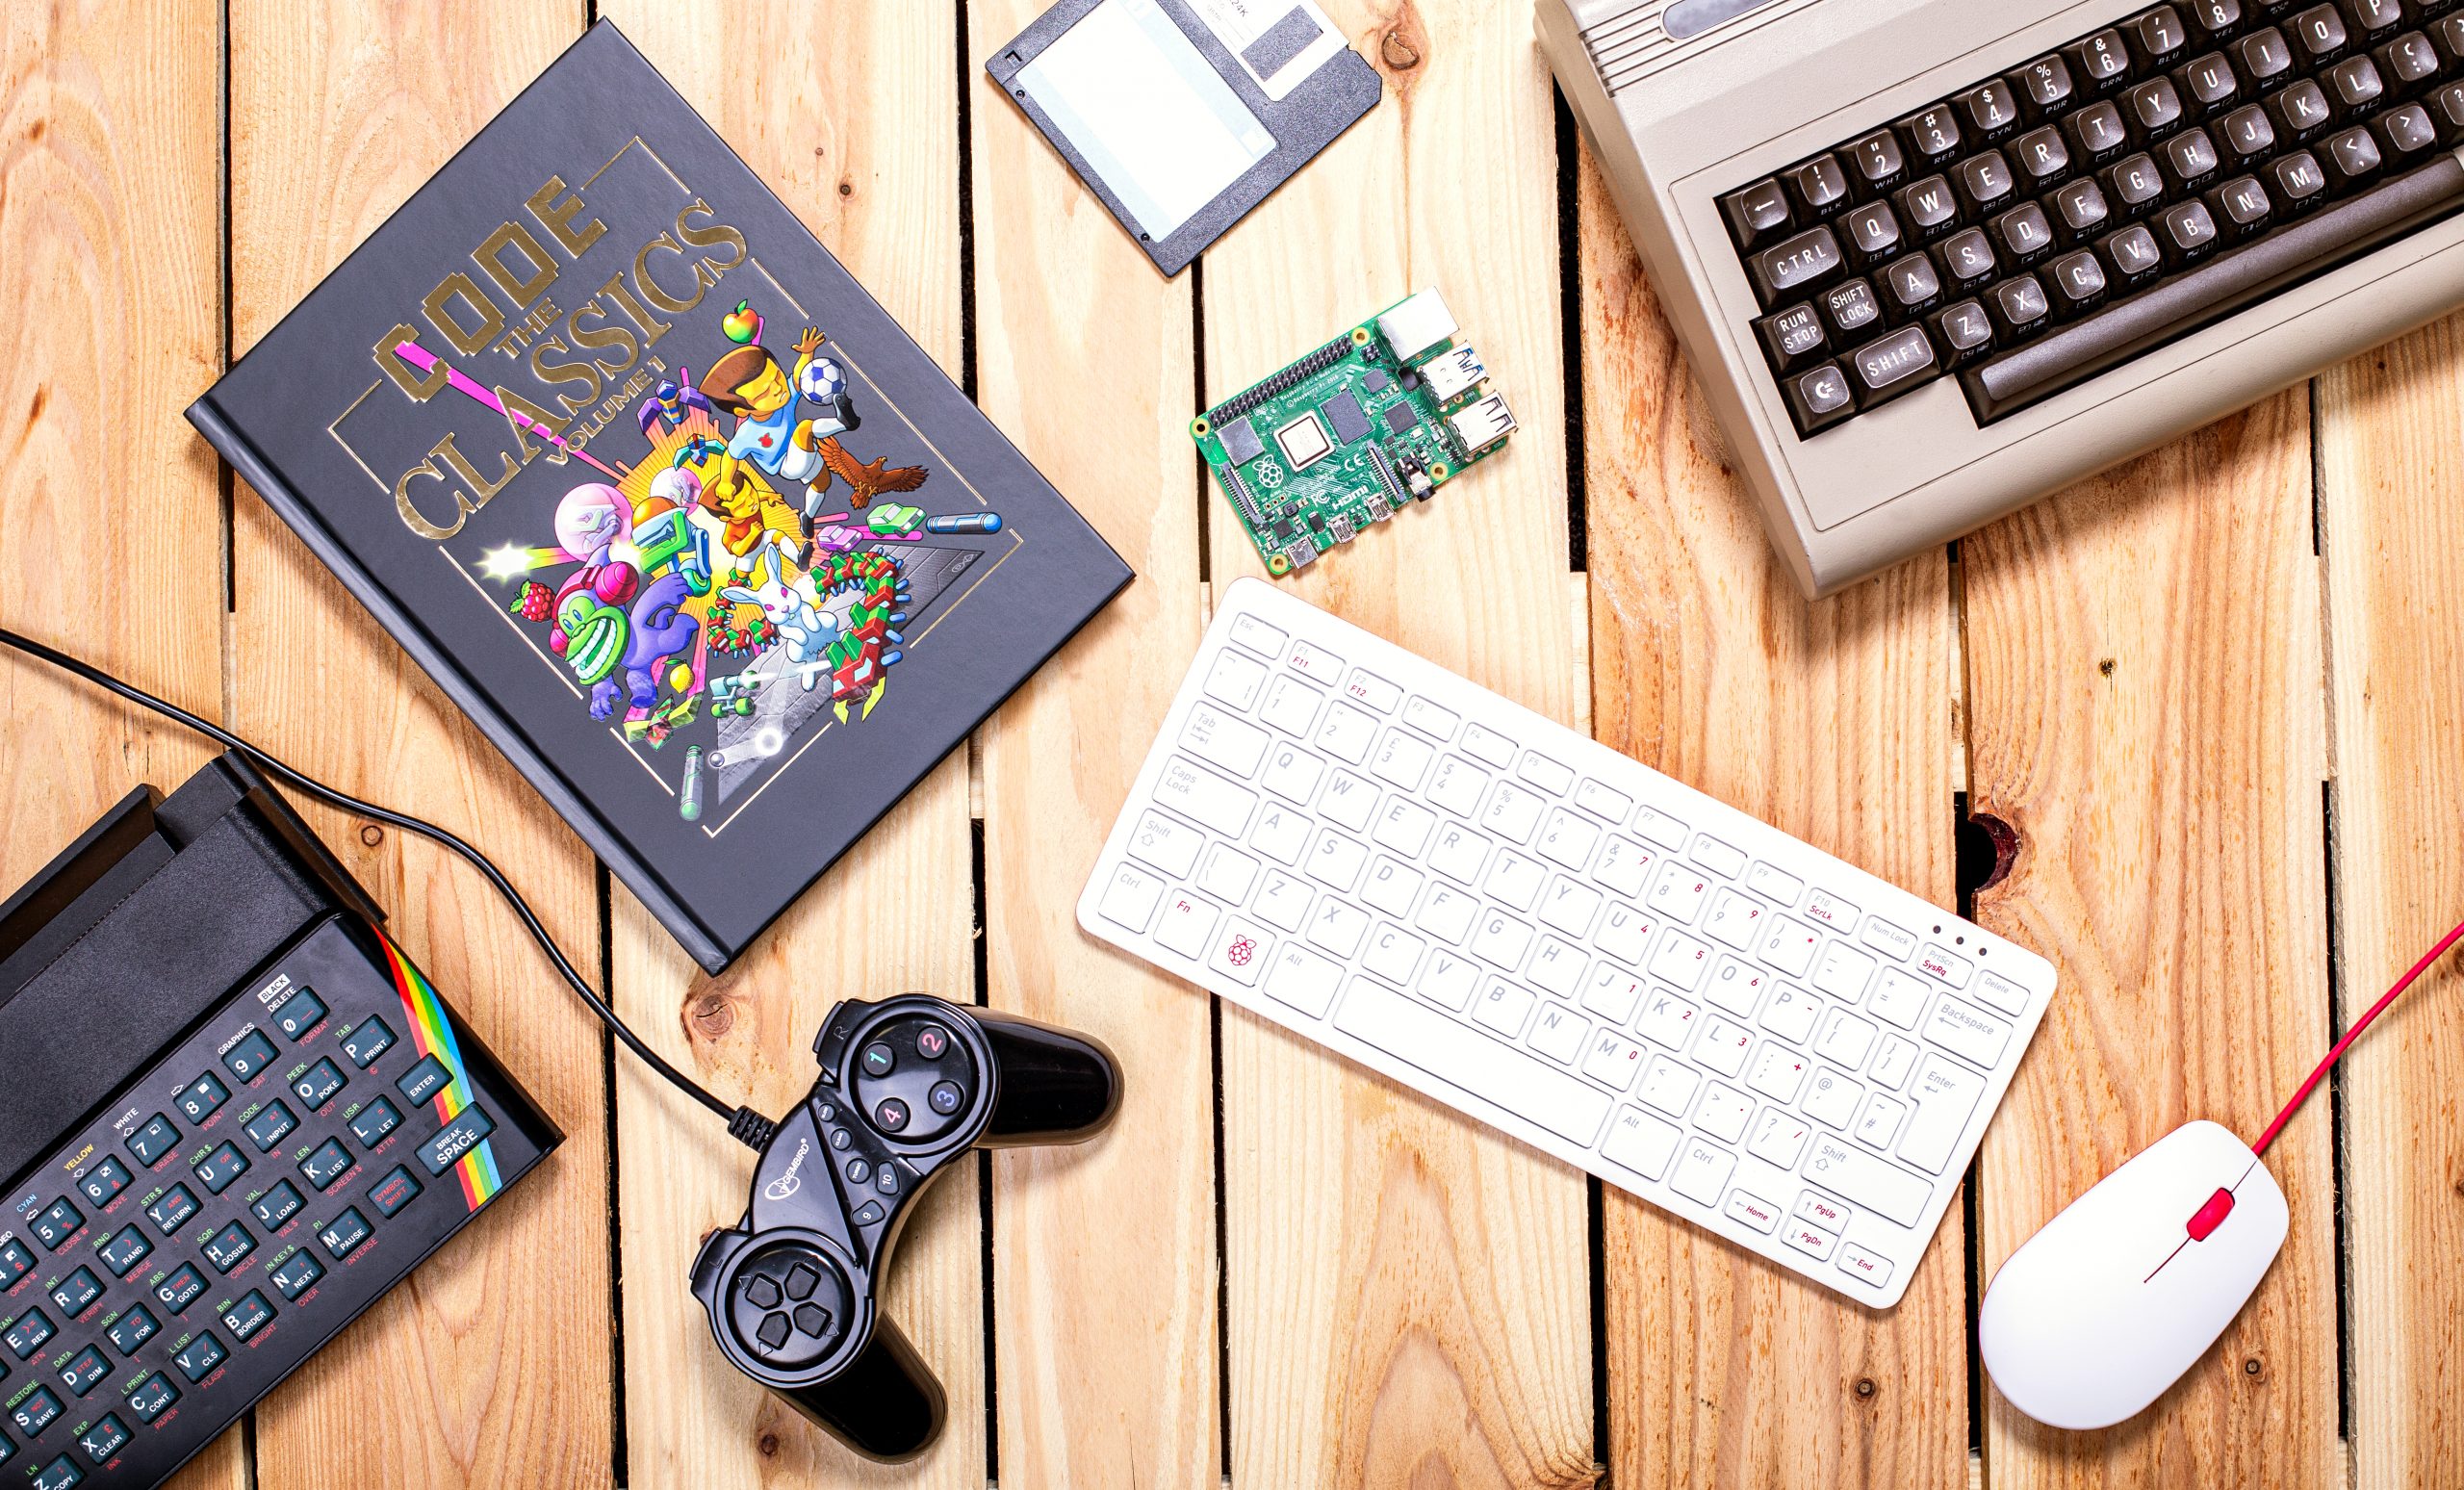
You can also download Code the Classics as a free PDF here, but the book, oh, the book – it’s a marvellous publication that deserves a physical presence in your home.
The post Play Pong with ultrasonic sensors and a Raspberry Pi | HackSpace magazine appeared first on Raspberry Pi.
Following on from yesterday’s introduction to Pong, we’re sharing Boing!, the Python-based tribute to Pong created by Eben Upton exclusively for Code the Classics. Read on to get a detailed look at the code for Boing!
You can find the download link for the Boing! code in the Code the Classics book, available now in a variety of formats. Be sure to stick with today’s blog post until the end, for a special Code the Classics offer.
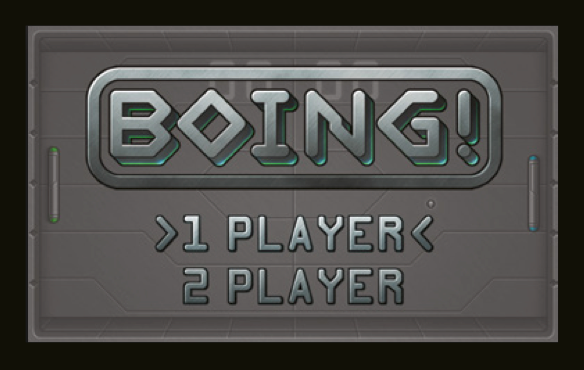
To show how a game like Pong can be coded, we’ve created Boing! using Pygame Zero, a beginner-friendly tool for making games in Python. It’s a good starting point for learning how games work – it takes place on a single screen without any scrolling, there are only three moving objects in the game (two bats and a ball), and the artificial intelligence for the computer player can be very simple – or even non-existent, if you’re happy for the game to be multiplayer only. In this case, we have both single-player and two-player modes.
The code can be divided into three parts. First, there’s the initial startup code. We import from other Python modules so we can use their code from ours. Then we check to make sure that the player has sufficiently up-to-date versions of Python and Pygame Zero. We set the WIDTH and HEIGHT variables, which are used by Pygame Zero when creating the game window. We also create two small helper functions which are used by the code.
The next section is the largest. We create four classes: Impact, Ball, Bat, and Game. The first three classes inherit from Pygame Zero’s Actor class, which amongst other things keeps track of an object’s location in the game world, and takes care of loading and displaying sprites. Bat and Ball define the behaviour of the corresponding objects in the game, while Impact is used for an animation which is displayed briefly whenever the ball bounces off something. The Game class’s job is to create and keep track of the key game objects, such as the two bats and the ball.
Further down, we find the update and draw functions. Pygame Zero calls these each frame, and aims to maintain a frame rate of 60 frames per second. Gameplay logic, such as updating the position of an object or working out if a point has been scored, should go in update, while in draw we tell each of the Actor objects to draw itself, as well as displaying backgrounds, text, and suchlike.
Our update and draw functions make use of two global variables: state and game. At any given moment, the game can be in one of three states: the main menu, playing the game, or the game-over screen. The update and draw functions read the state variable and run only the code relevant to the current state. So if state is currently State.MENU, for example, update checks to see if the SPACE bar or the up/down arrows are pressed and updates the menu accordingly, and draw displays the menu on the screen. The technical term for this kind of system is ‘finite state machine’.
The Game class’s job is to create and keep track of the key game objects
The game variable references an instance of the Game class as described above. The __init__ (constructor) method of Game optionally receives a parameter named controls. When we create a new Game object for the main menu, we don’t provide this parameter and so the game will therefore run in attract mode – in other words, while you’re on the main menu, you’ll see two computer-controlled players playing against each other in the background. When the player chooses to start a new game, we replace the existing Game instance with a new one, initialising it with information about the controls to be used for each player – if the controls for the second player are not specified, this indicates that the player has chosen a single-player game, so the second will be computer-controlled.
In Boing!, the Bat and Ball classes inherit from Pygame Zero’s Actor class, which provides a number of ways to specify an object’s position. In this game, as well as games in later chapters, we’re setting positions using the x and y attributes, which by default specify where the centre of the sprite will be on the screen. Of course, we can’t just set an object’s position at the start and be done with it – if we want it to move as the game progresses, we need to update its position each frame. In the case of a Bat, movement is very simple. Each frame, we check to see if the relevant player (which could be a human or the computer) wants to move – if they do, we either subtract or add 4 from the bat’s Y coordinate, depending on whether they want to move up or down. We also ensure that the bat does not go off the top or bottom of the screen. So, not only are we only moving along a single axis, our Y coordinate will always be an integer (i.e. a whole number). For many games, this kind of simple movement is sufficient. Even in games where an object can move along both the X and Y axes, we can often think of the movement along each axis as being separate. For example, in the next chapter’s game, Cavern, the player might be pressing the right arrow key and therefore moving along the X axis at 4 pixels per frame, while also moving along the Y axis at 10 pixels per frame due to gravity. The movement along each axis is independent of the other.
Able to move at any angle, the ball needs to move at the same speed regardless of its direction
For the Ball, things get a bit more complicated. Not only can it move at any angle, it also needs to move at the same speed regardless of its direction. Imagine the ball moving at one pixel per frame to the right. Now imagine trying to make it move at a 45° angle from that by making it move one pixel right and one pixel up per frame. That’s a longer distance, so it would be moving faster overall. That’s not great, and that’s before we’ve even started to think about movement in any possible direction.
The solution is to make use of vector mathematics and trigonometry. In the context of a 2D game, a vector is simply a pair of numbers: X and Y. There are many ways in which vectors can be used, but most commonly they represent positions or directions.
You’ll notice that the Ball class has a pair of attributes, dx and dy. Together these form a vector representing the direction in which the ball is heading. If dx and dy are 1 and 0.5, then each time the ball moves, it’ll move by one pixel on the X axis and a half a pixel on the Y axis. What does it mean to move half a pixel? When a sprite is drawn, Pygame Zero will round its position to the nearest pixel. So the end result is that our sprite will move down the screen by one pixel every other frame, and one pixel to the right every frame (Figure 1).
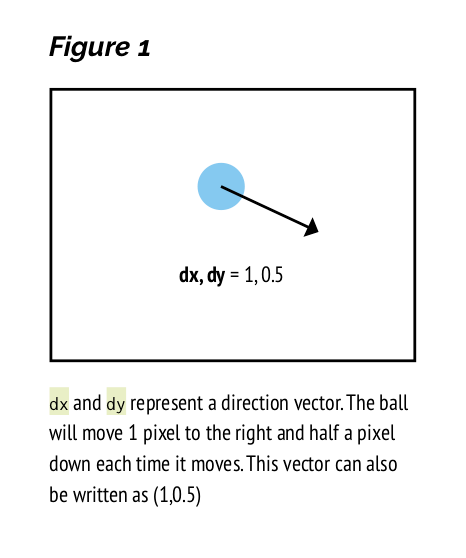
We still need to make sure that our object moves at a consistent speed regardless of its direction. What we need to do is ensure that our direction vector is always a ‘unit vector’ – a vector which represents a distance of one (in this case, one means one pixel, but in some games it will represent a different distance, such as one metre). Near the top of the code you’ll notice a function named normalised. This takes a pair of numbers representing a vector, uses Python’s math.hypot function to calculate the length of that vector, and then divides both the X and Y components of the vector by that length, resulting in a vector which points in the same direction but has a length of one (Figure 2).
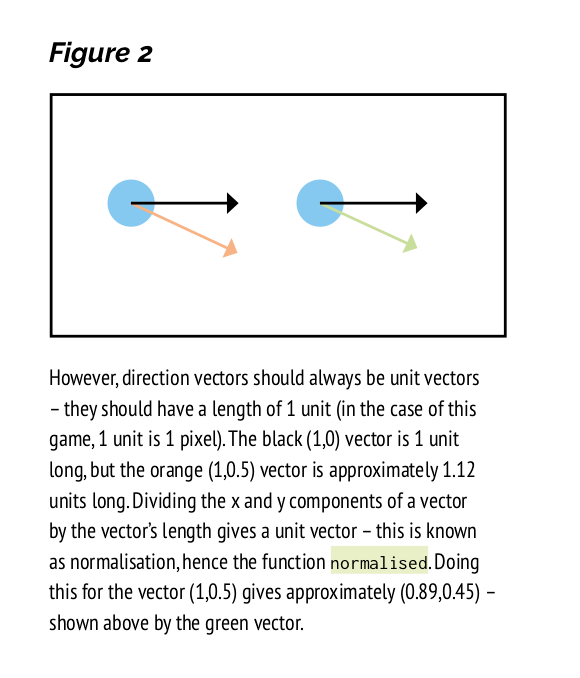
Vector maths is a big field, and we’ve only scratched the surface here. You can find many tutorials online, and we also recommend checking out the Vector2 class in Pygame (the library on top of which Pygame Zero is built).
Update Raspbian to try Boing! and other Code the Classics games on your Raspberry Pi.
The full BOING! tutorial, including challenges, further explanations, and a link to the downloadable code can be found in Code the Classics, the latest book from Raspberry Pi Press.
We’re offering £1 off Code the Classics if you order it before midnight tomorrow from the Raspberry Pi Press online store. Visit the store now, or use the discount code PONG at checkout if you make a purchase before midnight tomorrow.

As always, Code the Classics is available as a free PDF from the Wireframe website, but we highly recommend purchasing the physical book, as it’s rather lovely to look at and would make a great gift for any gaming and/or coding enthusiast.
The post Create Boing!, our Python tribute to Pong appeared first on Raspberry Pi.
In the latest Explaining Computers video, Christopher Barnatt explains how to use servo motors with Raspberry Pi. Using servos is a great introduction to the digital making side of computing; servos allow you to control the movement of all manner of project components with your Raspberry Pi and a motor controller attached to its GPIO pins.
Raspberry Pi Servo Motor Control
Control of SG90 servos in Python on a Raspberry Pi, including an explanation of PWM and how a servo differs from a motor. You can download the code from the video at: https://www.explainingcomputers.com/pi_servos_video.html The five-pack of SG90 servos used in this video was purchased on Amazon.co.uk here: https://www.amazon.co.uk/dp/B07H9VC698/ref=nosim?tag=explainin-21 with a similar product on Amazon.com here: https://amzn.to/2QHshx3 (affiliate links).
Christopher picked up his SG90 servo motors online, where you’ll find a variety of servo options. What type of servo you need depends on the project you want to create, so be sure to consider the weight and size of what you plan to move, and the speed at which you need to move it.
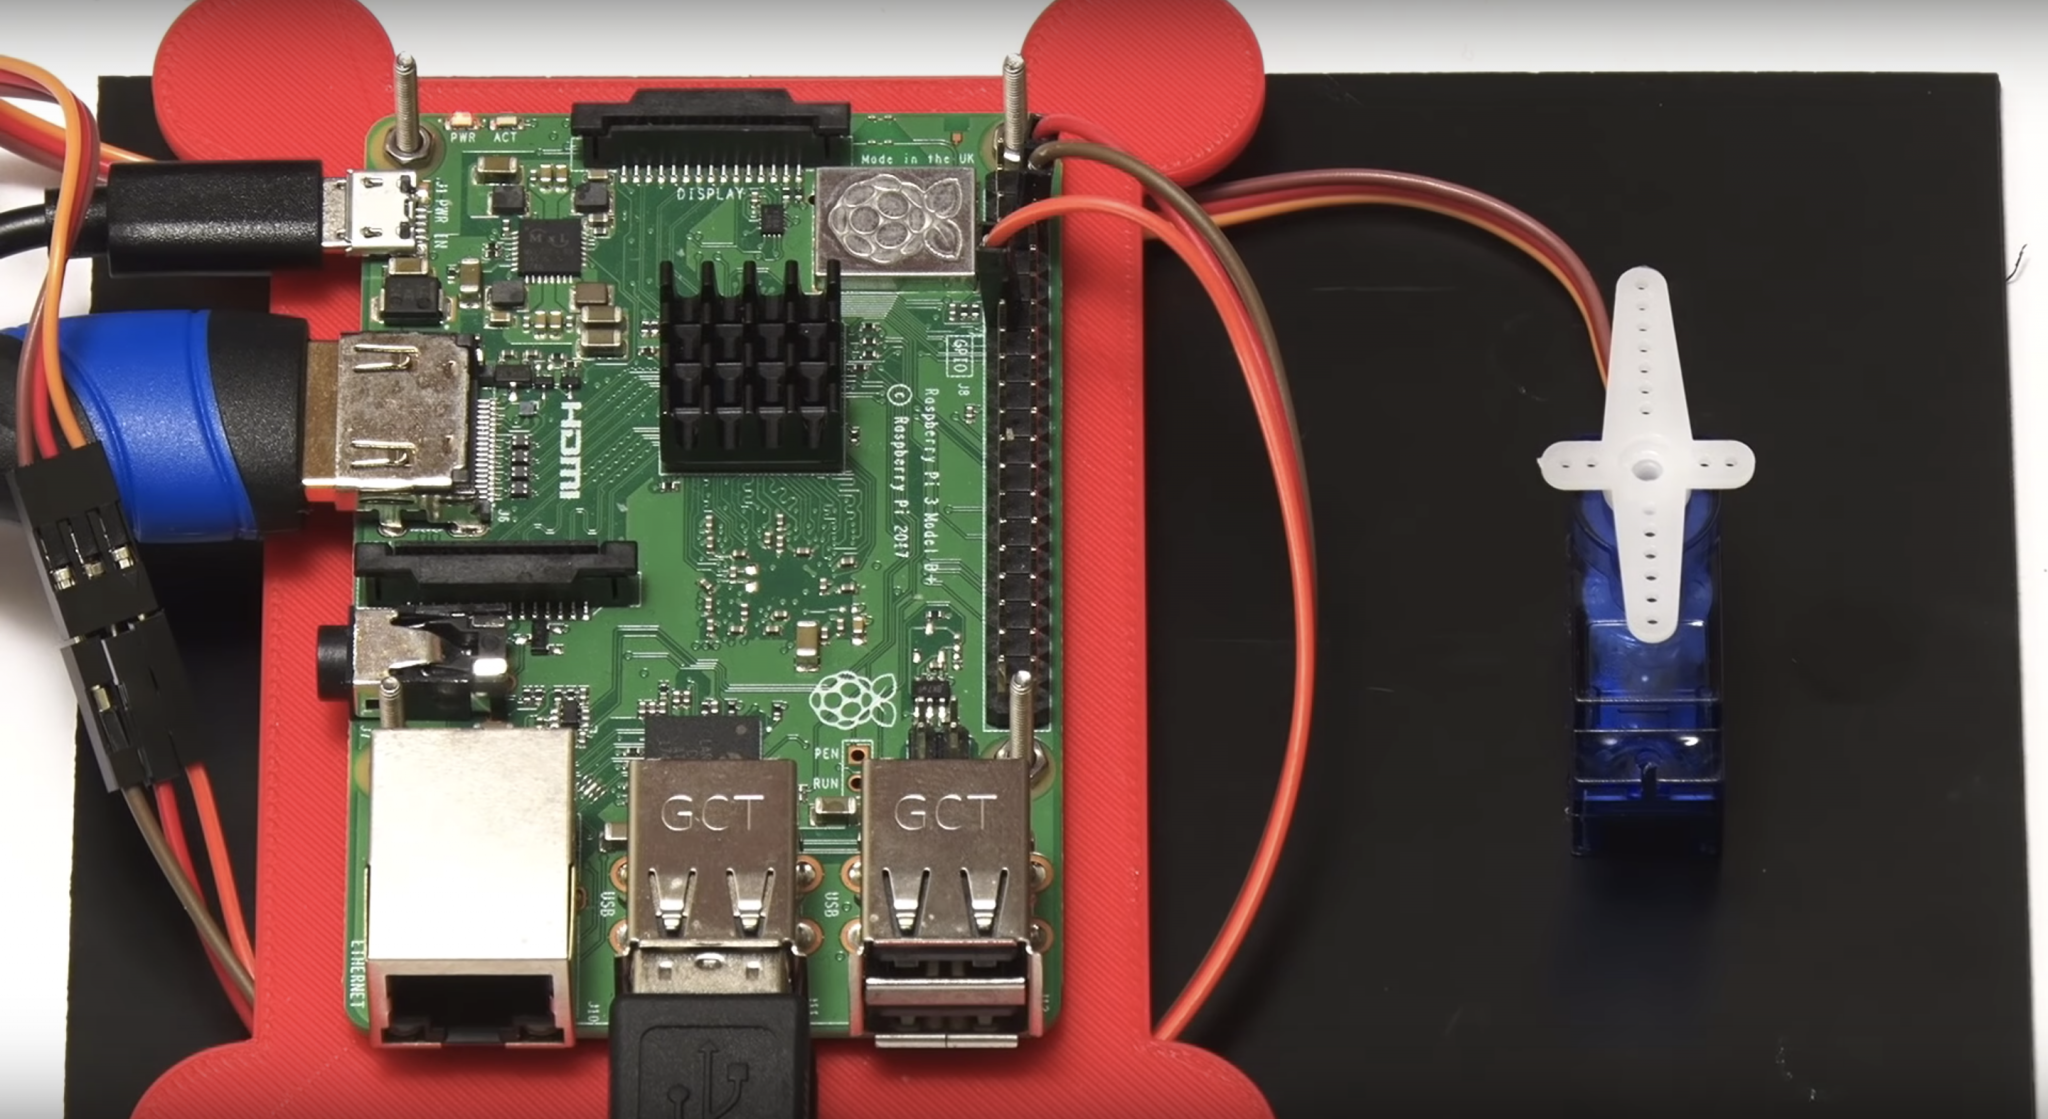
As the motor controller connects via GPIO, you can even use the tiny £5 Raspberry Pi Zero to control your servo, which makes adding movement to your projects an option even when you’re under tight space constraints.
For other detailed computing videos, be sure to subscribe to the Explaining Computers YouTube channel.
And for more Raspberry Pi projects, check out the Raspberry Pi projects page.
We’re always looking for people to join our incredible community of translators to help us translate our free resources, including the free projects found on our projects page.
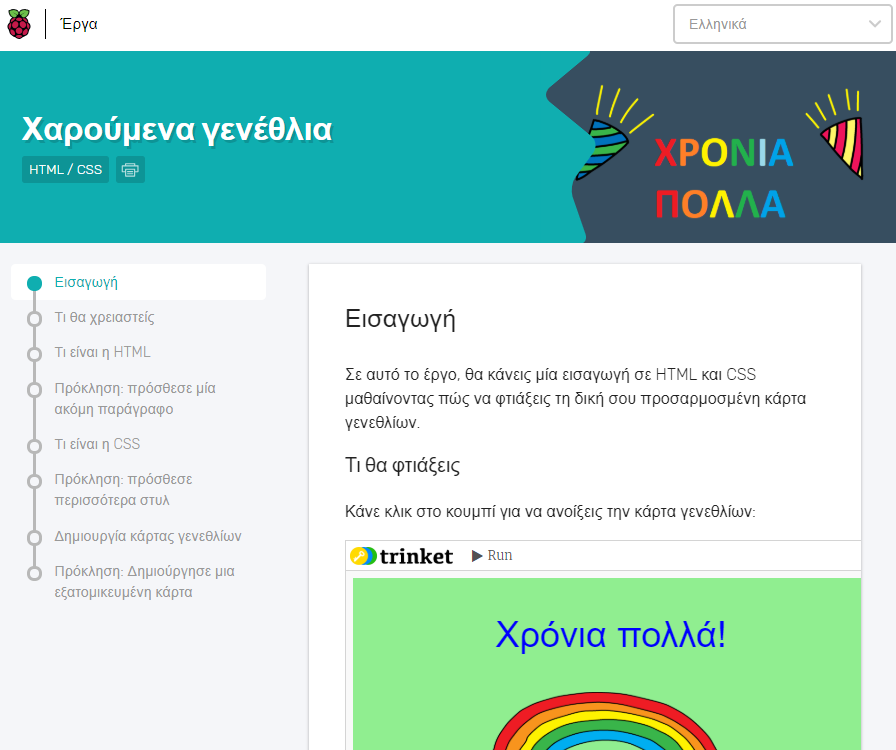
If you speak English and another language and would like to give a portion of your time to making our resources available to more people across the globe, sign up as a translator today.
The post How to control multiple servo motors with Raspberry Pi appeared first on Raspberry Pi.
If you own a 3D printer, you’ll likely have at least heard of OctoPrint, created by Gina Häußge and maintained by her and Guy Sheffer! OctoPrint has the potential to transform your 3D printing workflow for the better, and it’s very easy to set up. This guide will take you through the setup process step by step, and give you some handy tips along the way.

Before we start finding out how to install OctoPrint, let’s look at why you might want to. OctoPrint is a piece of open-source software that allows us to add WiFi functionality to any 3D printer with a USB port (which is pretty much all of them). More specifically, you’ll be able to drop files from your computer onto your printer, start/stop prints, monitor your printer via a live video feed, control the motors, control the temperature, and more, all from your web browser. Of course, with great power comes great responsibility — 3D printers have parts that are hot enough to cause fires, so make sure you have a safe setup, which may include not letting it run unsupervised.
• Raspberry Pi 3 (or newer)
• MicroSD card
• Raspberry Pi power adapter
• USB cable (the connector type will depend on your printer)
• Webcam/Raspberry Pi Camera Module (optional)
• 3D-printed camera mount (optional)
Before we get started, it is not recommended that anything less than a Raspberry Pi 3 is used for this project. There have been reports of limited success using OctoPrint on a Raspberry Pi Zero W, but only if you have no intention of using a camera to monitor your prints. If you want to try this with a Pi Zero or an older Raspberry Pi, you may experience unexpected print failures.
Firstly, you will need to download the latest version of OctoPi from the OctoPrint website. OctoPi (created by Guy Sheffer) is a Raspbian distribution that comes with OctoPrint, video streaming software, and CuraEngine for slicing models on your Raspberry Pi. When this has finished downloading, unzip the file and put the resulting IMG file somewhere handy.
Next, we need to flash this image onto our microSD card. We recommend using Etcher to do this, due to its minimal UI and ease of use; plus it’s also available to use on both Windows and Mac. Get it here: balena.io/etcher. When Etcher is installed and running, you’ll see the UI displayed. Simply click the Select Image button and find the IMG file you unzipped earlier. Next, put your microSD card into your computer and select it in the middle column of the Etcher interface.
Finally, click on Flash!, and while the image is being burned onto the card, get your WiFi router details, as you’ll need them for the next step.
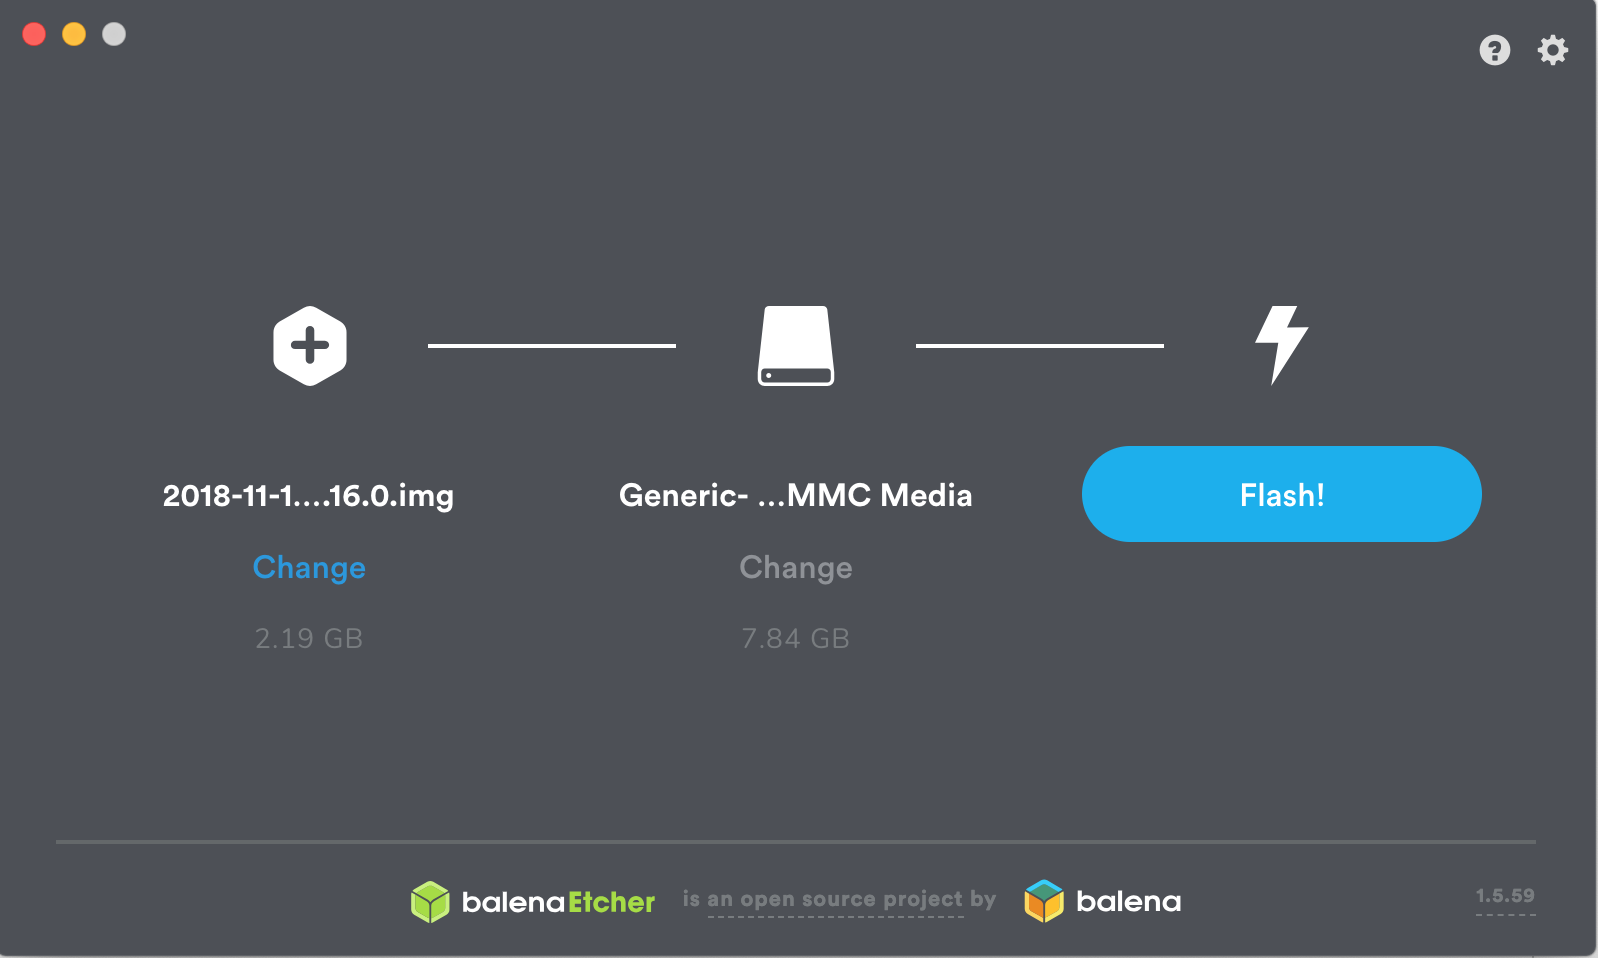
Now that you have your operating system, you’ll want to add your WiFi details so that the Raspberry Pi can automatically connect to your network after it’s booted. To do this, remove the microSD card from your computer (Etcher will have ‘ejected’ the card after it has finished burning the image onto it) and then plug it back in again. Navigate to the microSD card on your computer — it should now be called boot — and open the file called octopi-wpa-supplicant.txt. Editing this file using WordPad or TextEdit can cause formatting issues; we recommend using Notepad++ to update this file, but there are instructions within the file itself to mitigate formatting issues if you do choose to use another text editor. Find the section that begins ## WPA/WPA2 secured and remove the hash signs from the four lines below this one to uncomment them. Finally, replace the SSID value and the PSK value with the name and password for your WiFi network, respectively (keeping the quotation marks). See the example below for how this should look.
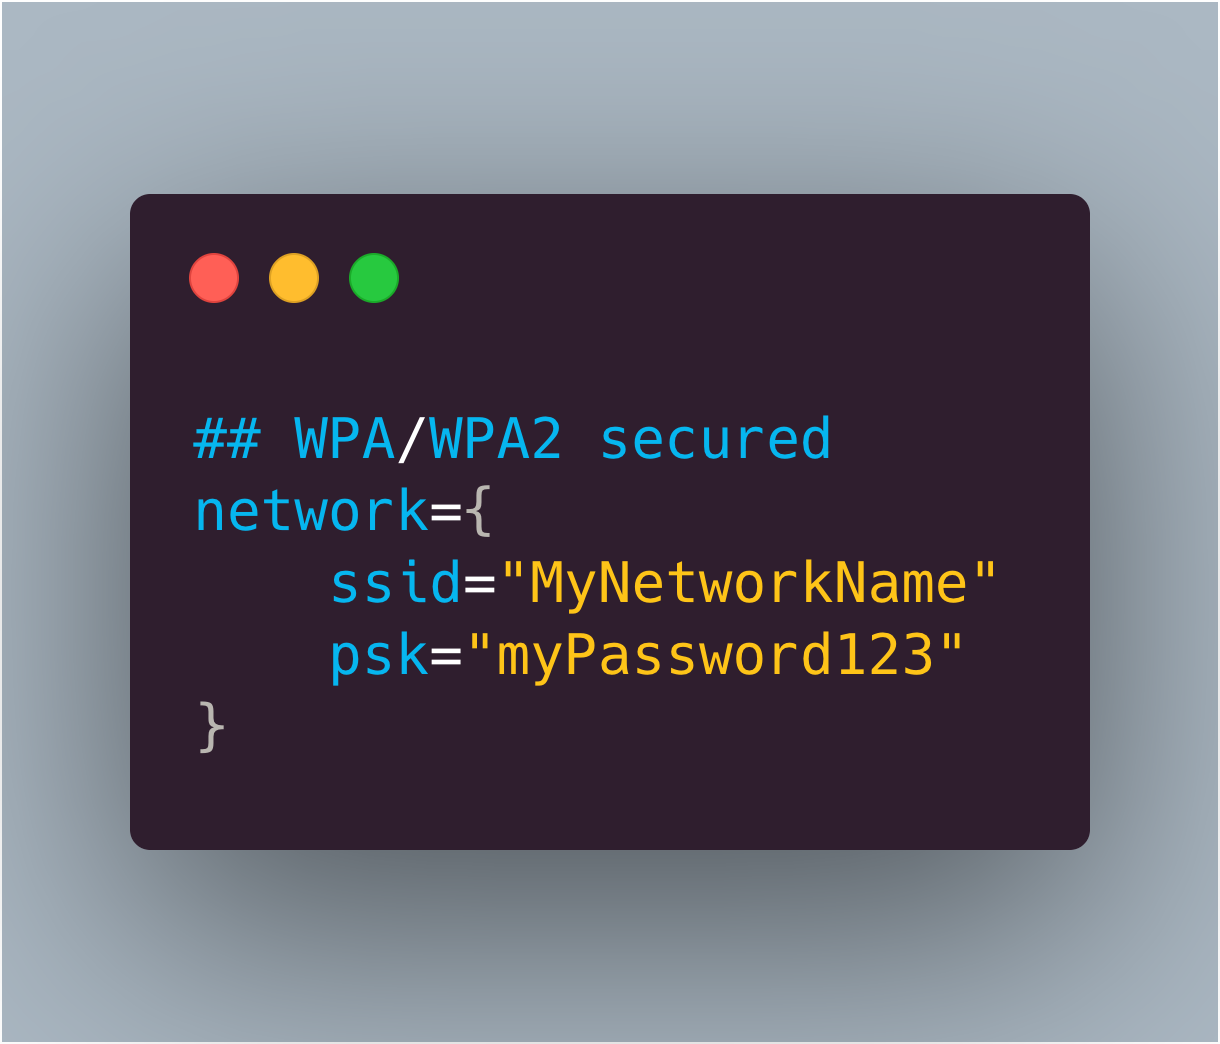
Further down in the file, there is a section for what country you are in. If you are using OctoPrint in the UK, leave this as is (by default, the UK is selected). However, if you wish to change this, simply comment the UK line again by adding a # before it, and uncomment whichever country you are setting up OctoPrint in. The example below shows how the file will look if you are setting this up for use in the US:
# Uncomment the country your Pi is in to activate Wifi in RaspberryPi 3 B+ and above
# For full list see: https://en.wikipedia.org/ wiki/ISO_3166-1_alpha-2
#country=GB # United Kingdom
#country=CA # Canada
#country=DE # Germany
#country=FR # France
country=US # United States
When the changes have been made, save the file and then eject/unmount and remove the microSD card from your computer and put it into your Raspberry Pi. Plug the power supply in, and go and make a cup of tea while it boots up for the first time (this may take around ten minutes). Make sure the Raspberry Pi is running as expected (i.e. check that the green status LED is flashing intermittently). If you’re using macOS, visit octopi.local in your browser of choice. If you’re using Windows, you can find OctoPrint by clicking on the Network tab in the sidebar. It should be called OctoPrint instance on octopi – double-clicking on this will open the OctoPrint dashboard in your browser.
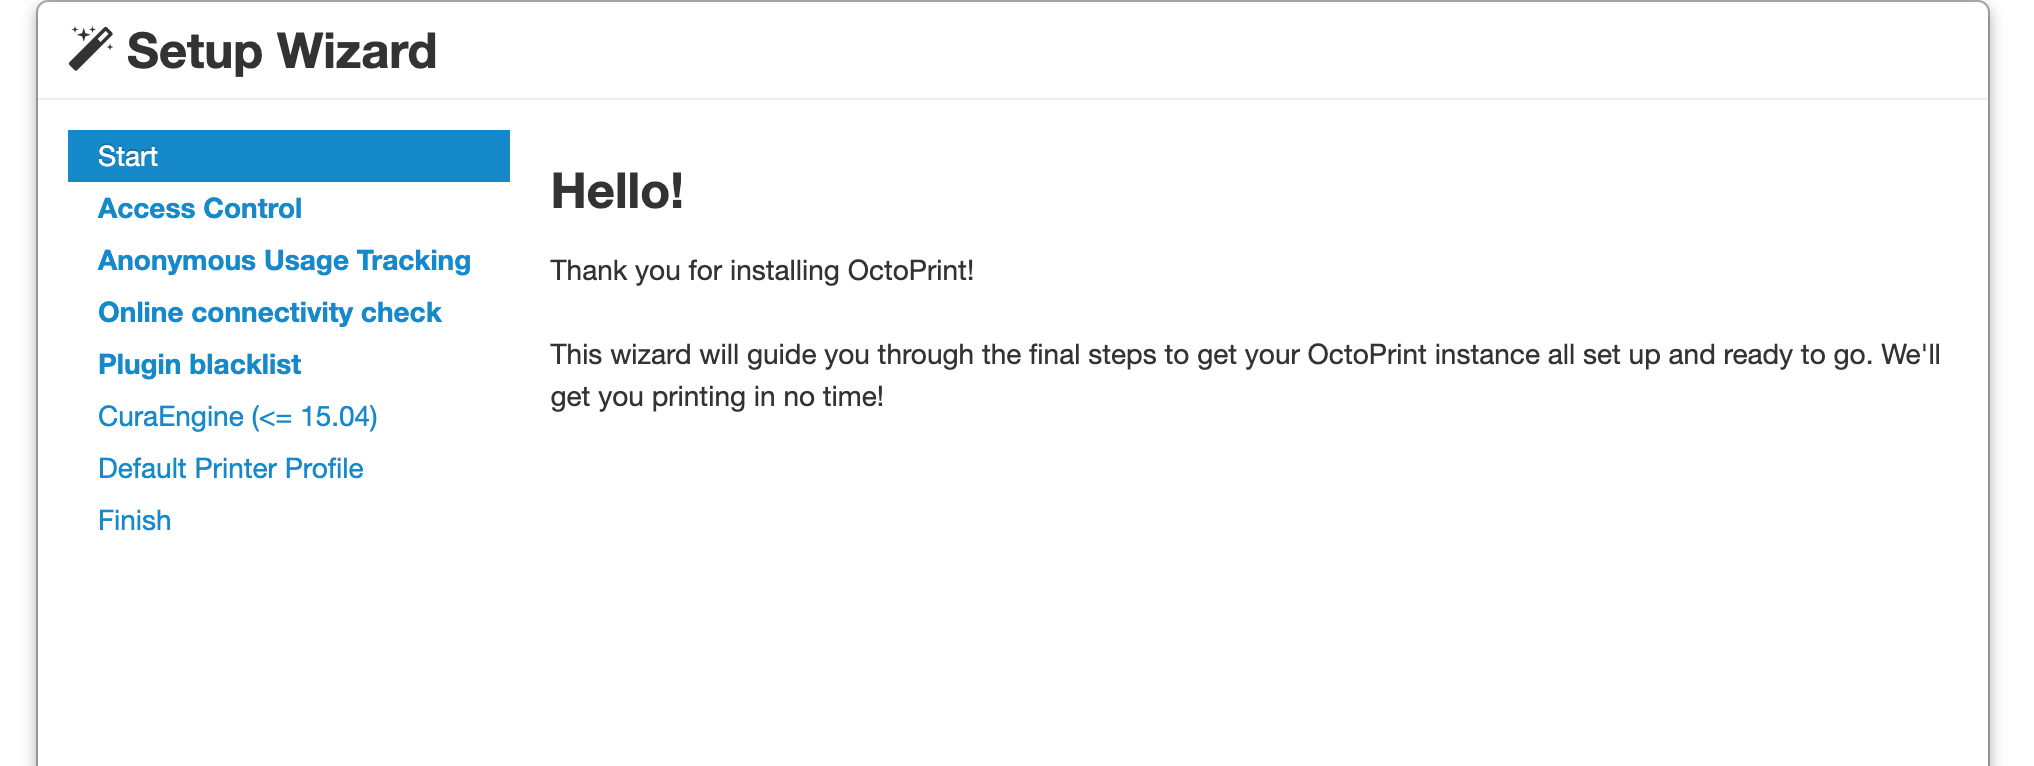
If you see the screen shown above, then congratulations! You have set up OctoPrint.
Not seeing that OctoPrint splash screen? Fear not, you are not the first. While a full list of issues is beyond the scope of this article, common issues include: double-checking your WiFi details are entered correctly in the octopi-wpa-supplicant.txt file, ensuring your Raspberry Pi is working correctly (plug the Raspberry Pi into a monitor and watch what happens during boot), or your Raspberry Pi may be out of range of your WiFi router. There’s a detailed list of troubleshooting suggestions on the OctoPrint website.
We now have the opportunity to set up OctoPrint for our printer using the handy wizard. Most of this is very straightforward — setting up a password, signing up to send anonymous usage stats, etc. — but there are a few sections which require a little more thought.
We recommend enabling the connectivity check and the plug-ins blacklist to help keep things nice and stable. If you plan on using OctoPrint as your slicer as well as a monitoring tool, then you can use this step to import a Cura profile. However, we recommend skipping this step as it’s much quicker (and you can use a slicer of your choice) to slice the model on your computer, and then send the finished G-code over.
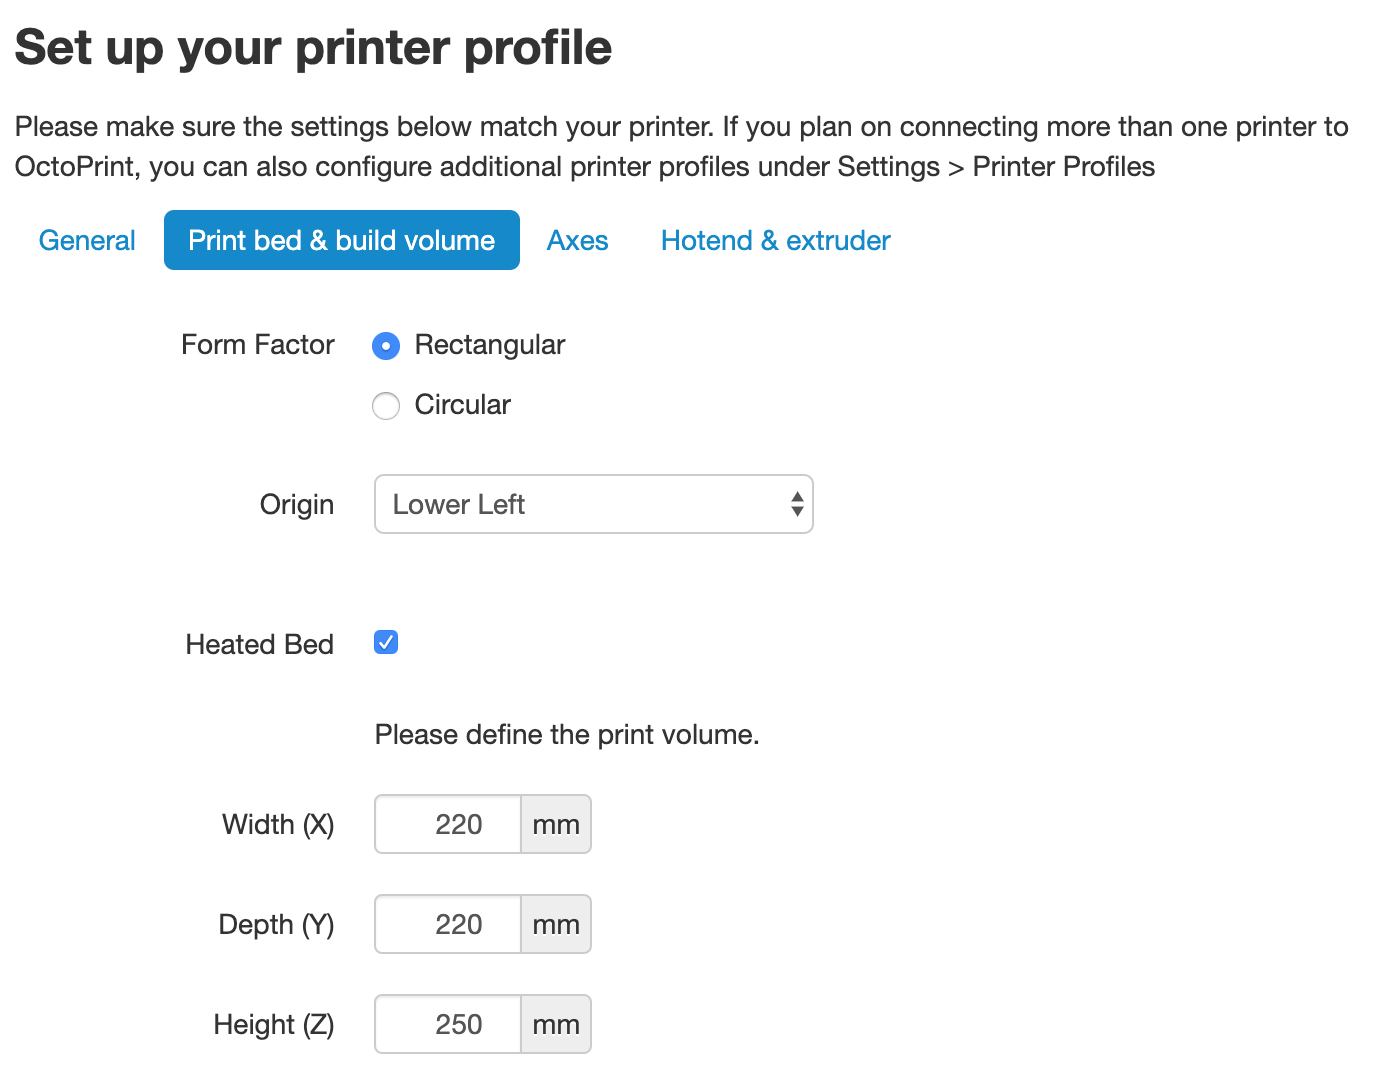
Finally, we need to put in our printer details. Above, we’ve included some of the specs of the Creality Ender-3 as an example. If you can’t find the exact details of your printer, a quick web search should show what you need for this section.
The General tab can have anything in it, it’s just an identifier for your own use. Print bed & build volume should be easy to find out — if not, you can measure your print bed and find out the position of the origin by looking at your Cura printer profile. Leave Axes as default; for the Hotend and extruder section, defaults are almost certainly fine here (unless you’ve changed your nozzle; 0.4 is the default diameter for most consumer printers).
Now that you’re set up with OctoPrint, you’re ready to start printing. Turn off your Raspberry Pi, then plug it into your 3D printer. After it has booted up, open OctoPrint again in your browser and take your newly WiFi-enabled printer for a spin by clicking the Connect button. After it has connected, you’ll be able to set the hot end and bed temperature, then watch as the real-time readings are updated.
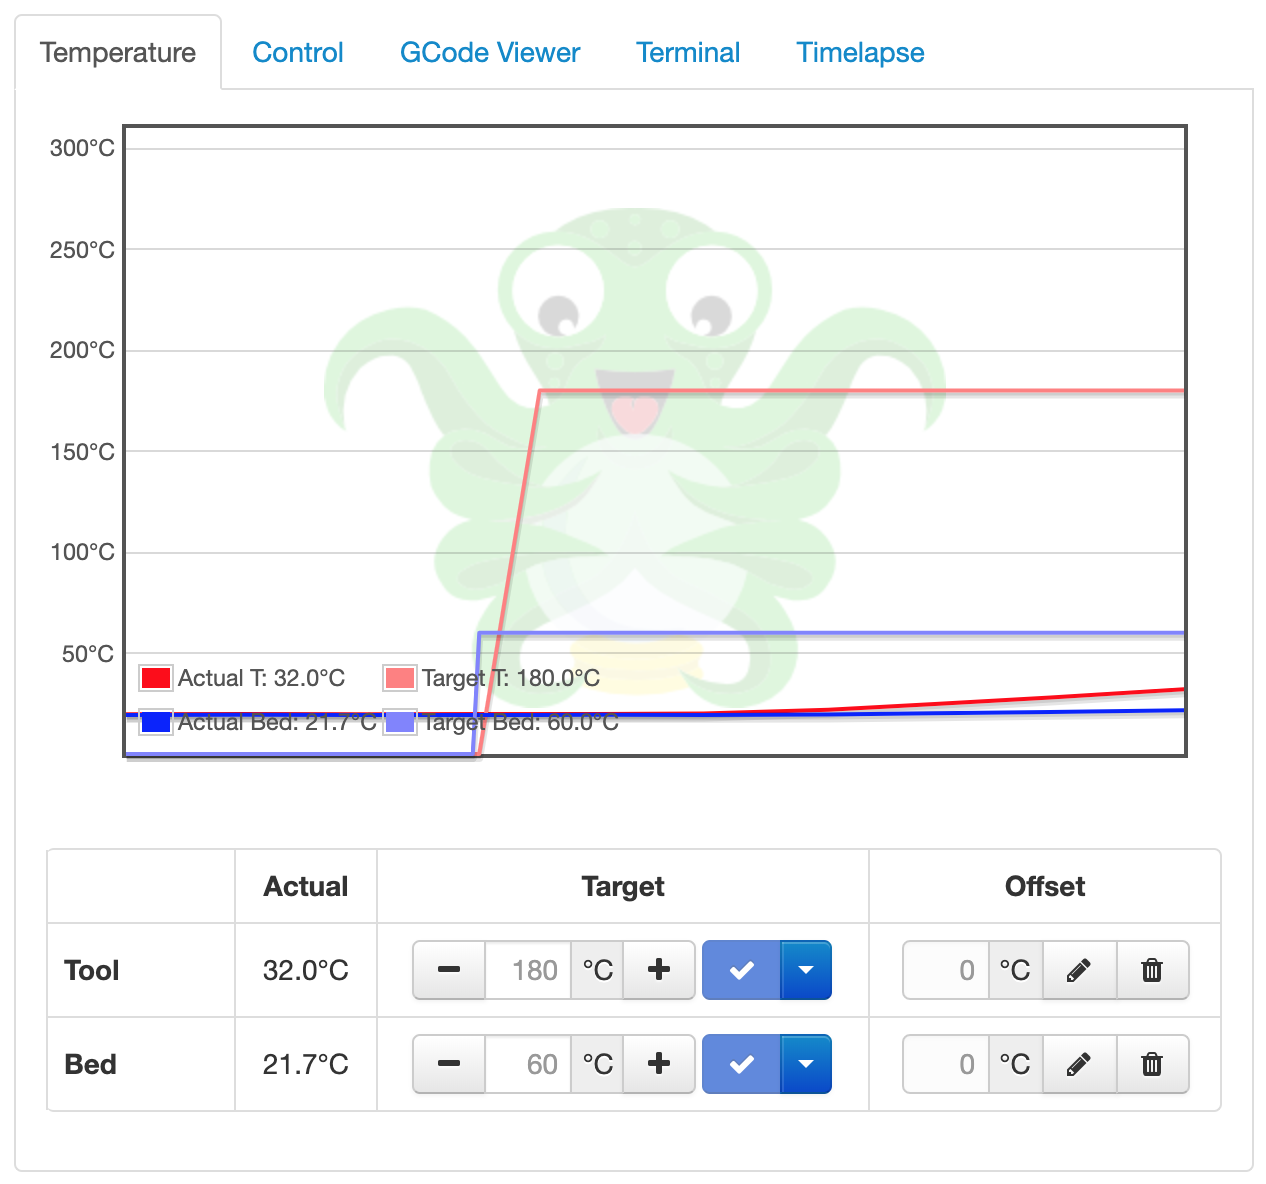
In the Control tab, we can see the camera stream (if you’re using one) and the motor controls, as well as commands to home the axes. There’s a G-code file viewer to look through a cross-section of the currently loaded model, and a terminal to send custom G-code commands to your printer. The last tab is for making time-lapses; however, there is a plug-in available to help with this process.
Undoubtedly the easiest way to set up video monitoring of your prints is to use the official Raspberry Pi Camera Module. There are dozens of awesome mounts on Thingiverse for a Raspberry Pi Camera Module, to allow you to get the best angle of your models as they print. There are also some awesome OctoPrint-themed Raspberry Pi cases to house your new printer brains. While it isn’t officially supported by OctoPrint, you can use a USB webcam instead if you have one handy, or just want some very high-quality video streams. The OctoPrint wiki has a crowdsourced list of webcams known to work, as well as a link for the extra steps needed to get the webcam working correctly.
As mentioned earlier, our recommended way of printing a model using OctoPrint is to first use your slicer as you would if you were creating a file to save to a microSD card. Once you have the file, save it somewhere handy on your computer, and open the OctoPrint interface. In the bottom left of the screen, you will see the Upload File button — click this and upload the G-code you wish to print.
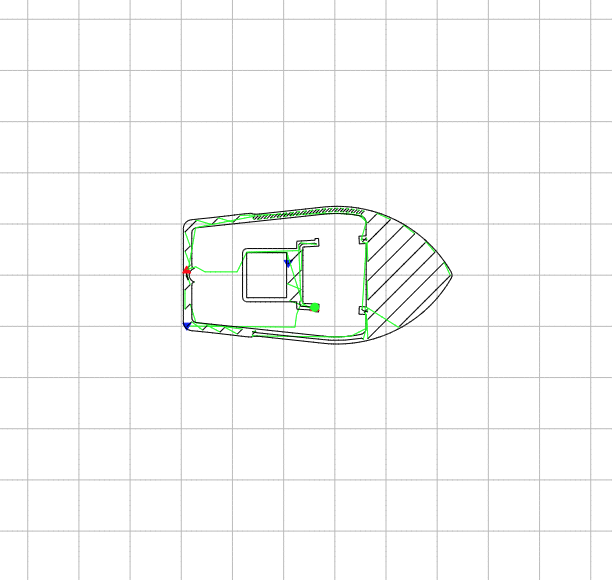
You’ll see the file/print details appear, including information on how long it’ll take for the object to print. Before you kick things off, check out the G-code Viewer tab on the right. You can not only scroll through the layers of the object, but, using the slider at the bottom, you can see the exact pattern the 3D printer will use to ‘draw’ each layer. Now click Print and watch your printer jump into action!
OctoPrint has scores of community-created plug-ins, but our favourite, Octolapse, makes beautiful hypnotic time-lapses. What makes them so special is that the plug-in alters the G-code of whatever object you are printing so that once each layer has finished, the extruder moves away from the print to let the camera take an unobstructed shot of the model. The result is an object that seems to grow out of the build plate as if by magic. You’ll not find a finer example of it than here.
Satisfying 3D Prints TimeLapse episode 7 (Prusa I3 Mk3 octopi)
3D Printing timelapses of models printed on the Prusa i3 MK3! Here’s another compilation of my recent timelapses. I got some shots that i think came out really great and i hope you enjoy them! as always if you want to see some of these timelapses before they come out or want to catch some behind the scenes action check out my instagram!
OctoPrint was created and is maintained by Gina Häußge (@foosel) and Guy Sheffer (@GuySoft)! A big thank you to both of them for putting in many, many volunteer hours to provide the world with an amazing piece of free, open-source software.
Head over to the OctoPrint website to find out how you can support OctoPrint’s continued existence.
This tutorial comes fresh from the pages of HackSpace magazine issue 26 and was written by Glenn Horan. Thanks, Glenn.
To get your copy of HackSpace magazine issue 26, visit your local newsagent, the Raspberry Pi Store, Cambridge, or the Raspberry Pi Press online store.
Fans of HackSpace magazine will also score themselves a rather delightful Adafruit Circuit Playground Express with a 12-month subscription. Sweet!
The post How to set up OctoPrint on your Raspberry Pi appeared first on Raspberry Pi.
You might have a baby/dog/hamster that you want to keep an eye on when you’re not there. We understand: they’re lovely, especially hamsters. Here’s how HackSpace magazine contributor Dr Andrew Lewis built a Raspberry Pi baby cam to watch over his small creatures…
When a project is going to be used in the home, it pays to take a little bit of extra time on appearance
You can get wireless baby monitors that have a whole range of great features for making sure your little ones are safe, sound, and sleeping happily, but they come with a hefty price tag.
In this article, you’ll find out how to make a Raspberry Pi-powered streaming camera, and combine it with a built-in I2C sensor pack that monitors temperature, pressure, and humidity. You’ll also see how you can use the GPIO pins on Raspberry Pi to turn an LED night light on and off using a web interface.
The hardware for this project is quite simple, and involves minimal soldering, but the first thing you need to do is to install Raspbian onto a microSD card for your Raspberry Pi. If you’re planning on doing a headless install, you’ll also need to enable SSH by creating an empty file called SSH on the root of the Raspbian install, and a file with your wireless LAN details called wpa_supplicant.conf.
You can download the code for this as well as the 3D-printable files from our GitHub. You’ll need to transfer the code to the Raspberry Pi. Next, connect the camera, the BME280 board, and the LEDs to the Raspberry Pi, as shown in the circuit diagram.
The BME280 module uses the I2C connection on pins 3 and 5 of the GPIO, taking power from pins 1 and 9. The LEDs connect directly to pins 19 and 20, and the camera cable fits into the camera connector.
Insert the microSD card into the Raspberry Pi and boot up. If everything is working OK, you should be able to see the IP address for your device listed on your hub or router, and you should be able to connect to it via SSH. If you don’t see the Raspberry Pi listed, check your wireless connection details and make sure your adapter is supplying enough power. It’s worth taking the time to assign your Raspberry Pi with a static IP address on your network, so it can’t change its IP address unexpectedly.
Use the raspi-config application to enable the camera interface and the I2C interface. If you’re planning on modifying the code yourself, we recommend enabling VNC access as well, because it will make editing and debugging the code once the device is put together much easier. All that remains on the software side is to update APT, download the babycam.py script, install any dependencies with PIP, and set the script to run automatically. The main dependencies for the babycam.py script are the RPi.bme280 module, Flask, PyAudio, picamera, and NumPy. Chances are that these are already installed on your system by default, with the exception of RPi.bme280, which can be installed by typing sudo pip3 install RPi.bme280 from the terminal. Once all of the dependencies are present, load up the script and give it a test run, and point your web browser at port 8000 on the Raspberry Pi. You should see a webpage with a camera image, controls for the LED lights, and a read-out of the temperature, pressure, and humidity of the room.
Finishing a 3D print by applying a thin layer of car body filler and sanding back will give a much smoother surface. This isn’t always necessary, but if your filament is damp or your nozzle is worn, it can make a model look much better when it’s painted
The easiest way to get the babycam.py script to run on boot is to add a line to the rc.local file. Assuming that the babycam.py file is located in your home directory, you should add the line python3 /home/pi/babycam.py to the rc.local file, just before the line that reads exit 0. It’s very important that you include the ampersand at the end of the line, otherwise the Python script will not be run in a separate process, the rc.local file will never complete, and your Raspberry Pi will never boot.
With the software and hardware working, you can start putting the case together. You might need to scale the 3D models to suit the tin can you have before you print them out, so measure your tin before you click Print. You’ll also want to remove any inner lip from the top of the can using a can opener, and make a small hole in the side of the can near the bottom for the USB power cable. Next, make a hole in the bottom of the can for the LED cables to pass through.
If you want to add more than a couple of LEDs (or want to use brighter LEDs), you should connect your LEDs to the power input, and use a transistor on the GPIO to trigger them
If you haven’t already done so, solder appropriate leads to your LEDs, and don’t forget to put a 330 Ω resistor in-line on the positive side. The neck of the camera is supported by two lengths of aluminium armature wire. Push the wire up through each of the printed neck pieces, and use a clean soldering iron to weld the pieces together in the middle. Push the neck into the printed top section, and weld into place with a soldering iron from underneath. Be careful not to block the narrow slot with plastic, as this is where the camera cable passes up through the neck and into the camera.
You need to mount the BME280 so that the sensor is exposed to the air in the room. Do this by drilling a small hole in the 3D-printed top piece and hot gluing the sensor into position. If you’re going to use the optional microphone, you can add an extra hole and glue the mic into place in the same way. A short USB port extender will give you enough cable to plug the USB microphone into the socket on your Raspberry Pi
Paint the tin can and the 3D-printed parts. We found that spray blackboard paint gives a good effect on 3D-printed parts, and PlastiKote stone effect paint made the tin can look a little more tactile than a flat colour. Once the paint is dry, pass the camera cable up through the slot in the neck, and then apply the heat-shrink tubing to cover the neck with a small gap at the top and bottom. Connect the camera to the top of the cable, and push the front piece on to hold it into place. Glue shouldn’t be necessary, but a little hot glue might help if the front parts don’t hold together well.
Push the power cable through the hole in the case, and secure it with a knot and some hot glue. Leave enough cable free to easily remove the top section from the can in future without stressing the wires.
If you’re having trouble getting the armature wire through the 3D-printed parts, try using a drill to help twist the wire through
Glue the bottom section onto the can with hot glue, and hot-glue the LEDs into place on the bottom, feeding the cable up through the hole and into the GPIO header. This is a good time to hot-glue a weight into the bottom of the can to improve its stability. I used an old weight from some kitchen scales, but any small weight should be fine. Finally, fix the Raspberry Pi into place on the top piece by either drilling or gluing, then reconnect the rest of the cables, and push the 3D-printed top section into the tin can. If the top section is too loose, you can add a little bit of hot glue to hold things together once you know everything is working.
With the right type of paint, even old tin cans make a good-looking enclosure
for a project
That should be all of the steps complete. Plug in the USB and check the camera from a web browser. The babycam.py script includes video, sensors, and light control. If you are using the optional USB microphone, you can expand the functionality of the app to include audio streaming, use cry detection to activate the LEDs (don’t make the LEDs too stimulating or you’ll never get a night’s sleep again), or maybe even add a Bluetooth speaker and integrate a home assistant.
HackSpace magazine is out now, available in print from your local newsagent, the Raspberry Pi Store in Cambridge, and online from Raspberry Pi Press.
If you love HackSpace magazine as much as we do, why not have a look at the subscription offers available, including the 12-month deal that comes with a free Adafruit Circuit Playground!
And, as always, you can download the free PDF here.
The post Raspberry Pi 3 baby monitor | Hackspace magazine #26 appeared first on Raspberry Pi.
In Hello World issue 11, Pen Holland and Sarah Wyse discuss how educators and students can get closer to the natural world while honing maths and computing skills. Using a Raspberry Pi, you too can join this citizen science collaboration.
Connectedness to nature as measured by the Nature Connection Index is currently the lowest in young people aged 16-24, with everyone aged 8-34 reporting lower connectedness, compared to the 35+ age groups.
Although there is some positive correlation between individuals living in the same households, parents are now less likely to raise their children where they grew up themselves, and as such they may be less knowledgeable about local species. Connecting with nature does not have to mean a trip out into the wilds: urban ecology is increasingly popular in research, and even the most determined of city dwellers is likely to pass a municipal tree or two during their day.
The positive association between connectedness to nature and wellbeing should encourage us all to appreciate and explore our local environments. However, being at one with the natural world doesn’t preclude an abundance of enjoyable science and technology. For example, the authors’ overriding memory of GCSE maths involves triangles – a lot of triangles – combined with frequent musings over how this could possibly ever be useful in the real world. Fast forward 20 years, and we’ve spent more time than we’d like to count surrounded by triangles, chanting ‘SOH CAH TOA’ in the name of ecology.
The Seed Eater project arose from research into how fast winged seeds (samaras) fall, in order to predict how far they might travel across a landscape, and hence understand how quickly populations of invasive trees might spread. In the past, ecologists have measured the terminal velocity of seeds using stopwatches and lasers, but stopwatches are inaccurate, and lasers are expensive.
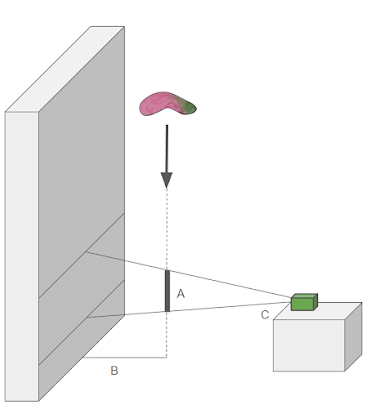
Timestamped images in which the seed appears tell us the time taken for it to fall through the field of view (A). The distance at which the seed lands from the wall (B) and the viewing angle of the camera (C) are used to calculate distance travelled by the seed while in view. Finally, the speed at which the seed is travelling can be calculated as distance/time.
Enter stage left, Pieter the Seed Eater; a low-cost device fitted with a Raspberry Pi computer and camera that captures a sequence of images, assesses which timestamped images contain a falling seed, and then calculates how far the seed fell, and hence how fast it was travelling.
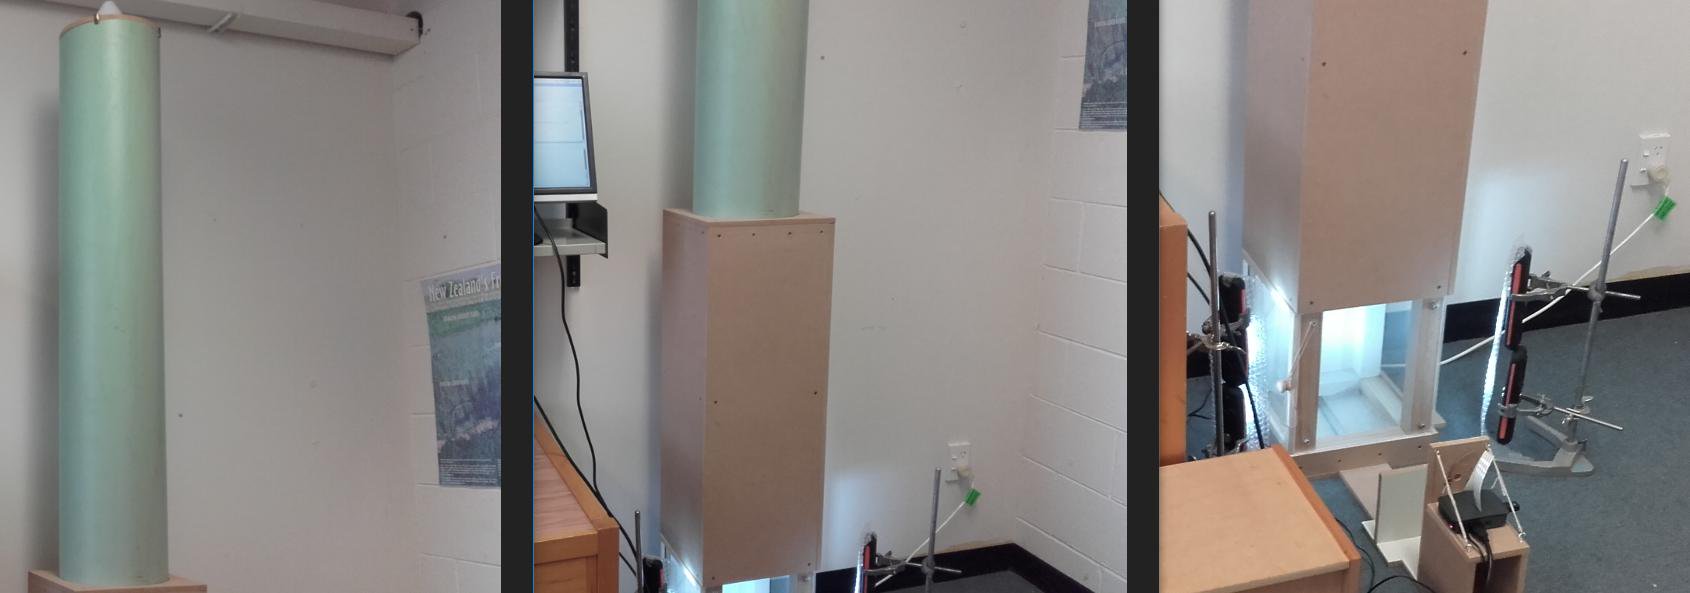
Pieter the Seed Eater was introduced in issue 10 of Hello World, and if you missed that, you can download a free PDF copy of the magazine from the website.
Pieter the Seed Eater was designed to measure the terminal velocity of pine (Pinus species) seeds from invasive trees in New Zealand, with a particular interest in the variation in falling speeds among seeds from the same cones, between different cones on the same tree, between trees in the same population, and between populations across the landscape. His diet is now expanding to take in a whole range of pine species, but there are many other species of tree around the world that also have winged seeds, in a variety of fascinating shapes.
To help emphasise the connections between nature and STEM, and because Pieter doesn’t have time to eat all the seeds, we are making cross-curricular resources available to support teaching activities. These range from tree identification and seed collection, through seed dispersal experiments and Seed Eater engineering, to terminal velocity measurements and understanding population spread.
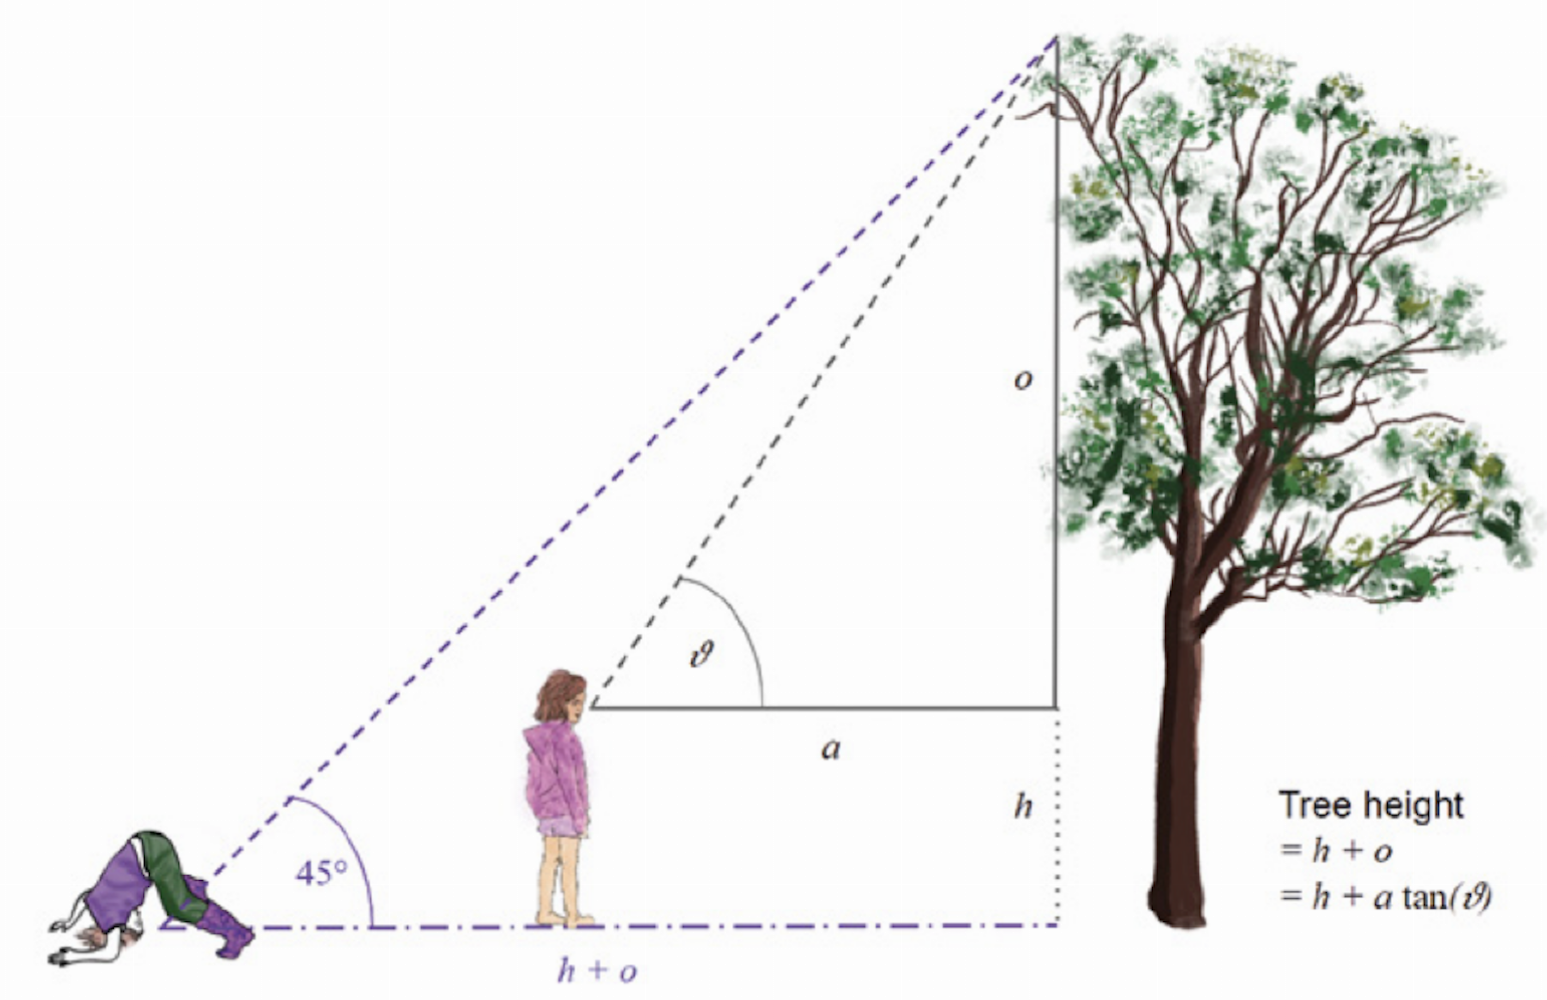
There are several ways to measure tree height, which can be a stimulating discussion and activity. Fire arrows attached to string over high branches, go exploring on Google street view, or use trigonometry, making measurements in a variety of simple or sophisticated ways. Are they all equally accurate? Would they all work on isolated trees and in a dense forest?
These draw on links from elsewhere (for example, the tree identification keys provided by the Natural History Museum, and helicopter seed templates hosted by STEM Learning UK), as well as new material designed specifically for Pieter the Seed Eater, and more general cross-curricular activities related to ecology. In addition, participants can contribute their data to an online database and explore questions about their data using visualisation tools for dispersal equations and population spread.
The teaching resources fall into four main categories:
Each section contains background information, suggested activities for groups and individuals, data recording sheets, and stretch activities for students to carry out in class or at home. The resources are provided as Google slides under a Creative Commons license so that you can edit and adapt them for your own educational needs, with links to the National Curriculum highlighted throughout (thanks to Mary Howell, professional development leader at STEM Learning UK) and interactive graphics hosted online to help understand some of the concepts and equations more easily. Python code for the Seed Eater can be downloaded or written from scratch (or in Scratch!), so that you can set up the device or let students engineer it from first principles. It will need some calibration, but that is all part of the learning experience, and the resources come with some troubleshooting ideas to get started.
Relevant resources are available here. These are currently aimed at Key Stage 3 (age 11-14) and 4 (14-16), but will be developed and extended as time passes, feedback is incorporated, and new requests are made.
Ultimately, we would like to reach Key Stage 1 to sixth form and beyond, and develop the project into a citizen science collaboration in which people around the world share information about their local trees and seeds with the global community.
We welcome feedback and engagement with the project from anyone who is interested in taking part – get in touch via Twitter or email pen.holland@york.ac.uk.
Hello World is available now as a FREE PDF download. UK-based educators can also subscribe to receive Hello World directly to their door in all its shiny printed goodness. Visit the Hello World website for more information.
The post Exploring the interface of ecology, mathematics, and digital making | Hello World #11 appeared first on Raspberry Pi.
New to the Raspberry Pi Store, Cambridge: T-shirts made using Raspberry Pis in Rapanui’s sustainable factory.
Oli Wilkin – our Glorious Retail Guru, to give him his formal title – has been hard at work this year bringing the Raspberry Pi Store, Cambridge, to life. Open since February, the store continues to evolve as it introduces our credit card-sized computer to a high-street audience. Oli and the store team are always talking to customers, exploring new ideas, and making changes. Here’s Oli on the latest development: Rapanui clothing, made sustainably with the help of Raspberry Pis.
Rapanui 2
Subscribe to our YouTube channel: http://rpf.io/ytsub Help us reach a wider audience by translating our video content: http://rpf.io/yttranslate Buy a Raspberry Pi from one of our Approved Resellers: http://rpf.io/ytproducts Find out more about the #RaspberryPi Foundation: Raspberry Pi http://rpf.io/ytrpi Code Club UK http://rpf.io/ytccuk Code Club International http://rpf.io/ytcci CoderDojo http://rpf.io/ytcd Check out our free online training courses: http://rpf.io/ytfl Find your local Raspberry Jam event: http://rpf.io/ytjam Work through our free online projects: http://rpf.io/ytprojects Do you have a question about your Raspberry Pi?
Brothers Mart and Rob started bespoke clothing company Rapanui in a garden shed on the Isle of Wight, with an initial investment of £200 (about $257 US). Ten years later, Rapanui has grown to a fully fledged factory providing over 100 jobs. Their vision to create a sustainable clothing brand has seen them increase Rapanui’s offering from T-shirts to a much wider range of clothing, including jumpers, socks, and jackets. Another reason we like them a lot is that the factory uses over 100 Raspberry Pis with a wide variety of functions.
Rapanui’s early early days weres not without their challenges. Mart and Rob found early on that every improvement in sustainability came with a price tag. They realised that they could use technology to help keep costs down without cutting corners:
Along the way, we needed a real low-cost option for us to be able to get computing in and around the place. Someone said,
“Oh, you should check out Raspberry Pi.”
“What’s that?”
“It’s a computer, and costs twenty quid or something, and it’s the size of a credit card.”
“OK – that can’t be true!”
We got one, and it just blew our mind, because there’s no limit to what we could do with it.
– Mart
The Raspberry Pis are supporting things like productivity improvements, order tracking, workload prioritisation, and smart lighting. All employees are encouraged to try coding when they start working for Rapanui, and they’re empowered to change their workplace to make it smarter and more efficient.
As Mart explains,
In the world today, there’s a lot of issues around environment and sustainability, which feel like compromises – you want to do your bit, but it costs more. What this kind of technology allows us to do is make things cost less because you can create these massive efficiencies through technology, and that’s what enables you to be able to afford the things that you want to do with sustainability, without having to compromise on price.
All of the organic cotton that Rapanui uses is fully traced from India to the Isle of Wight, where it is turned into amazing quality branded items for their customers. Once a garment has come to the end of its life, a customer can simply scan the QR code on the inside label, and this QR code generates a Freepost address. This allows the customer to send their item back to Rapanui for a webshop credit, thus creating a circular economy.

All of this makes us very pleased to be working with Rapanui to print the T-shirts you buy in the Raspberry Pi store.
Rapanui – from workshop to store
Subscribe to our YouTube channel: http://rpf.io/ytsub Help us reach a wider audience by translating our video content: http://rpf.io/yttranslate Buy a Raspberry Pi from one of our Approved Resellers: http://rpf.io/ytproducts Find out more about the #RaspberryPi Foundation: Raspberry Pi http://rpf.io/ytrpi Code Club UK http://rpf.io/ytccuk Code Club International http://rpf.io/ytcci CoderDojo http://rpf.io/ytcd Check out our free online training courses: http://rpf.io/ytfl Find your local Raspberry Jam event: http://rpf.io/ytjam Work through our free online projects: http://rpf.io/ytprojects Do you have a question about your Raspberry Pi?
We have started with our Raspberry Pi 4 T-shirt, and others will follow. Our hope is that all our T-shirts will be fully sustainable and better for you, our customers.
The post Sustainable clothing with Rapanui and Raspberry Pi appeared first on Raspberry Pi.
Today’s blog post started as a deflated “What do I buy my Secret Santa person?” appeal from a friend last night. My answer is this, a nice and early Secret Santa idea guide for anyone stuck with someone for whom they have no idea what to buy.
All the gifts listed below cost £10 or less, and they’re all available from the Raspberry Pi store in Cambridge, UK. Many of them are also available to buy online, but if you’re able to visit our store, you definitely should – we have a couple of in-store exclusives on offer too.
If your Secret Santa limit is set at £5, as many seem to be, we’ve a few ideas that will fit nicely within your budget.
We’ll start with the obvious: Raspberry Pi Zero, our tiny computer that packs a punch without leaving a dent in your finances. At bang on £5, anyone of the electronics/techie persuasion will be delighted to receive this at the office Christmas party.
Help your Secret Santa pick show their love for Raspberry Pi with a Raspberry Pi pin (£3) or sticker pack (£4). They’ll be as on-brand as Pete Lomas (and that’s saying something).
The CamJam Edukit #1 is jam-packed with all the bits you need to get started with digital making, and it’s supported by free downloadable worksheets. It’s a fantastic gift for anyone who’d enjoy learning electronics or expanding their coding know-how. At £5, you can’t go wrong.
At £3.99 each, the Essentials Guides cover a range of topics, including Learning to code with C, Hacking and making in Minecraft, and Making games in Python. Our in-store offer will score you three guides for £10, which brings us nicely to…
A £10 budget? Check you out!

With added wireless LAN and Bluetooth connectivity, Raspberry Pi Zero W will cost you £9.50, leaving you 50p to buy yourself some sweets for a job well done.
Babbage Bear, for many the face of Raspberry Pi, is the perfect gift for all ages. He’ll cost you £9, as will any of his Adafruit friends.
What do you buy for the Raspberry Pi fan who has everything? A store-exclusive travel cup. At £8 each, our branded drinkware is rather swell, even if we do say so ourselves.

Ranging in price from £3.99 to around £15, our Raspberry Pi Press books and magazines are a great gift for anyone looking to learn more about making, electronics, or video gaming.
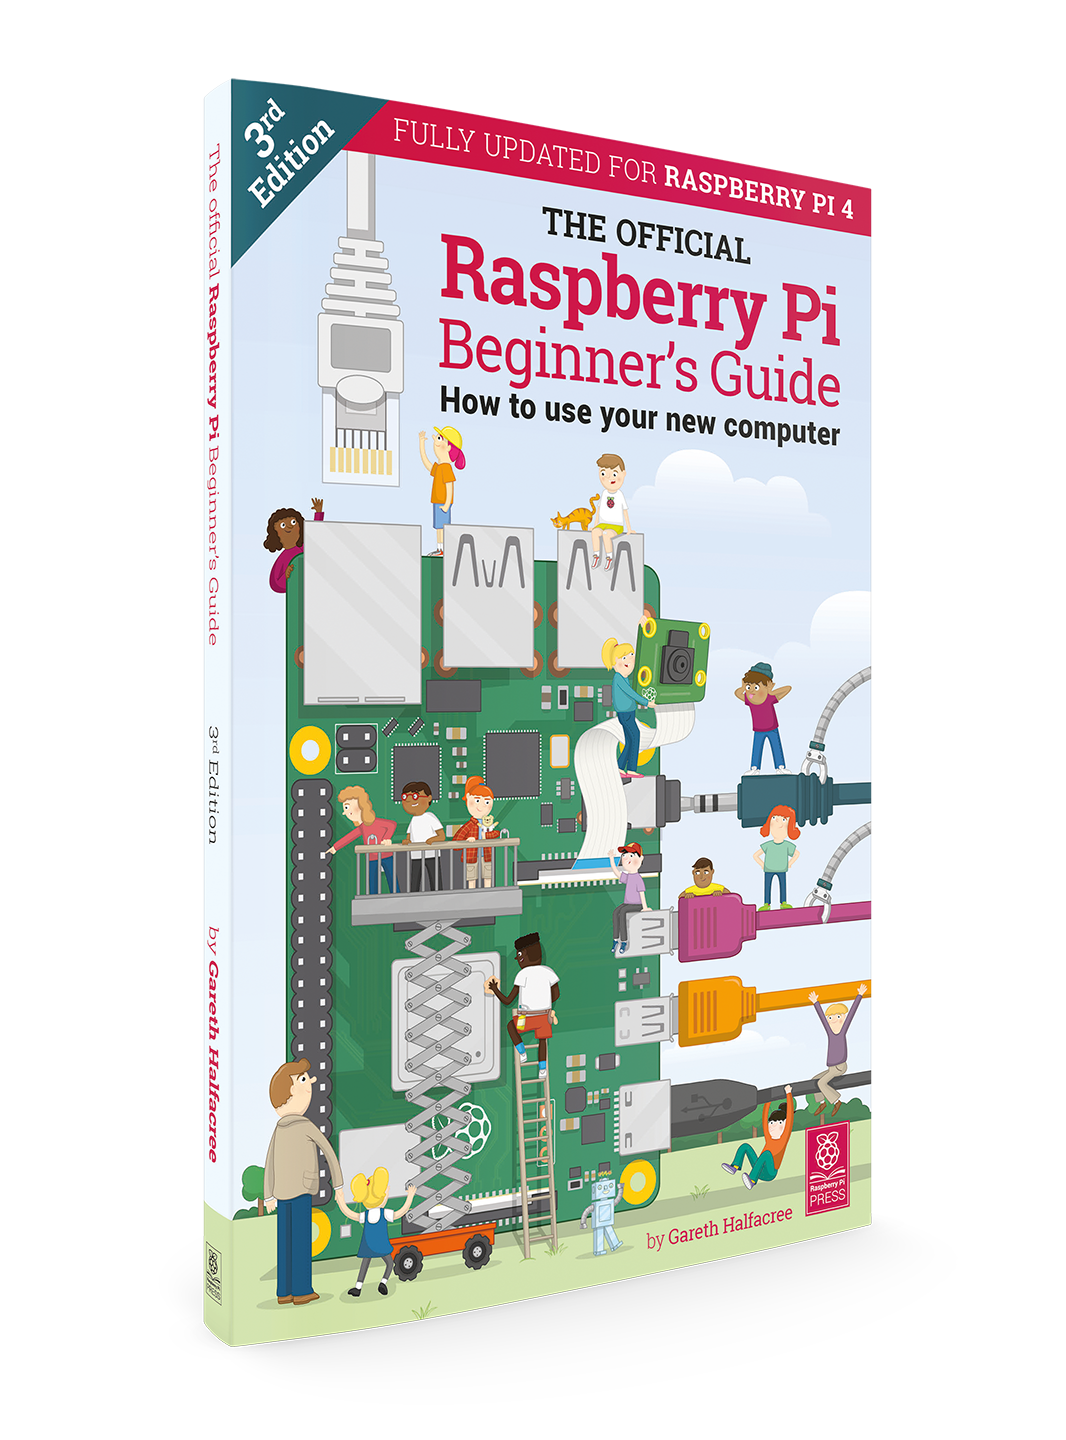
If you’ve heard your Secret Santa match mention that they like tinkering and making in their spare time, but you don’t think they’ve tried Raspberry Pi yet, this is the book for them. Updated to include the new Raspberry Pi 4 and upgrades to Scratch 3, our Beginner’s Guide will help them get started with this fabulous addition to their toolkit.
These gifts are a little more than £10, and worth every penny. They’d make the perfect gift for anyone who loves making and Raspberry Pi.
The Bearable badges are cute, light-activated LED badges that require no soldering or external computers. Instead, the kit uses conductive thread and sensors, making it a wonderful maker project for anyone, whether or not they’ve done any electronics before. Choose between an adorable sleepy fox and a lovable little bear, both at £15.
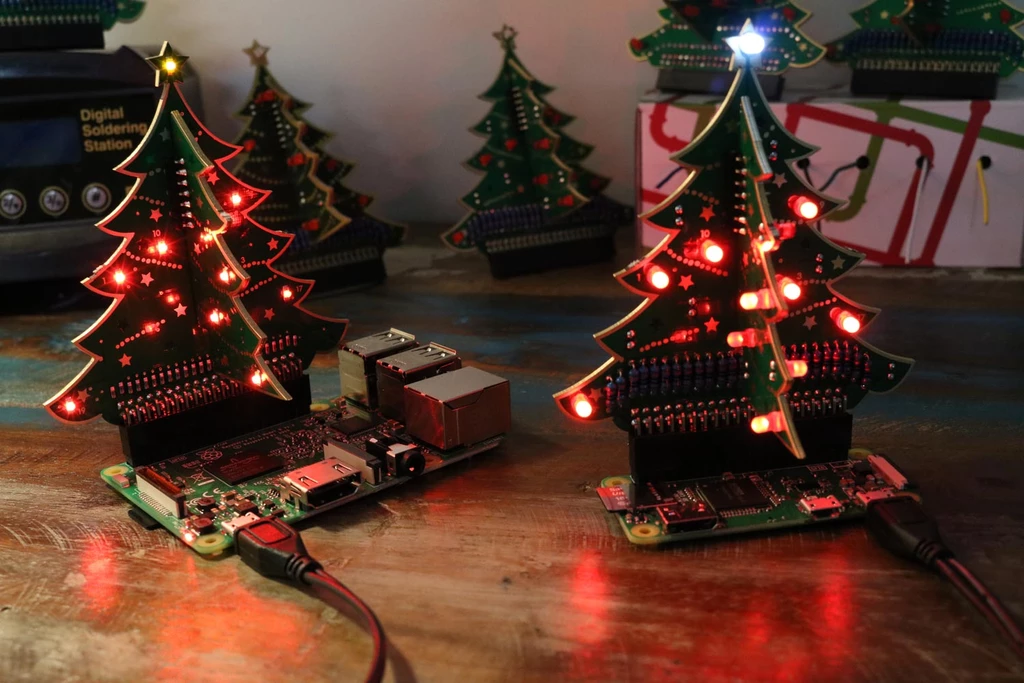
Available both as a pre-soldered kit (£15) and as a solder-yourself kit (£12), the 3D Xmas Tree is the ultimate festive HAT for Raspberry Pi. Once it’s assembled, you can use pre-written code to light it up, or code your own light show.

The Raspberry Pi Store now offers gift cards, giving your giftee the chance to pick their own present. Add whatever value you’d like from a minimum of £5, and watch them grin with glee as they begin to plan their next project.
Plus, our wonderful Jack has designed these rather lovely Christmas tote bags, available exclusively in store and as a limited run!
We’ll be publishing our traditional Raspberry Pi gift guide soon. It’ll include all the tech and cool maker stuff your nearest and dearest will love to receive this holiday season, with links to buy online. If you think there’s something we shouldn’t miss, let us know in the comments below.
The post Secret Santa ideas for the Raspberry Pi fan in your office appeared first on Raspberry Pi.
Plant scientists and agronomists use growth chambers to provide consistent growing conditions for the plants they study. This reduces confounding variables – inconsistent temperature or light levels, for example – that could render the results of their experiments less meaningful. To make sure that conditions really are consistent both within and between growth chambers, which minimises experimental bias and ensures that experiments are reproducible, it’s helpful to monitor and record environmental variables in the chambers.
Arabidopsis thaliana in a growth chamber on the International Space Station. Many experimental plants are less well monitored than these ones.
(“Arabidopsis thaliana plants […]” by Rawpixel Ltd (original by NASA) / CC BY 2.0)
In a recent paper in Applications in Plant Sciences, Brandin Grindstaff and colleagues at the universities of Missouri and Arizona describe how they developed Growth Monitor pi, or GMpi: an affordable growth chamber monitor that provides wider functionality than other devices. As well as sensing growth conditions, it sends the gathered data to cloud storage, captures images, and generates alerts to inform scientists when conditions drift outside of an acceptable range.
Appl Plant Sci. 2019 Aug; 7(8): e11280. Figure 1, © 2019 Grindstaff et al. / CC BY 4.0
The authors emphasise – and we heartily agree – that you don’t need expertise with software and computing to build, use, and adapt a system like this. They’ve written a detailed protocol and made available all the necessary software for any researcher to build GMpi, and they note that commercial solutions with similar functionality range in price from $10,000 to $1,000,000 – something of an incentive to give the DIY approach a go.
GMpi uses a Raspberry Pi Model 3B+, to which are connected temperature-humidity and light sensors from our friends at Adafruit, as well as a Raspberry Pi Camera Module.
Appl Plant Sci. 2019 Aug; 7(8): e11280. Figure 2, © 2019 Grindstaff et al. / CC BY 4.0
The team used open-source app Rclone to upload sensor data to a cloud service, choosing Google Drive since it’s available for free. To alert users when growing conditions fall outside of a set range, they use the incoming webhooks app to generate notifications in a Slack channel. Sensor operation, data gathering, and remote monitoring are supported by a combination of software that’s available for free from the open-source community and software the authors developed themselves. Their package GMPi_Pack is available on GitHub.
Appl Plant Sci. 2019 Aug; 7(8): e11280. Figure 3, © 2019 Grindstaff et al. / CC BY 4.0
With a bill of materials amounting to something in the region of $200, GMpi is another excellent example of affordable, accessible, customisable open labware that’s available to researchers and students. If you want to find out how to build GMpi for your lab, or just for your greenhouse, Affordable remote monitoring of plant growth in facilities using Raspberry Pi computers by Brandin et al. is available on PubMed Central, and it includes appendices with clear and detailed set-up instructions for the whole system.
The post Growth Monitor pi: an open monitoring system for plant science appeared first on Raspberry Pi.